
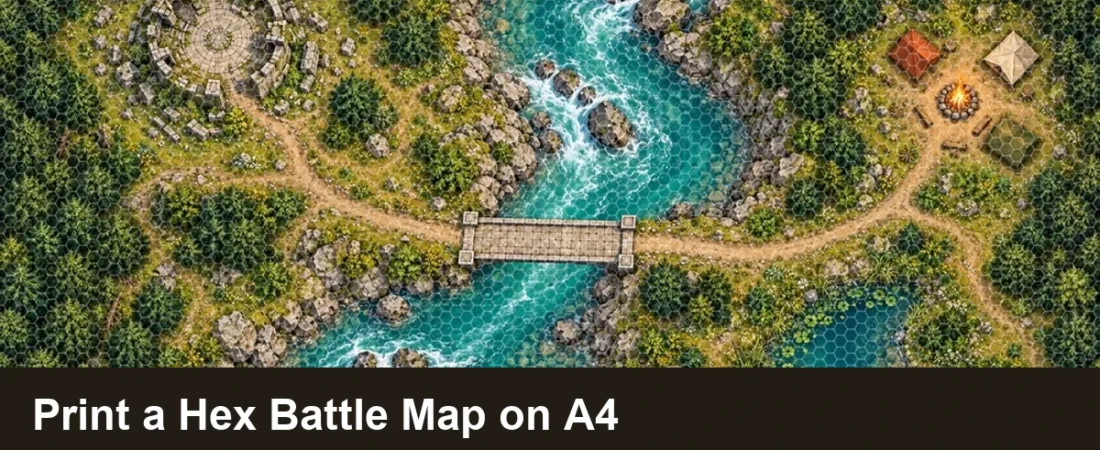
Already have a battle map with a hex grid baked into the image? The print job is not to draw a second grid: it is to divide the existing map into paper sheets without losing the terrain at the seams. Here is a tested A4 workflow using a river crossing image in the DnD Map Printer & Scaler. The image came from our separate hex-grid river encounter walkthrough; this guide covers what happens after the map already has its grid.
Start with the actual map, not another overlay
Our source is the same 1000 × 563 WebP river crossing, with a bridge, camp, ruins and pond. The earlier 80-pixel hex export made the cells too large for this tiled print example. To make them smaller, we returned to the original ungridded map—not the already-gridded image—and used the Map Gridder to export new images. Choose Hexagons, white #ffffff, opacity 0.7 (70%), and WebP. These examples also use one eighth of the tool’s default line thickness, applied only in our export session; the current public tool has no thickness slider. The 5–6 cell-size values were applied in that export session too; they are below the public slider’s minimum of 10. Use Cell Size 6 for example 1 or 5 for examples 2 and 3. These are source-image pixel settings, not physical inches. Upload the resulting already-gridded image to Map Printer. Adding a smaller overlay on top of large baked-in hexes would leave both grids visible.
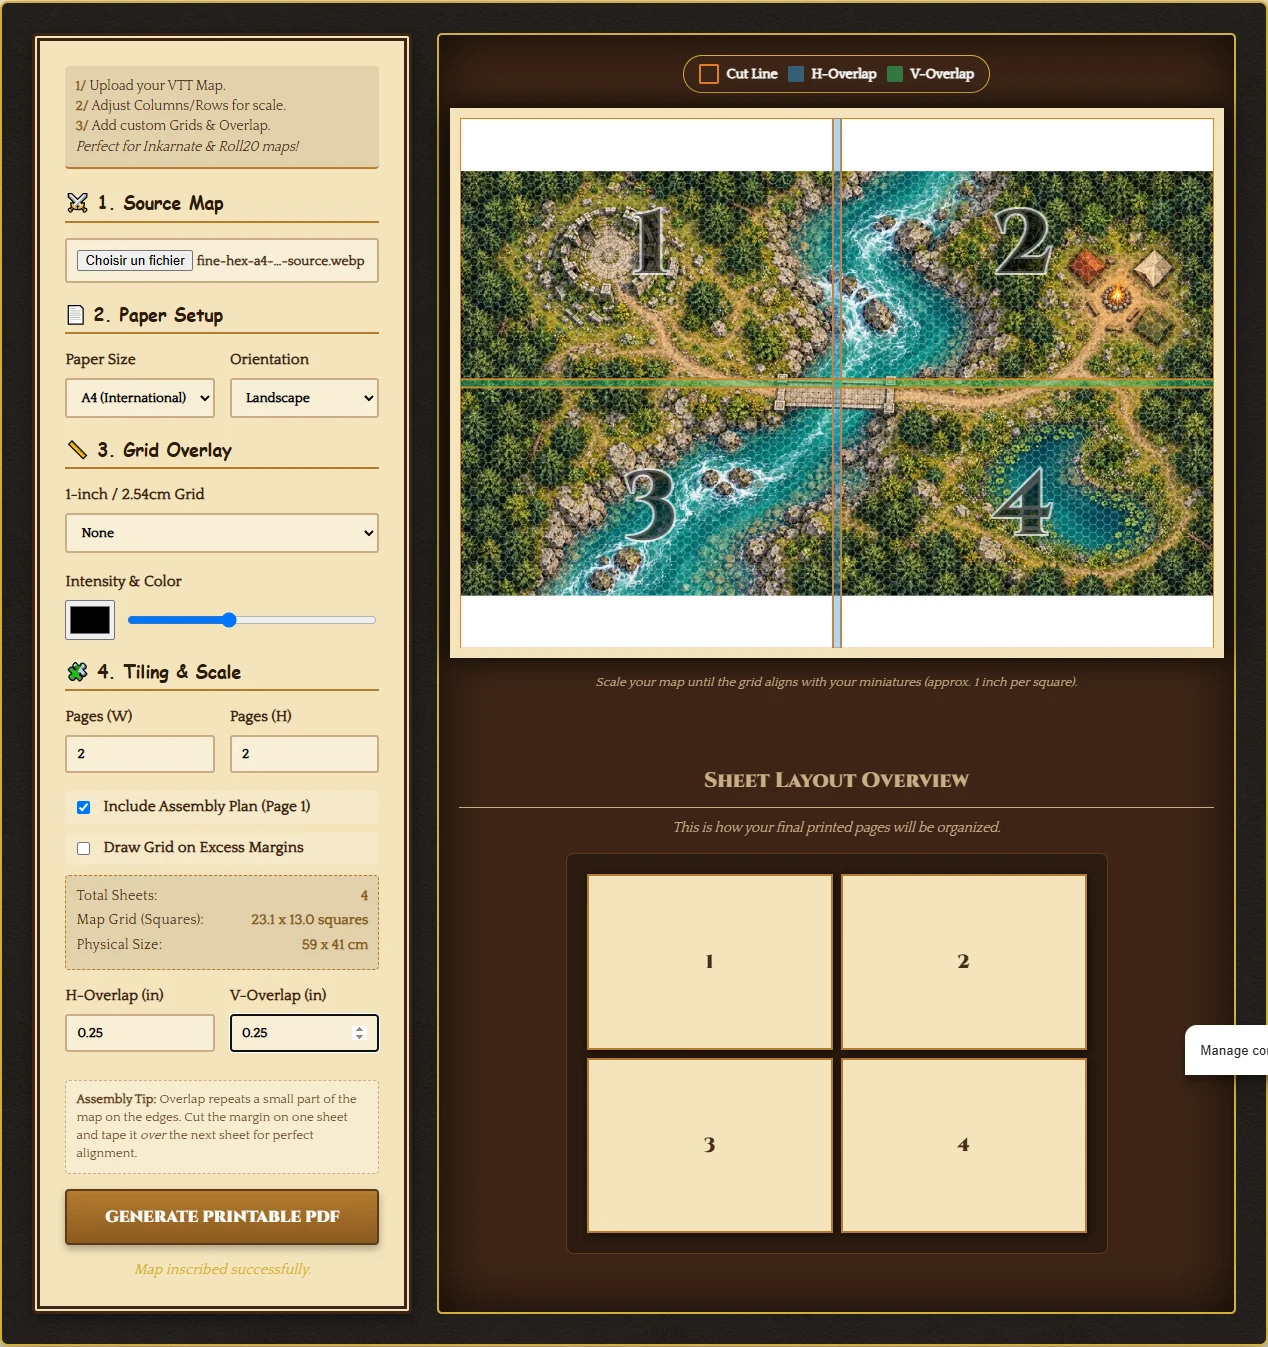
In the printer’s Source Map section, choose your image. Under Paper Setup, select A4 (International) and Landscape. In Grid Overlay, choose None. Leaving the default Square Grid selected would add square lines over the already-hexed image and make it harder to use.
Tile the river crossing across four sheets
- In Tiling & Scale, set Pages (W) to 2 and Pages (H) to 2. That produces four image sheets in the on-screen arrangement.
- Keep Include Assembly Plan (Page 1) selected if you want an overview of the four positions. In our test, the downloaded PDF had five A4 landscape pages: one plan and four map pages.
- Start with the displayed H-Overlap and V-Overlap values of 0.25 in. An overlap repeats a narrow strip so you can trim one sheet and tape it to its neighbor. Check where the bridge and paths cross page edges in the preview before exporting.
- Press Generate Printable PDF. Open the downloaded file and look at every page before you use paper or ink. Our tested file was named
Legendary_Map_Ready_To_Print.pdf; your browser may save it elsewhere.
The PDF is a layout result, not proof that the hexes have a particular real-world measurement. Check one printed hex with a ruler against the miniature base or scale you actually use. If it is too large or small, adjust the page count or source preparation and test again. In the PDF viewer and printer dialog, select Actual size / 100% rather than “fit to page”; a fit setting can silently change the scale. The source grid remains part of the picture, so merely changing the printer’s grid dropdown cannot resize those existing hex pixels independently.
Three real exports: smaller hexes and a map cut across sheets
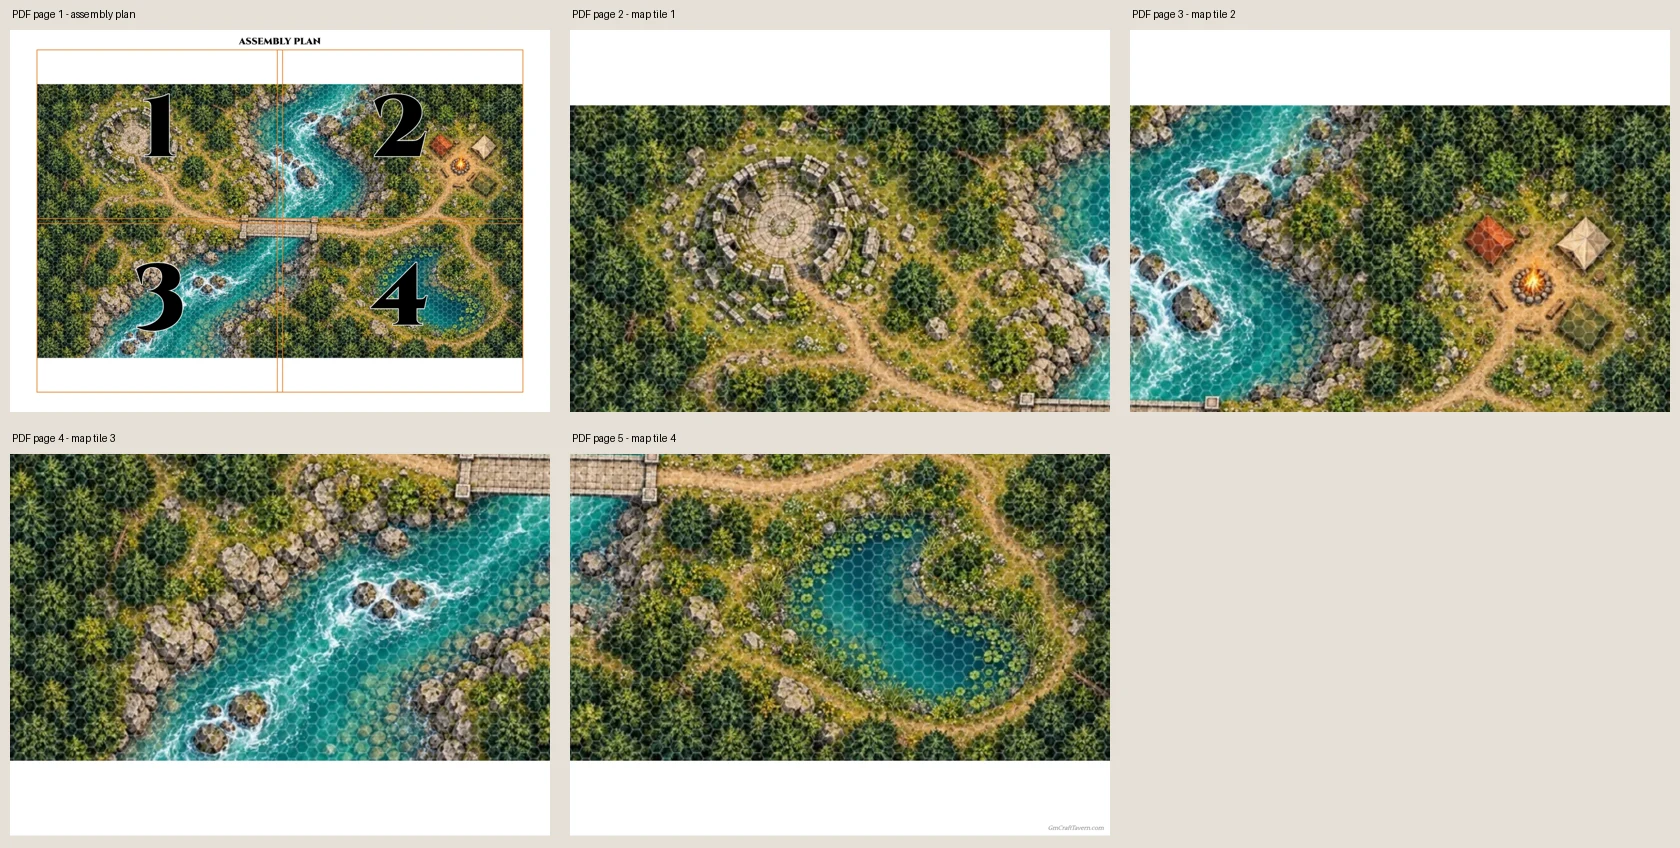
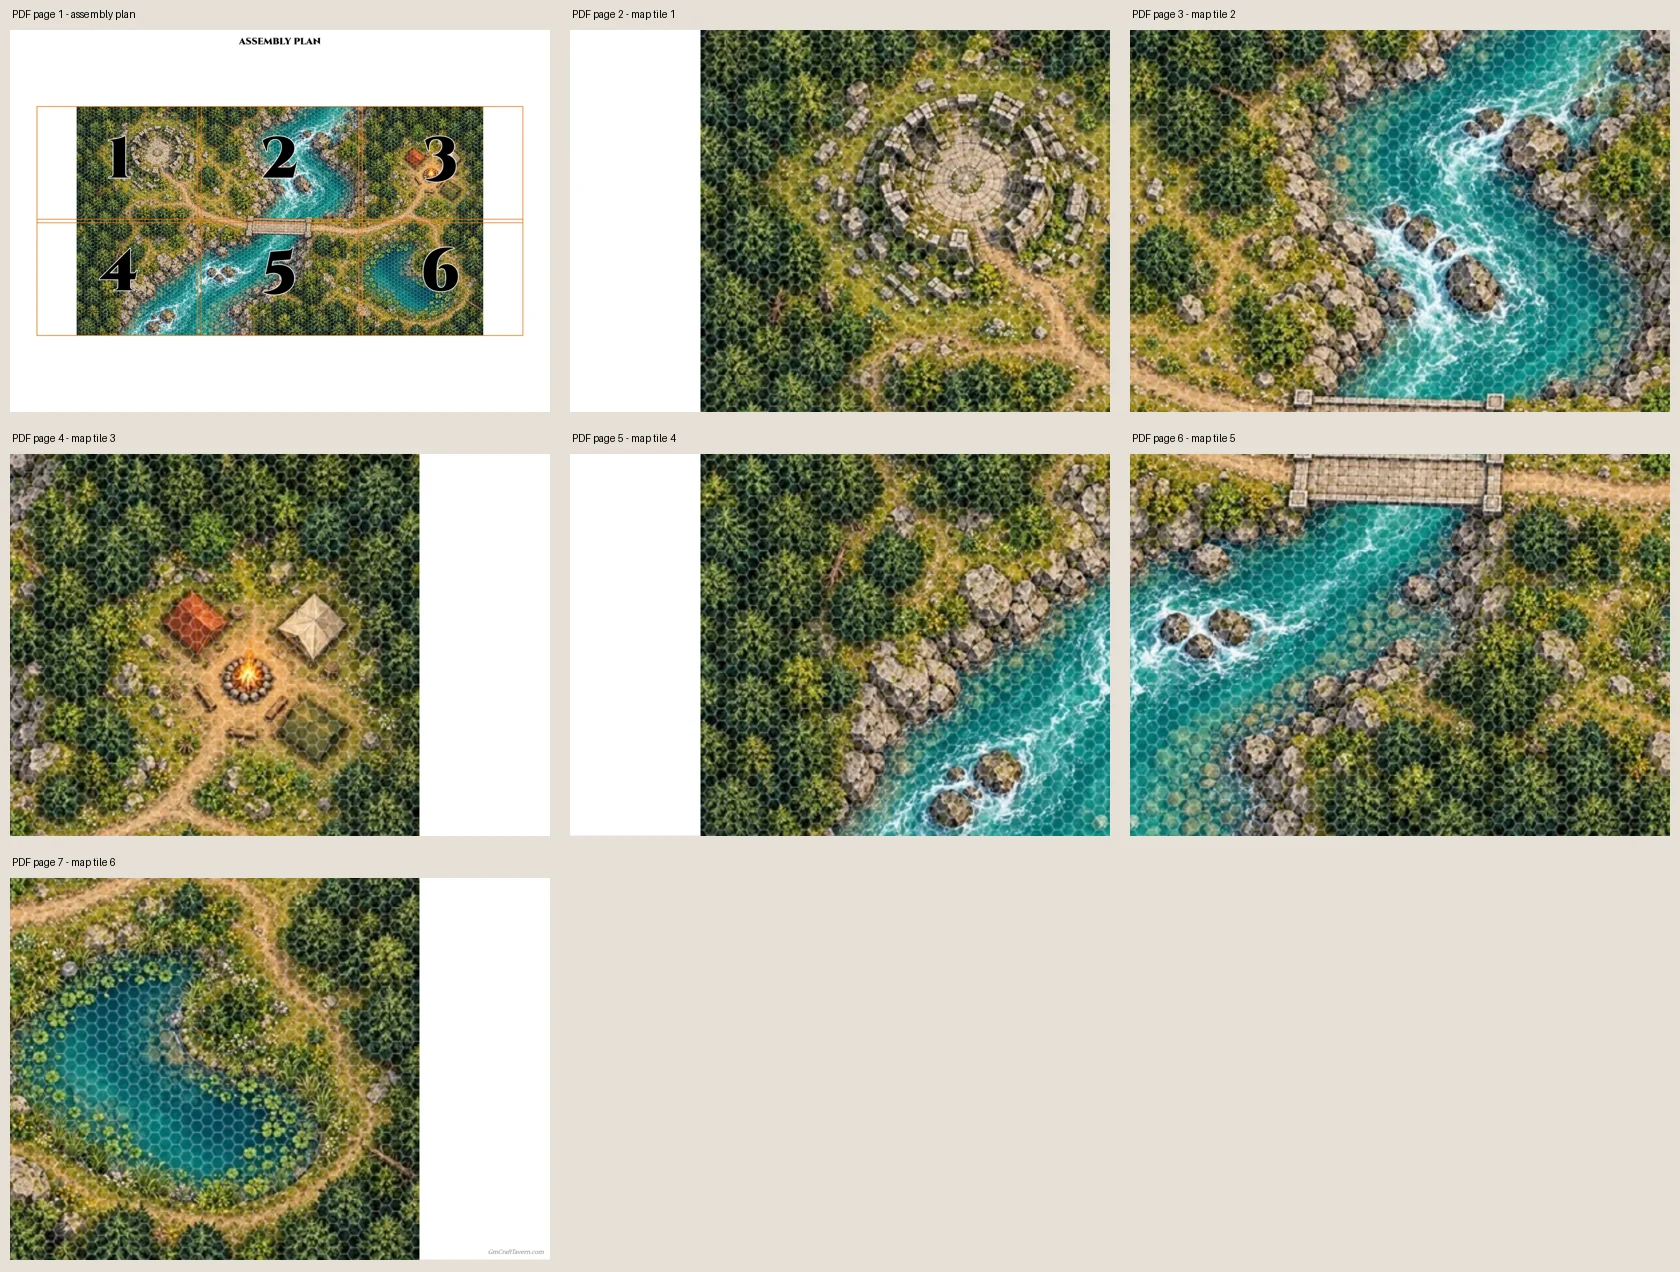
Each example below was exported by pressing Generate Printable PDF in the live Map Printer. The images show every page rendered directly from its downloaded PDF, not a fabricated grid or a single cropped page. The first PDF page is the numbered assembly plan; the remaining pages contain different sections of the map. All three use A4, Grid Overlay: None, H-Overlap: 0.25 in and V-Overlap: 0.25 in, with the assembly plan enabled and Draw Grid on Excess Margins disabled.
Example 1: 2 × 2 landscape — 4 map sheets
Map Gridder Cell Size: 6. Printer Pages (W): 2; Pages (H): 2; orientation: Landscape. The PDF contains 5 A4 pages: one plan plus 4 map tiles. Download the actual example 1 PDF.
Example 2: 3 × 2 landscape — 6 map sheets
Map Gridder Cell Size: 5. Printer Pages (W): 3; Pages (H): 2; orientation: Landscape. The PDF contains 7 A4 pages: one plan plus 6 map tiles. Download the actual example 2 PDF.
Example 3: 3 × 1 portrait — 3 map sheets
Map Gridder Cell Size: 5. Printer Pages (W): 3; Pages (H): 1; orientation: Portrait. The PDF contains 4 A4 pages: one plan plus 3 map tiles. Download the actual example 3 PDF.

Which layout to choose? The 2 × 2 landscape version is the compact four-sheet option. The 3 × 2 landscape version enlarges the terrain across six map sheets and uses a finer 5-pixel source grid. The 3 × 1 portrait version splits the map into three tall strips. White areas are the tool’s aspect-ratio padding, not missing terrain; they remain in the actual PDF. We rejected a 3 × 2 portrait trial because it left too much blank paper. The printer’s “Map Grid (Squares)” readout is a one-inch reference, not a count of the baked-in hexes.
Cut and assemble: use the numbered plan to place map tiles left to right, then top to bottom. Print map pages at 100%, trim an appropriate margin or repeated seam strip on just one of each adjoining pair, line up the river and paths in the overlap, and tape. Do not trim both copies of the overlap. The complete PDF pages above retain the white padding so you can see exactly what must be cut away. Because the original image is only 1000 × 563 pixels, these enlarged prints do not create extra terrain detail; use a higher-resolution original when you have one.
Quick checks before taping
- Double grid? Change Grid Overlay to None when your map already contains hexes or squares. If you need a new grid, begin with an ungridded source.
- Edges do not line up? Check that all pages were printed with the same paper size and at 100%, then use the repeated overlap strip to align the terrain. Trim only the appropriate edge, not both copies of the same seam.
- Minis do not fit a hex? Measure the physical print. A four-page layout alone does not guarantee a one-inch hex. Adjust and test a single page before printing the entire set.
- Want US Letter instead? Select US Letter before export and regenerate the PDF; do not mix A4 settings with Letter paper in your printer.
This is a browser-based layout workflow for an existing image, not an AI map generator. If you need other preparation tools, the free GM tools directory groups map, grid and image utilities by job. For this paper task, return to the Map Printer with a map whose grid and dimensions you can inspect.