
Creating a safe and inclusive environment for virtual tabletop (VTT) games is essential for enjoyable gameplay. This checklist will guide you through the necessary steps to ensure that all players feel secure and respected. From establishing session zero goals to implementing safety tools, these practices will enhance your gaming experience.
In this article, we will cover various aspects of VTT safety, including digital privacy, communication tools, moderation practices, and asset management. By following these guidelines, you can create a welcoming space for everyone at your table.
What you’ll learn in this article
- ✅1Understand the importance of a session zero checklist for VTTs to create a safe environment.
- 🎲2Discover how to set goals and boundaries for your virtual tabletop RPG.
- 🔎3Learn about digital privacy measures for platforms like Roll20 and Foundry.
- 🧙4♂️ Explore communication tools and etiquette necessary for effective gameplay.
- ✅5Implement moderation tools and incident reporting protocols for safety.
- 🎲6Craft content warnings and trigger advisories to support player comfort.
- 🔎7Discover accessibility settings to accommodate all players in your VTT sessions.
- 🧙8♂️ Manage assets responsibly and ethically for your gaming environment.
- ✅9Automate safety-focused scripts and macros to streamline your gameplay.
- 🎲10Prepare essential pre-session documents and templates for a smooth start.
- 🎲11Incident Response and Post-Incident Care
- 🎲12Long-term Maintenance, Community Management, and Onboarding
- 🎲13Resources & complementary tools
1. Define Session Zero Goals and Boundaries
1.1 Clarify campaign expectations and playstyle
It’s crucial to set clear expectations for your campaign during Session Zero. This is where you establish the playstyle, which can range from story-driven to mechanics-focused gameplay. You should also discuss how you handle character deaths, player-versus-player (PvP) situations, and spotlight time (the amount of time each player gets to be the focus of the game). I often use a shared document on platforms like Notion or World Anvil to record these agreements so everyone has access to the same information and can refer back to it as needed.
To help shy players express their preferences, consider running an anonymous pre-Session Zero poll using tools like Google Forms or Mentimeter. This way, everyone can share their thoughts on playstyle and campaign expectations without feeling pressured.
- Tip: Use a template checklist for playstyle negotiation that includes questions like, “What is your comfort level with character death?” and “How should we handle conflicts between players?” This can streamline discussions and ensure everyone’s voice is heard.
1.2 Establish safety goals: emotional, social, technical
When setting up your Session Zero, it’s essential to establish safety goals across three main pillars: emotional, social, and technical. Emotional safety involves how the group will handle sensitive content and triggers, while social safety focuses on respect for personal boundaries and the use of preferred pronouns. Technical safety encompasses account privacy, backups, and ensuring everyone’s digital space is secure.
Allocate time to discuss each pillar and introduce tools that can help, such as the X-Card for real-time content vetoing and Lines & Veils for pre-agreed boundaries. A good approach is to have a brief demo of these tools so everyone knows how to use them effectively during gameplay. You might set measurable goals, like ensuring all players can use content warning tools within five minutes or confirming that backup restore tests are completed before the second session.
- Warning: Make sure to choose a limited number of emotional safety tools to avoid overwhelming players. Starting with just one or two (like the X-Card and Lines & Veils) allows for easier implementation and better retention.
1.3 Agree on consent model (X-card, lines and veils, consent checklist)
Establishing a consent model during Session Zero is vital for creating a safe environment. Present options such as the X-Card, which allows players to veto content in real-time, Lines & Veils, where players agree on certain boundaries before gameplay, and a Consent Checklist, which can be a ranked form where players indicate their comfort levels with various topics.

To effectively agree on a consent model, run an anonymous consent checklist 48 hours before the session, and then discuss the aggregated results during your meeting. It’s beneficial to start with 1-2 tools and practice them, ensuring that everyone is comfortable with how to use them. For example, if someone uses the X-Card, have a procedure in place, such as pausing the game, rewinding a bit, and checking in privately with the player.
- Example: If you choose to implement the X-Card, demonstrate how to use it by having a physical card or an emoji in your VTT chat that players can use to signal discomfort. This not only normalizes the process but also reassures players that their comfort is a priority.
2. Digital Privacy and Account Security for VTTs
2.1 Account management: passwords, 2FA, unique emails
Managing your accounts securely is the first step in ensuring a safe gaming environment. Use unique emails for each account when possible and create strong passwords that combine letters, numbers, and symbols. Enabling Two-Factor Authentication (2FA) is also crucial; this adds an extra layer of security by requiring a second form of identification, like a code sent to your phone.
If a player decides to leave, promptly revoke their access to prevent any unauthorized entry into your game. Avoid using shared GM accounts, as this can lead to confusion and security issues. Tools like password managers (e.g., 1Password or Bitwarden) can help manage your passwords securely, and I recommend creating a shared document that lists recovery emails and backup codes stored safely.
- Tip: Create an actionable checklist for players to follow before the first session. Include steps like enabling 2FA, setting a unique password via a password manager, and confirming who has access to accounts.
2.2 Platform-specific privacy settings (visibility, friend lists, invites)
When setting up your VTT, it’s essential to adjust the privacy settings to ensure that only intended players can access your game. Set your games to invite-only, hide personal information like emails or real names, and limit who can join voice or text channels. Using expiring invite links and sharing them through secure channels helps prevent unwanted access.
Each platform has its own set of privacy controls. For instance, on Roll20, you can navigate to “Game Settings > Game Details” to adjust privacy levels. It’s a good practice to test invites in a private staging game to ensure everything is set correctly before inviting players to the main session.
- Warning: Be cautious with public invites. They can leak your game links, so always prefer private messages for sharing invites to maintain your game’s privacy.
2.3 Backups and local copies of characters and maps
Creating backups of your game assets is crucial for preserving your hard work and ensuring that you can recover from any technical issues. Enable automated exports where available, and schedule weekly manual backups to a secure cloud service. Always test your restore processes to confirm that you can recover your data when needed.
Instead of granting live access to co-GMs, share read-only backups. This approach helps maintain control over the game environment while ensuring that others can still access necessary resources. For example, I recommend a minimal backup policy that outlines the frequency of backups (e.g., daily or weekly) and how long you’ll retain them (e.g., 30, 90, or 365 days).
- Tip: Run a restore test in a staging world to ensure your backup process works smoothly. Document who to contact if issues arise during recovery.
3. Communication Tools and Voice/Chat Safety
3.1 Choosing and configuring voice platforms (Discord, integrated VTT voice)

Selecting the right voice platform is essential for effective communication during your game. While I prefer Discord for ongoing chat and Zoom for video if necessary, many VTTs also offer integrated voice options that can simplify the experience. Configure these platforms to ensure they are secure; use invite-only settings, establish roles to limit access, and enable push-to-talk features to minimize background noise.
When setting up Discord, make sure to establish server roles that dictate what players can do, and consider using stage channels for larger groups. It’s also important to have a clear consent policy for recording audio or video sessions, ensuring that everyone is aware and agrees before any recording takes place.
- Example: Before your first session, read a statement that outlines your recording policy and ask for consent. This sets a precedent for transparency and respect regarding privacy.
3.2 Text channels, logging, and ephemeral spaces
Organizing your text channels is key to maintaining a clean and functional communication environment. Set up channels for in-character (IC), out-of-character (OOC), rules, and support. Implement slow-mode in busy channels to prevent overwhelming players with too much information at once. Additionally, consider using ephemeral spaces for sensitive discussions, where messages can auto-delete after a set time.
You might also want to employ a logging policy that specifies what should be logged, where logs are stored, and who has access to them. For example, you could create a channel where sensitive discussions occur but limit message retention to a week to respect privacy.
- Tip: Develop a channel map that outlines the purpose of each channel and the retention policy for messages. This can help players navigate your server more easily and understand the privacy measures in place.
3.3 Microphone and camera etiquette and consent
Establishing microphone and camera etiquette is crucial to creating a comfortable environment for all players. Decide on rules for microphone use—whether to use push-to-talk or open mic—and clarify expectations for camera use, allowing players to opt out if they prefer not to be on video. Consent for recording audio or video should be explicit, and players should feel free to decline.
I suggest creating a brief etiquette statement for your Session Zero that covers these points. Additionally, consider providing accommodations for neurodivergent players, such as allowing them to use virtual backgrounds for privacy or reducing camera usage.
- Example: At the start of your session, read a quick script that outlines your microphone and camera policies, and provide an opt-out process for those who may not want to participate in video calls. This ensures everyone feels comfortable and respected.
4. Moderation Tools, Roles, and Incident Reporting
4.1 Role assignment and moderator powers on VTT and chat
Clearly defining roles and responsibilities within your gaming group is essential for maintaining a safe and respectful environment. Assign roles such as GM, Moderator, Player, and Observer, and describe the specific powers associated with each role, like muting or kicking players and editing permissions. This helps prevent accidental misuse of power and ensures everyone knows who to turn to in case of issues.
Using a role hierarchy in platforms like Discord can further enhance this structure. For instance, you might set up a system where only moderators can access certain channels or perform specific actions. Regular training for moderators can also be beneficial, ensuring they understand their responsibilities and are equipped to handle incidents appropriately.
- Tip: Create a role matrix that maps out the powers and responsibilities for each role. Make this document accessible to all players to promote transparency and trust within the group.
4.2 Creating and using incident reporting workflows
Having a clear incident reporting workflow in place is vital for addressing any issues that arise during gameplay. If an incident occurs, the first step is to pause the session and document the situation with screenshots and timestamps. Afterward, you should conduct private mediation and, if necessary, report the incident to the platform.
It’s also important to maintain a simple incident log that includes details like the date, description, witnesses, and resolution steps. Incorporating an anonymous reporting option, like a Google Form, can encourage players to report incidents without fear of retaliation.
- Warning: Ensure that your incident reporting process is transparent and communicated to all players. This builds trust and encourages players to speak up if they experience or witness any inappropriate behavior.
4.3 Sample moderation messages and escalation steps
Providing your moderators with sample messages for different scenarios can streamline the moderation process during gameplay. Prepare templates for private warnings, public reminders, and escalation messages (such as moving from a private warning to a temporary mute). This helps ensure that moderators can respond quickly and consistently in stressful situations.
For example, you might have a template for a private warning that reads: “Hey, I noticed some behavior that doesn’t align with our code of conduct. Can we chat about it?” Additionally, consider including timelines for escalation steps so that moderators know when to take further action, such as temporary mutes or removals.
- Example: Create at least three ready-to-use moderation message templates, such as a private warning, temporary penalty, and removal notice, to help moderators respond effectively and maintain a respectful gaming environment.
✨ Discover the Ultimate Tavern Bundle ✨
Stop prepping for hours. Get 350,000+ digital assets to create immersive campaigns instantly.

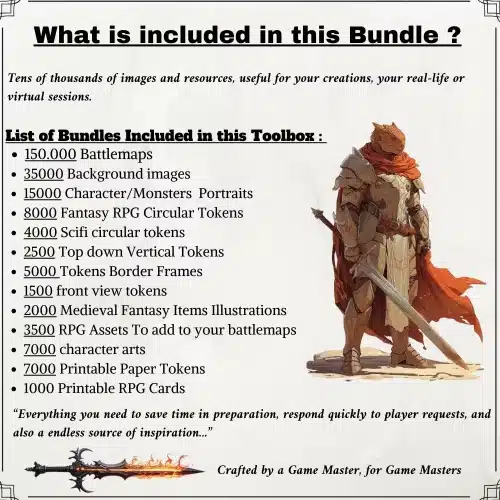
🎲 Get the Ultimate Toolbox Now
Instant Download • Lifetime Access
5. Content Warnings, Triggers, and Safe Mechanics
5.1 Crafting content warnings and trigger advisories
Content warnings (CWs) are an essential part of creating a safe gaming environment, especially if your campaign includes sensitive topics. Use clear CWs in session handouts and VTT overlays to inform players about potentially triggering content. Aggregate anonymous pre-session responses to decide on “veils” (content players want to avoid) and ensure that all players have the opportunity to opt out of specific themes.
To implement CWs, consider using short labels (e.g., “violence: veiled” or “sexual content: none”) and provide a detailed link for players to review if they wish. It’s also helpful to include a post-session survey question to track whether any triggers were missed or if players felt comfortable with the content presented.
- Tip: Standardize your CW phrasing and decide where they will be displayed, such as in a pinned handout or VTT sidebar, to ensure visibility and accessibility for all players.
5.2 In-session mechanisms: X-card alternatives and timeouts
Implementing in-session safety mechanisms is crucial for player comfort and emotional safety. The X-Card, which allows players to signal discomfort in real-time, can be adapted for VTT use through emojis or macros. Other options include Lines & Veils and the Traffic Lights system, which can help players communicate their comfort levels easily.
During your Session Zero, demonstrate how to use these tools and limit the number of mechanisms to 1-2 to avoid overwhelming players. For instance, after a player uses the X-Card, have a procedure in place for the GM to pause the game, rewind a bit, and check in privately with the player to address their concerns.
- Example: If using the X-Card, you could create a macro that blurs the map when the card is activated, ensuring that the content is immediately hidden from all players. This allows for a smoother and more respectful transition when sensitive topics arise.
5.3 Example phrasing for trigger checks and boundaries
Having concise scripts for checking in with players before scenes can help maintain a comfortable atmosphere. Use phrases like, “Heads up: this scene may include bladed violence. Green/Yellow/Red?” to gauge comfort levels before diving into potentially triggering content.
Additionally, create private check-in scripts for after an X-Card is used, ensuring that players feel supported and heard. For example, if a player activates the X-Card, you might follow up with, “I noticed you used the X-Card. Would you like to talk about it privately?” This shows that you’re attentive to their needs and encourages open communication.
- Tip: Equip GMs and players with neutral, effective language for managing triggers gracefully. This can help normalize discussions around boundaries and ensure everyone feels empowered to speak up.
6. Accessibility and Inclusivity Settings
6.1 Visual accessibility: color contrast, tokens, map readability
When it comes to visual accessibility, using high-contrast themes is crucial for ensuring that all players can see and engage with the game materials. For instance, if your VTT platform allows it, choose a dark background with light text or vice versa. Additionally, ensure that tokens have clear silhouettes and use distinct shapes to represent different characters or items. This is especially helpful for players with visual impairments or color blindness.
Make sure your maps are designed with readability in mind. Use clear labels and avoid overly complex designs that can confuse players. Providing a checklist for token and map preparation can ensure that you consistently meet these accessibility standards. For example, check that each token has a contrasting border and that all maps have alt-text descriptions for players using screen readers.
- Tip: Encourage players to provide feedback on visual elements during your sessions, as this can help you adjust and improve the experience over time.
6.2 Auditory accessibility: captions, transcripts, pacing

Auditory accessibility is essential for creating an inclusive VTT experience. Start by offering captions or transcripts for any spoken content. Tools like Otter.ai can help generate real-time captions during sessions, which can be a lifesaver for hearing-impaired players. Additionally, ensure that you provide summaries of key points discussed during the game, allowing players to refer back to them as needed.
Pacing is another critical aspect. Avoid overwhelming players with fast dialogue or complex scenarios. Instead, encourage slower pacing during discussions, and use visual timers to signal when it’s time to transition between topics. By allowing players to process information at their own pace, you create a more comfortable environment for everyone involved.
- Example: Before a session, you might say, “We’ll be using captions today, and I’ll provide a brief summary at the end to ensure everyone is on the same page.”
6.3 Cognitive accessibility: simplify UI, session summaries, pacing aids
Cognitive accessibility focuses on creating an environment that reduces overload and makes participation easier for neurodivergent players. Simplifying the user interface (UI) where possible can help. For instance, use clear labels for different functions in your VTT and avoid cluttering screens with too much information at once. Frequent summaries and clear agendas can also help players stay oriented throughout the session.
Incorporate pacing aids, such as visual timers or reminders for breaks, to help players manage their attention and energy levels. For instance, you could schedule micro-breaks every hour to allow players to recharge. Providing session notes or summaries afterward can also aid in retention and understanding, ensuring players can revisit important information at their own pace.
- Tip: Regularly ask your players how they feel about the pacing and structure of your sessions, and be willing to adapt based on their feedback.
7. Asset Management and Licensing on VTTs
7.1 Sourcing tokens, maps, and art responsibly
When sourcing assets for your VTT, it’s important to adhere to ethical practices. Utilize resources like CC0 (Creative Commons Zero) or OpenGameArt, which provide free-to-use assets without the need for attribution. Additionally, consider purchasing licensed assets from reputable creators. For example, the Game Master Toolbox offers a wide array of VTT-ready items that can enhance your gameplay.
Maintain records of your asset purchases and licenses, as this will protect you from potential copyright issues. Create a procurement checklist that includes the license type, allowed uses, and any necessary attribution text. For instance, when using a CC-BY licensed asset, ensure you include the appropriate attribution in your session handouts or VTT journal.
- Tip: Regularly review your asset library to ensure compliance with licensing agreements and to update any outdated materials.
7.2 Organizing libraries, naming conventions, and folder structure
A well-organized asset library can significantly enhance your VTT experience. Establishing a clear naming convention for files, such as “worldname_category_desc_YYYYMMDD_v1.png,” will make it easier to locate assets during gameplay. Additionally, use a logical folder structure, such as /maps/ for maps and /tokens/ for character tokens, to keep everything organized.

Consider implementing a metadata tagging system that allows you to categorize assets further. For example, you might tag tokens with labels like #fantasy, #urban, or #sci-fi. This will facilitate quicker searches and streamline your asset management process. By organizing your assets effectively, you can reduce downtime during sessions and ensure a smoother gameplay experience.
- Example: Create a master index spreadsheet that lists all your assets, their locations, and their licensing information, making it easy to track what you have and where it’s stored.
7.3 Example asset attribution and license notes
Proper attribution is key when using assets from various sources. Include attribution and license notes in a visible location within your VTT, such as a journal handout. For example, you might use a template like: “Artwork by [Artist Name], used under [License Type].” This ensures that you respect the original creators’ rights and comply with licensing agreements.
Maintain thorough provenance records for all assets, especially those that are player-submitted. If a player creates art for the game, make sure to have a consent form that outlines how their work will be used and stored. This not only protects you legally but also fosters a respectful and collaborative environment among your players.
- Tip: Regularly update your attribution notes and ensure they are easily accessible to all players, promoting transparency and respect for creators.
8. Automation, Macros, and Safety-Focused Scripts
8.1 Automating content warnings and consent prompts
To streamline the process of managing content warnings and consent prompts, consider using macros and bots. For example, you can set up a macro that automatically posts content warnings at the start of each session and periodically throughout gameplay. Additionally, some platforms offer modules that can automate the pausing of sessions when a safety signal is activated, enhancing player comfort.
When implementing these features, ensure that you have a clear plan for where the prompts will appear. For example, placing them in a visible area of the VTT sidebar or as a pinned message in your Discord channel can ensure that players see them immediately. Test these features in a staging environment to confirm they work as intended before the actual session.
- Tip: Encourage players to provide feedback on the effectiveness of these prompts and be willing to adjust them based on their input.
8.2 Macros for private messages (secret notes, private rolls)
Using macros for private messages can help maintain player privacy and confidentiality during your VTT sessions. For instance, you can create private-roll macros that allow players to make secret checks without others seeing the results. Additionally, utilizing journal entries for private notes can help keep sensitive information secure.
To implement these macros, provide clear instructions for players on how to access and use them. For example, you might say, “You can use the whisper macro to send secret messages to me if you have something you’d like to keep private.” This ensures players feel comfortable utilizing these tools without creating confusion.
- Example: Create a macro that whispers player rolls to the GM, allowing for secret actions to be resolved without other players knowing the details.
8.3 Rate-limiting and automated moderation scripts

Automated moderation scripts can help maintain a safe and respectful environment in your VTT sessions by enforcing rules and managing chat activity. For instance, using bots to implement slow-mode can prevent chat overwhelm and reduce the chances of sensitive information being shared unintentionally. Additionally, these bots can log offensive content triggers, helping you keep track of any issues that arise.
When setting up these moderation tools, it’s important to establish a clear policy for what the bots will log and how long that information will be retained. For example, you might decide to keep logs for 30 days before automatically deleting them. This not only helps maintain privacy but also ensures that you have a record in case of disputes.
- Tip: Regularly review the performance of your moderation bots and adjust their settings as necessary to ensure they are effectively managing chat without stifling player interaction.
9. Platform-Specific Setup Tips (Roll20, Foundry, Fantasy Grounds, others)
9.1 Quick privacy/security checklist per major VTT
| VTT Platform | Privacy/Security Settings |
|---|---|
| Roll20 | Set games to “invite-only,” adjust privacy level, test macros. |
| Foundry | Ensure self-hosting, use SSL, and maintain regular backups. |
| Fantasy Grounds | Conduct license checks and create local data backups. |
This table provides a quick reference for ensuring that your VTT environment is secure and private before you start inviting players.
- Tip: Regularly revisit these settings and update them as necessary, especially when new players join or game dynamics change.
9.2 Foundry: user roles, worlds, and packages to improve safety
Foundry VTT offers a robust environment for managing user roles and ensuring the safety of your gaming sessions. When you self-host Foundry, you have complete control over your data, which includes setting up user roles like GM, player, and moderator. Each role can have specific permissions, such as the ability to mute or kick players. To enhance safety, consider implementing modules like the “Safety Tools” and “Accessibility Module.” These can help automate certain safety features like pausing the game when a player signals distress through a tool like the X-Card.
Tip: Make sure to establish a minimal hosting security checklist, such as enabling SSL (Secure Sockets Layer) for encrypted connections, setting up a firewall to protect against unauthorized access, and scheduling daily exports of your game data. This ensures that you have backups in case of any issues and limits exposure to potential threats.
9.3 Roll20: game invites, handouts, and API options
When using Roll20, securing your game starts with managing invites and privacy settings effectively. Navigate to “Game Settings” and then to “Game Details > Privacy Level” to ensure your game is set to invite-only. This minimizes the risk of unwanted players joining your session. Additionally, use handouts for important policies, such as your code of conduct, and make sure they are visible to all players from the start.
Warning: Be cautious when sharing invite links; use private messages to send these to players instead of posting them publicly. This helps prevent unwanted access to your game.

To enhance your game’s safety further, consider utilizing API scripts for automation. For example, you can set up a macro to automatically trigger a blur effect on your maps when the X-Card is activated. This can be done using the QuantumRoll API, which allows you to create sophisticated macros for various in-game functions. Test these scripts in a staging game to ensure they perform as expected before your actual session.
- Tip: Always double-check your privacy settings before sending out invites to ensure that only intended players can access your game.
10. Pre-Session Documents and Templates
10.1 Sample Session Zero agenda and fillable form
A well-structured Session Zero agenda can significantly impact the effectiveness of your initial meeting. Include key topics such as introductions, a demonstration of consent tools, a checklist for account and privacy settings, and discussions around playstyle preferences. This framework allows everyone to align their expectations and understand the safety measures in place. You can also create a fillable Google Form to collect anonymous feedback on player preferences, helping shy players voice their concerns without fear.
- Tip: Offer a downloadable Session Zero agenda template that GMs can easily edit and customize to fit their specific needs. This can streamline the preparation process for different groups.
10.2 Sample consent and content-warning templates players sign
Incorporating consent and content-warning templates is essential for creating a safe gaming environment. Use simple checklists that allow players to express their preferences regarding content and consent tools, such as the X-Card or Lines & Veils. Store these responses privately to respect player confidentiality while still reviewing aggregate data for group awareness.
- Warning: Ensure that these templates are easy to understand and accessible. Complicated language can deter players from actively engaging with them.
10.3 Example code of conduct for your table
Establishing a code of conduct is critical to maintaining a respectful and inclusive gaming environment. Your code should cover essential points such as anti-harassment policies, respect for pronouns, and a clear escalation policy for violations (e.g., warning, temporary mute, removal). Make sure this document is easily accessible to all players, ideally pinned in a handout or shared as a channel rule.
- Example: A concise code of conduct might include the following bullet points:
- Treat all players with respect and kindness.
- No harassment or discriminatory comments will be tolerated.
- Use correct pronouns and names for all players.
- Report any concerns to the GM or a designated moderator.
Encourage players to read and acknowledge the code of conduct by including a sign-off checkbox in your digital documents. This not only reinforces accountability but also fosters a culture of mutual respect, where everyone feels safe and valued.
11. Incident Response and Post-Incident Care
11.1 Steps to secure accounts and evidence preservation
In the event of an incident, securing accounts and preserving evidence is paramount. Start by pausing the session to prevent further escalation. Document the incident thoroughly, collecting screenshots and timestamps to create a clear record. Next, secure accounts by changing passwords and revoking any tokens or access that may have been compromised. This step is crucial in preventing further issues.
- Warning: Ensure that evidence preservation follows a systematic approach. Export chat logs and copy server audit logs for comprehensive documentation.
11.2 Communicating outcomes and restorative options
Once an incident has been addressed, it’s important to communicate the outcomes clearly and sensitively. Begin by providing a private summary to the involved parties, ensuring that sensitive details are redacted to protect everyone’s privacy. Afterward, consider sharing a public closure message to inform the broader group of the resolution, while still respecting individuals’ confidentiality.
- Example: A public closure message might state, “We addressed a recent incident involving player conduct. Appropriate actions have been taken to ensure a safe environment for everyone. Thank you for your understanding.”
In addition to informing players about the outcome, offer restorative options such as facilitated mediation or opportunities for the offending player to apologize and make amends. This not only helps in healing the community but also reinforces a culture of accountability and growth, allowing players to learn from their mistakes.
11.3 Supporting impacted players (resources and referrals)
Supporting players who have been impacted by an incident is a crucial part of your post-incident care. Begin by offering them a chance to take time off or have private check-ins to discuss their feelings and needs. Additionally, provide referrals to mental health resources, such as crisis lines or counseling services, to ensure they have access to professional support.
- Tip: Create a resource sheet that includes contact information for local crisis lines and online counseling directories. This can be invaluable for players needing immediate assistance.
When a player is ready to return to the game, consider implementing accommodations such as reduced spotlight time or a refresh of their safe words. This approach demonstrates empathy and understanding, allowing them to re-enter the gaming space at their own pace. Make sure to check in regularly to ensure they feel comfortable and supported as they reintegrate into the group.
12. Long-term Maintenance, Community Management, and Onboarding
12.1 Periodic rechecks and reconsent procedures
Establishing a routine for periodic rechecks and reconsent is crucial for maintaining a safe gaming environment. Consider implementing quarterly reconsent polls to gauge player comfort levels with current safety tools and policies. This proactive approach allows you to address any concerns before they escalate and ensures that everyone feels heard.
- Example: You might create a simple reconsent template that includes questions about the effectiveness of current consent tools and any new issues players may have encountered. Encourage players to share their thoughts openly, fostering an inclusive atmosphere where everyone’s opinion is valued.
12.2 Onboarding new players with mini Session Zeros
Onboarding new players effectively is key to fostering a supportive gaming environment. Consider running short 15–20 minute one-on-one onboarding sessions for newcomers. These mini Session Zeros should cover essential topics like consent tools, account checks, and accessibility needs, ensuring new players feel informed and included from the start.
- Tip: Provide a scripted mini-Session Zero template that outlines the key points to cover, along with a checklist for required acknowledgments such as recording policies and the code of conduct.
During the onboarding process, pair new players with a buddy who can help guide them through their first few sessions. This buddy system not only provides support but also helps integrate newcomers into the group dynamic, making them feel welcome and valued.
12.3 Archiving and data retention policies
Establishing clear archiving and data retention policies is essential for protecting player privacy and ensuring compliance with legal requirements. Define a retention timeline for player data, such as deleting personal information 30 days after a campaign concludes unless players opt-in for archival. This approach respects player privacy while allowing for necessary record-keeping.
- Warning: Be mindful of legal considerations regarding stored personal data, including email addresses and IP logs. Document your retention decisions clearly to ensure transparency and accountability.
Create a template for your retention policy that outlines the default deletion timeline and the opt-in process for archiving data. This not only helps in managing player information responsibly but also builds trust within your gaming community, as players can feel confident that their data is handled with care.
13. Resources & complementary tools
When it comes to enhancing safety and inclusivity in your VTT sessions, leveraging the right resources and tools can make all the difference. Start by consulting the Roll20 privacy guide and the Foundry Accessibility Module for practical insights into improving your game’s environment. Additionally, consider utilizing asset sources like OpenGameArt and select Etsy items, such as the Game Master Toolbox and Procreate Fantasy Map-Making Brush Kit, to enrich your gaming experience.
- Tip: Incorporate emotional safety training resources, like Behind the Screen and Let’s Role, to deepen your understanding of creating safe spaces for players.
For moderation, explore bots like the X-Card bot to automate safety functions within your sessions. These tools can help streamline your processes and ensure that everyone feels secure while playing. By curating a prioritized list of high-impact resources, you can easily implement safety measures without overwhelming yourself with research.
Fox’s take
In conclusion, prioritizing safety and inclusivity in your virtual tabletop sessions is not just beneficial—it’s essential. By following this session zero checklist, you’ll be well-equipped to create a gaming environment where everyone feels respected and comfortable. Remember to revisit these practices regularly and encourage open communication among your players. As you embark on your next adventure, keep these tools and strategies in mind, and let’s make every session an enjoyable experience for everyone involved!

FAQ
How do I run a Session Zero that protects player privacy on a VTT?
Ensure your game is ‘invite-only’, hide personal info, and use secure channels for invites.
What are simple, repeatable consent mechanics I can use digitally?
Use the X-Card and Lines & Veils, implemented through macros or emojis for easy access.
Which VTT privacy settings should I change before inviting players?
Set games to ‘invite-only’, hide personal details, and limit visibility of game invites.
How do I handle a harassment report that happened on a VTT?
Pause the session, document the incident, mediate privately, and communicate outcomes respectfully.
What assets and licensing checks should I perform for maps and tokens?
Source from reputable platforms, check licenses, and maintain organized records of assets.
Continue reading
- Running a memorable session zero: templates and tips
Session zero templates for aligning player expectations and safety tools in RPG campaigns. - The Ultimate Guide to Organizing Your Digital RPG Assets in 2026
Organizing digital RPG assets: step-by-step strategies for tidy libraries, VTT prep, backups, and faster session prep.