
Have you ever found yourself in the middle of an exciting tabletop session, only to realize you need a character portrait or handout on the fly? It can be a challenge, but with generative AI NPC portraits, you can create stunning visuals in real-time that enhance your storytelling. In this guide, I’ll walk you through practical steps to integrate these AI tools into your gameplay, from generating images to presenting them seamlessly. Let’s dive in and transform your gaming experience!
What you’ll learn in this article
- 🎲1Discover how to use generative AI NPC portraits to enhance gameplay.
- ✅2Learn about the best tools and platforms for generating real-time visuals in DnD online.
- 🔎3Understand the integration of AI-generated images into popular VTTs like Roll20 and Foundry.
- 🧙4♂️ Explore effective methods for organizing assets and naming conventions for quick access during play.
- 🎨5Get tips on file formats, DPI settings, and size presets for both digital and printed handouts.
- ⚙6️ Master batch automation techniques to streamline the creation of NPC portraits and tokens.
- 🎲7Batch automation & presets (scripting and API examples)
- 🎲8Handouts: design templates and printable export steps
- 🎲9Speed vs quality: model settings, size, and trade-offs
- 🎲10Legal, ethics & licensing for generated art
- 🎲11Performance, caching & offline backup plans
- 🎲12Troubleshooting common problems
- 🎲13Mini case study: two-hour session using real-time AI visuals
- 🎲14Resources & complementary tools (required list)
- 🎲15Quick best-practices and memorables for GMs
- 🎲16Ready-made prompts and presets (6+ copy-paste prompts)
- 🎲17File-size, DPI & export metrics for screen and print
- 🎲18Featured automation snippet (pseudocode) for batch generation
1. Tools & platforms — choosing AI models, UIs and VTTs
When it comes to generating NPC portraits and handouts in real-time, selecting the right tools and platforms is crucial. For beginners, I recommend starting with user-friendly cloud-based options like Midjourney or ZSky AI. These platforms allow you to generate images directly from your browser, which is especially handy during live sessions when you need quick results. For more advanced users, tools like Automatic1111 provide local control over Stable Diffusion, enabling you to generate high-quality images offline.
This setup requires installation and a capable GPU, but it offers greater flexibility, especially if your internet connection is unreliable.
Model providers (local vs cloud) and recommended APIs
Choosing between local and cloud model providers can significantly impact your workflow. For local generation, Automatic1111 (a user interface for Stable Diffusion) is a popular choice. It allows you to run models like Realistic Vision and SDXL Turbo directly on your machine. This setup is beneficial for GMs who prefer not to rely on internet connectivity during sessions.
On the other hand, cloud services like ZSky AI and Pixa offer fast, browser-based image generation and are perfect for those who want to jump straight into creating without the technical hurdles.
Image editors and quick touch-up tools
After generating your NPC portraits, you might want to make some quick adjustments before presenting them. Tools like Photopea and GIMP are excellent for this purpose. Photopea is a browser-based editor that mimics Photoshop, making it accessible without any installation. You can use it to crop images, remove backgrounds, and add borders to your tokens.
GIMP is a more robust desktop application that offers extensive editing capabilities, ideal for those who prefer a powerful toolset.
Virtual tabletops and presentation platforms
Integrating your generated images into a Virtual Tabletop (VTT) platform is the next step in your workflow. Popular options like Foundry VTT and Roll20 allow you to import your NPC portraits and handouts seamlessly. In Foundry, you can simply drag and drop your PNG files into the interface, while Roll20 provides an easy art library management system for quick access during your sessions.
To ensure that your visuals appear correctly, always check the import settings for each platform. For example, Foundry typically requires tokens to be square with transparent backgrounds.
2. Preparing assets and folder structure for live play
Organizing your assets before a session is key to maintaining a smooth gameplay experience. I recommend creating a folder structure that is easy to navigate during live play. For example, you might set up folders like `./CurrentSession/NPCs/` for your active characters and `./Archive/` for previous sessions.
This way, you can quickly access the portraits and tokens you need without wasting time searching through files.
Naming conventions, folder layout, and quick-access folders
A clear naming convention can drastically reduce the time it takes to find your assets during a session. For example, you might name your files using the format `Archetype_Race_Gender_SessionDate.png`. This helps you quickly identify the character’s type and relevant details at a glance.
Additionally, consider tagging your files with relevant keywords or creating a small JSON metadata file to provide extra information about each NPC, such as their backstory or abilities.
File format, DPI, and size presets for screen and print
When preparing your assets, understanding file formats and DPI (dots per inch) is crucial for ensuring your images display correctly on both screens and printed materials. For VTT tokens, I recommend using PNG files with a size of 512×512 pixels at 72 DPI.
This format provides a transparent background and is typically lightweight, making it easy to upload to platforms like Roll20 or Foundry VTT.
3. Writing prompts for NPC portraits — structure and examples
Creating effective prompts for NPC portraits is essential for generating the desired visuals. A well-structured prompt typically includes details about the character’s appearance, expression, and setting. For example, you might write a prompt like, “A grizzled warrior with a scarred face, wearing leather armor and a determined expression, set against a misty forest backdrop.” This level of detail can help the AI produce a more accurate image.
Additionally, experimenting with different styles and expressions can yield varied results that can be useful in different scenarios.
Prompt anatomy: subject, style, expression, lighting, camera
When writing prompts, consider breaking them down into components: subject, style, expression, lighting, and camera angle. For example, a prompt might read: “A noble elven lady, in a fantasy art style, with a serene expression, soft lighting, and a close-up shot.” This structure helps ensure that you capture all the necessary elements for a compelling visual.
Each component plays a vital role in how the AI interprets the request and generates the final image.
Negative prompts and style modifiers
In addition to positive prompts, incorporating negative prompts can help refine the output. For example, you might include terms like “blurry” or “deformed” to instruct the AI on what to avoid. This can significantly improve the quality of the generated images.
Style modifiers can also enhance the output by specifying whether you want a realistic look, a cartoonish style, or something else entirely.
4. Persona templates & archetype prompts (5+ examples)
Having a variety of persona templates and archetype prompts at your disposal can streamline the character creation process. Here are some examples of archetypes you might use:
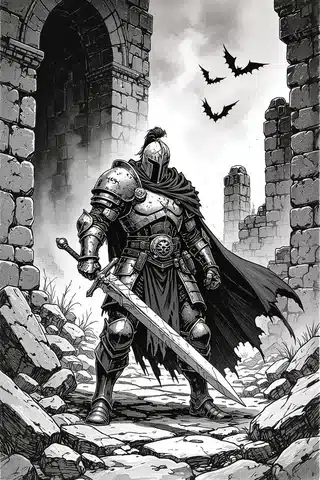
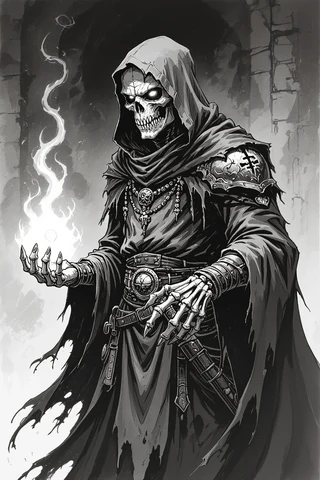
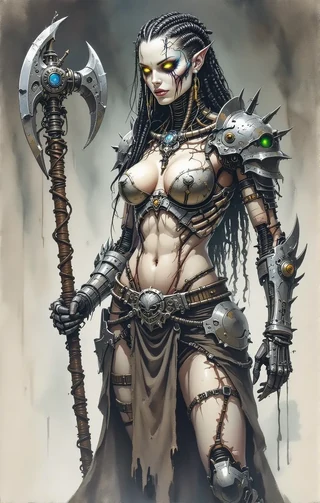
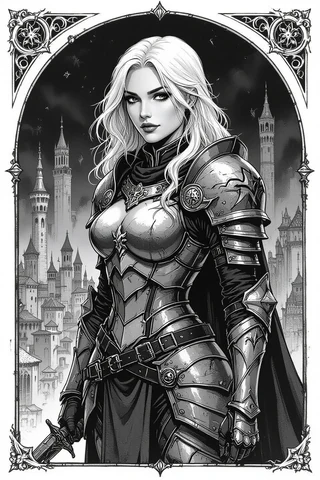
1. Noble: A regal nobleman in elaborate attire, stern expression, highly detailed face, dramatic lighting.
2. Tavern Keeper: A jovial tavern keeper with a big smile, wearing an apron, warm lighting.
3. Street Urchin: A scrappy street urchin with dirty clothes and a mischievous grin, bright colors.
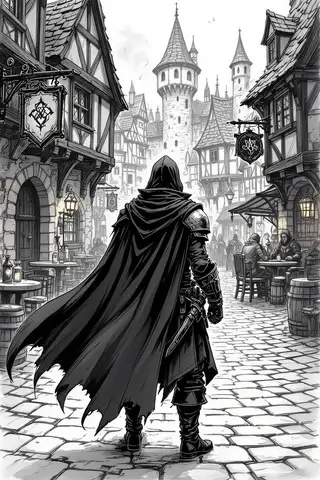
4. Elven Scout: An elven scout with keen eyes, dressed in camouflaged gear, forest background.
✨ Discover the Ultimate Tavern Bundle ✨
Stop prepping for hours. Get 350,000+ digital assets to create immersive campaigns instantly.
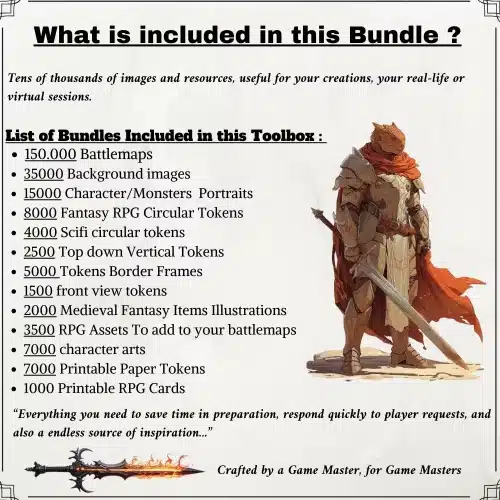
🎲 Get the Ultimate Toolbox Now
Instant Download • Lifetime Access
5. Cyberpunk Hacker: A cyberpunk hacker with neon tattoos and a focused expression, sitting in front of multiple screens.
Personality blurbs and expression cues
In addition to physical descriptions, including personality blurbs can add depth to your NPCs. Consider adding a few lines about their motivations or quirks. For instance, a noble might be proud and aloof, while a tavern keeper could be warm-hearted but shrewd.
These traits can help players connect with the characters on a deeper level and make interactions more engaging.
5. Fast in-session generation workflows (3–6 step procedures)
To ensure you can generate NPC portraits quickly during a session, establishing a streamlined workflow is key. Here’s a simple 3-6 step procedure you can follow:
1. Prepare your NPC prompt ahead of time.
2. Use your chosen AI tool to generate the portrait.
3. Make quick adjustments using an image editor if necessary.
4. Save the image in the appropriate format.
5. Import the image into your VTT platform.
This process can help you create NPC visuals in under two minutes, allowing for smooth gameplay.
Single NPC portrait in under 2 minutes
When time is of the essence, generating a single NPC portrait quickly is crucial. Having your prompts ready to go and using efficient tools can allow you to create a portrait in as little as 60 seconds.
For example, if you are using a cloud-based service, simply inputting your prompt and waiting for the AI to generate the image can provide you with a usable portrait in a fraction of the time.
Generating a printable handout quickly
Creating printable handouts can also be done efficiently. Once you have your NPC portrait, you can use an image editor to add text and additional details about the character.
Exporting this as a PDF with the correct DPI settings ensures that your handouts look professional and are ready for distribution to players.
6. VTT integration & token management
Integrating your NPC portraits and handouts into a Virtual Tabletop (VTT) can streamline your gaming sessions and enhance the experience for your players. When preparing your tokens, it’s essential to crop them to a square format, center the character’s head in the frame, and add a border for a polished look.
For example, you can use tools like Photopea or GIMP to crop your images to 512×512 pixels and apply a 64-pixel stroke border around the edges.
Cropping, auto-framing, token borders and export settings
To create visually appealing tokens, you’ll first want to crop your images to a square format. Utilizing tools like Photopea or GIMP, you can easily crop your images to ensure the character’s head occupies about 70% of the frame.
Adding a border can enhance the overall look of the token; a 64-pixel stroke works well for a 512×512 canvas. When exporting your tokens, always choose PNG format to maintain transparency.
Token size presets and transparent PNG advice
When creating tokens for your VTT, sticking to specific size presets can significantly improve your workflow. A standard size for tokens is 512×512 pixels, with a DPI (dots per inch) of 72.
This size keeps your files manageable, typically between 150 to 300 KB, which is ideal for quick uploads. Always ensure that your final token exports include an alpha channel for transparency.
7. Batch automation & presets (scripting and API examples)
Batch automation can save you a significant amount of time when generating NPC portraits and tokens. By employing tools like Make.com or Zapier, you can create a workflow that generates multiple variations of an NPC portrait with just a few clicks.
For example, you could set up a CSV file with prompts for each NPC and use a script that calls an API to generate images based on those prompts.
Example automation: generate 10 variations and export tokens
To create multiple variations of an NPC portrait, you can use a script to automate the process. For instance, imagine you want to generate ten variations of a tavern-keeper. Your pseudocode might look something like this:
for i in range(10):
prompt = f”Tavern-keeper, age 45, wearing an apron, {i} variations”
image = generate_image(prompt)
save_image(image, f”tavern_keeper_{i}.png”)
Using Zapier/Make, simple local scripts and VTT APIs
Integrating automation tools like Zapier or Make.com can significantly enhance your workflow for generating NPC portraits and tokens. For example, you can set up a Zap that triggers an API call whenever you add a new row to a Google Sheet containing your NPC prompts.
This allows for seamless generation without requiring manual intervention each time. Local scripts can also be employed for batch generation if you prefer to work offline.
8. Handouts: design templates and printable export steps
Creating handouts that are visually appealing and informative is essential for enhancing player engagement. Consider using design templates that incorporate both images and text in a clean, organized manner.
Once you have your designs ready, exporting them as PDFs with the appropriate bleed and margin settings ensures that they look professional when printed.
Three printable handout layout templates (title + blocks)
Here are three layout ideas for your handouts:
- **Layout 1**: Title at the top, NPC portrait on the left, description block on the right.
- **Layout 2**: Title centered at the top, portrait below, with a detailed description beneath.
- **Layout 3**: Title at the top, portrait to the side, with bullet points for key traits or abilities.
Exporting to PDF and bleed/margin considerations
When exporting your handouts to PDF, pay attention to bleed and margin settings to ensure that your designs are printed correctly. A standard recommendation is to set a 0.125-inch bleed to avoid any white edges on your printed material.
Also, ensure that your text is within the safe margin area to prevent it from being cut off during printing.
9. Speed vs quality: model settings, size, and trade-offs
In the world of generative AI, there is often a trade-off between speed and quality. While you may want to generate images quickly, it’s important to find a balance that suits your needs.
For instance, using lower settings may speed up generation time but could result in lower-quality images.
Recommended presets for fast generation vs high-res
Consider creating two sets of presets: one for quick generation and another for high-resolution images. For fast generation, you might use lower step counts and resolution settings, while for high-res outputs, you could increase both parameters significantly.
This way, you can adapt your approach based on the needs of your session.
Parallelization and GPU/local caching tips
To further enhance your workflow, consider parallelizing your image generation tasks. If you have access to multiple GPUs or a powerful local setup, you can generate several images simultaneously.
This can drastically reduce the time it takes to prepare assets for your session, allowing you to focus on gameplay instead.
10. Legal, ethics & licensing for generated art
As you integrate AI-generated art into your gaming sessions, it’s crucial to understand the legal and ethical considerations involved. Always check the licensing agreements for the models and APIs you use.
Some may have restrictions on commercial use or require attribution, so it’s important to adhere to these guidelines to ensure you are using the art legally and ethically.
Checking model & platform licenses
Before using any AI-generated images, take the time to review the licensing terms of the model or platform you’re utilizing. This can help you avoid any potential legal issues down the line.
For example, some platforms may allow images for personal use but restrict commercial applications, so it’s essential to understand the limitations.
Attribution, streaming, and commercial use rules
If you plan to use AI-generated art in streams or published adventures, be sure to comply with attribution requirements where applicable. This may involve crediting the model or platform used for the images.
Understanding these rules is not only a legal necessity but also an ethical consideration in ensuring that creators are recognized for their work.
11. Performance, caching & offline backup plans
To maintain a smooth workflow during your sessions, implementing performance and caching strategies is essential. Consider using local caching systems to store frequently used images and assets.
This can help minimize delays and ensure that you have quick access to the visuals you need, even if your internet connection is unstable.
Local caching and naming/version control
When you’re generating NPC portraits and assets in real-time, maintaining an organized system is crucial. I recommend setting up a local caching system to store your images efficiently. You can create a folder structure like `./Cache/[Archetype]/v1-v5.png`, where you save different versions of your assets.
Using descriptive names will help you locate the images quickly during gameplay.
3–5 step offline fallback workflow
Having a backup plan is essential, especially if you encounter internet issues during your session. Here’s a straightforward 3–5 step offline fallback workflow you can use to generate NPC portraits quickly:
- **Boot Automatic1111** (a local UI for Stable Diffusion) on your laptop.
- **Load your cached prompt** for the NPC you want to generate.
- **Set the generation parameters** to around 20 steps for a quick output (this balances speed and quality).
- **Save the image** to your `./OfflineNPCs/` folder.
- **Edit the image in GIMP** if needed, to polish it up before presenting it to your players.
12. Troubleshooting common problems
Even the best systems can run into hiccups, especially when generating AI NPC portraits in real time. Here’s a troubleshooting guide to handle some common problems you might encounter during your session:
- **Blurry faces**: If the portraits come out looking blurry, try increasing the steps in your generation settings or add “sharp focus” to your prompt.
- **Deformed hands or features**: To avoid awkwardly rendered body parts, utilize negative prompts like “deformed” or “extra limbs” to guide the AI away from these errors.
13. Mini case study: two-hour session using real-time AI visuals
In a recent two-hour hybrid D&D session, I had the opportunity to utilize real-time AI visuals to enhance the gameplay experience. The session included six players and featured dynamic NPC interactions. I prepped by caching archetypes for a tavern keeper, a street urchin, and an elven scout.
During the session, I generated around 12 images, including portraits and tokens, and created four handouts with minimal interruptions. The ability to create visuals in real-time not only kept the session flowing but also added a layer of immersion that my players appreciated.
14. Resources & complementary tools (required list)
Here’s a curated list of resources and tools that can enhance your experience with generative AI NPC portraits and handouts:
- Midjourney: A Discord-based image generation tool that produces quick, stylized outputs. Useful for generating unique tokens.
- Automatic1111: A user-friendly local UI for Stable Diffusion, allowing you to generate images offline with more control.
- Photopea: A browser-based image editor that allows for quick token edits without requiring installation.
- Game Master Toolbox (Etsy): A collection of assets and tokens that can complement your AI-generated images.
15. Quick best-practices and memorables for GMs
To maximize the effectiveness of your generative AI NPC portraits during sessions, here are some quick best practices to keep in mind:
- **Cache 20 common NPCs**: This saves time and keeps your session flowing smoothly.
- **Use negative prompts**: Adding “blurry” or “deformed” can help refine the quality of your outputs.
- **512px for speed**: Keeping your portraits at this resolution can help generate images quickly.
- **Name descriptively**: Clear filenames will help you locate your assets swiftly when the heat of the game is on.
- **Hotkey AI tools**: Set up hotkeys for your most-used commands to speed up the process during gameplay.
16. Ready-made prompts and presets (6+ copy-paste prompts)
If you’re looking to streamline your NPC generation process, here are some ready-made prompts to copy and paste directly into your generative AI tool:
- **Noble**: “A regal nobleman in elaborate attire, stern expression, highly detailed face, dramatic lighting.”
- **Tavern Keeper**: “A jovial tavern keeper with a big smile, wearing an apron, warm lighting.”
- **Street Urchin**: “A scrappy street urchin with dirty clothes and a mischievous grin, bright colors.”
- **Elven Scout**: “An elven scout with keen eyes, dressed in camouflaged gear, forest background.”
- **Cyberpunk Hacker**: “A cyberpunk hacker with neon tattoos and a focused expression, sitting in front of multiple screens.”
17. File-size, DPI & export metrics for screen and print
Understanding file size and DPI is crucial for ensuring your images are suitable for both screen and print. For VTT tokens, a size of 512×512 pixels at 72 DPI is recommended, while handouts should be exported at 300 DPI.
This ensures that your visuals maintain quality across different formats, whether displayed on a screen or printed out for players.
18. Featured automation snippet (pseudocode) for batch generation
To create multiple variations of an NPC portrait, you can use a script to automate the process. For instance, imagine you want to generate ten variations of a tavern-keeper.
Your pseudocode might look something like this:
for i in range(10):
     prompt = f"Tavern-keeper, age 45, wearing an apron, {i} variations"
     image = generate_image(prompt)
     save_image(image, f"tavern_keeper_{i}.png")
Fox’s take
By following these guidelines, you can efficiently use generative AI to create stunning NPC portraits and handouts that enhance your tabletop gaming experience. Whether you’re a beginner or a seasoned GM, these tools and practices will help you create a visually engaging atmosphere for your players.

FAQ
- How fast can I generate a usable NPC portrait with generative AI during a session?
You can generate a usable NPC portrait in as little as 60 seconds. - What image size and file type should I use for VTT tokens and printable handouts?
Use PNG files sized at 512×512 pixels for VTT tokens and 300 DPI for handouts. - Are AI-generated portraits safe to use on streams or in published adventures?
Yes, as long as you adhere to the licensing agreements of the tools used. - How do I batch-create tokens and handouts for a session in under 10 minutes?
Prepare a CSV file with NPC prompts and use automation tools for quick generation. - What are the simplest offline fallbacks if my internet or API fails during play?
Use a local AI model like Automatic1111 with cached prompts for quick outputs.
Continue reading
- How to use DnD Beyond?
Learn how to use D&D Beyond: step-by-step character builds, campaign management, and VTT integrations like Beyond20 in one practical guide. - How to play DnD in Solo
How to play DnD solo: practical steps, tools, and templates for engaging solo campaigns.