
Running a tabletop RPG session with minimal preparation can seem daunting, but with the right mindset and digital tools, it becomes an achievable goal. The Lazy DM’s approach focuses on utilizing resources efficiently to create an engaging experience for players without the need for extensive planning. This article will guide you through the necessary tools and techniques to embrace this approach.
What you’ll learn in this article
- 🎲 Discover how to use the lazy DM digital toolkit to streamline your tabletop RPG sessions.
- ✅ Learn how to play DnD online with zero prep time using effective strategies.
- 🔎 Explore quick VTT macros to automate gameplay and enhance player experience.
- 🧙♂️ Generate instant NPCs and plot hooks with AI tools for seamless storytelling.
- 🎶 Utilize soundboard RPG techniques to create immersive atmospheres during sessions.
- 🗺️ Find the best battlemap asset packs for immediate access to high-quality visuals.
- 🔄 Master improv encounter design to adapt on the fly to player choices.
- ⚙️ Implement GM automation tools to manage combat and bookkeeping efficiently.
- 📝 Access a one-page session engine template for quick adventure setups.
The Lazy DM Mindset: Goals, Limits, and Rules of Thumb
As a Lazy DM, embracing a zero-prep approach means being ready to run engaging sessions without extensive preparation. Zero-prep doesn’t mean you throw caution to the wind; it’s about having session-ready assets, templates, and AI tools to streamline the process. Think of it as having a toolbox filled with quick solutions rather than a blank slate. This mindset allows you to focus on storytelling and player engagement rather than getting bogged down by intricate planning.
When you adopt this mindset, it’s crucial to set realistic expectations. Not every session will be a cinematic masterpiece, and that’s perfectly okay. Instead, prioritize scenes that require more detail, like boss encounters or pivotal story moments, while letting your digital tools fill in the gaps for the rest. For instance, you might start a session with a strong hook—a rumor in town about a hidden treasure. This sets the stage for improvisation and gives you time to prepare for the more complex scenes that follow.
1.1 What zero-prep really means
Zero-prep is about being “session-ready,” which means having everything you need to run a game at your fingertips. This includes pre-made assets, templates, and utilizing AI tools to create content on the fly. It’s not about showing up with no thought; rather, it’s about minimal pre-session checks that ensure you’re set to go. Before you start, you might check party levels, ensure your Virtual Tabletop (VTT) is ready, and load a playlist for ambiance.
Here’s a quick checklist to ensure you’re ready for zero-prep gaming:
- Confirm the party level and any player absences.
- Ensure your VTT is set up with the necessary maps and tokens.
- Load your chosen playlist for atmosphere.
- Select a one-page engine (like a 30-minute dungeon loop) to guide your session.
- Activate any safety tools, such as the digital X-Card, to maintain an inclusive environment.
1.2 Rules of thumb for 10–60 minute segments
When running zero-prep sessions, time management is critical. Having a clear understanding of how long different segments will take helps you maintain pacing and keeps the game flowing smoothly. For instance, a combat encounter might fit into a 20-minute flash scene, while a more elaborate dungeon crawl could take up to 60 minutes. Here are some rules of thumb to guide you:
– **20-minute flash scene**: This is perfect for a quick combat or social interaction. Aim for 2-3 key moments that escalate tension, such as a surprise attack or a sudden twist in negotiations.
– **30-minute dungeon loop**: This structure includes an entrance, a skill check or roleplay segment, a combat scenario, and a twist or puzzle to keep players engaged.
– **60-minute session arc**: Combine multiple shorter segments into a cohesive story. You can have several beats where players can explore, engage in combat, and uncover plot twists.
1.3 Minimal prep vs. improvisation: when to swap
Knowing when to lean into minimal prep versus improvisation is essential for a Lazy DM. If a scene significantly impacts the plot or character backstories, it’s worth taking a moment to gather your thoughts and prepare. However, if you find yourself in a filler scene or a moment that can be resolved with some quick improvisation, feel free to wing it.
For example, if a player’s character has a backstory involving a rival, you might want to take a moment to craft that rival’s stats and motivations. On the other hand, if players engage in a side quest to gather herbs, you can improvise the details and let the players explore without extensive preparation.
Core Digital Tools Every Lazy DM Needs
As a Lazy DM, having the right digital tools is essential to streamline your game sessions. The core pillars of your toolkit should include Virtual Tabletop (VTT) platforms, AI copilots, asset libraries, and soundboards. Each of these tools serves a unique purpose, allowing you to create a rich gameplay experience with minimal effort.
When choosing a VTT, consider options like Roll20, Foundry, or Owlbear Rodeo. Each has its strengths: Roll20 is user-friendly and free, Foundry offers powerful automation with a one-time purchase, and Owlbear Rodeo is great for quick setups without an account. Regardless of your choice, make sure you can quickly load maps, import tokens, and share links with your players to jump right into the action.
2.1 Virtual Tabletop platforms (quick setup options)
Virtual Tabletops (VTTs) are essential for running games online and can drastically reduce prep time. Roll20, Foundry, and Owlbear Rodeo are popular choices, each with unique features. Roll20 is known for its user-friendly interface and free tier, making it accessible for new DMs. Foundry is a powerful option for those willing to invest in a one-time purchase and dive into modular setups. Owlbear Rodeo is ideal for quick setups, requiring no account and allowing you to get started with just a link.
When setting up your VTT, you can follow these quick steps:
- Choose your platform and create a game.
- Upload your map and set it to the appropriate grid size.
- Import your tokens and arrange them on the map.
- Share the game link with your players.
- Begin the session with a brief introduction.
2.2 AI copilots and text generators
AI tools can be a game-changer for Lazy DMs, providing assistance in generating content quickly and efficiently. Tools like ChatGPT or Claude can help you create NPCs, plot twists, and environmental descriptions on the fly. To use an AI effectively, structure your prompts to include the context, desired outputs, and any specific details you want included.
For example, you can use the following prompt to generate an NPC: “Create a quirky merchant who sells magical trinkets. Include their name, three personality traits, and a secret they are hiding.”
Here’s a quick guide to using AI as a copilot:
- Identify the aspect of your game that needs content (NPC, plot twist, etc.).
- Structure your prompt with clear instructions.
- Generate the content and review it for consistency.
- Integrate the AI-generated material into your session.
- Use the AI as a backup resource throughout your game for additional ideas.
2.3 Map & asset libraries (fast access)
Having a well-organized asset library can save you significant prep time during your sessions. Websites like Etsy offer a variety of map and token packs that cater to different genres, including fantasy, sci-fi, and post-apocalyptic themes. By investing in these asset packs, you can quickly access high-quality visuals that enhance your gaming experience.
To maximize your asset library’s efficiency, consider these steps:
- Organize your digital assets by genre and use (e.g., battlemaps, tokens).
- Use clear naming conventions for easy searchability (e.g., “Fantasy_Town_Map_Grid_70ppi.png”).
- Import assets into your VTT as needed, ensuring they are scaled correctly for gameplay.
- Create a folder structure that allows for quick drag-and-drop access during sessions.
- Regularly update your library with new assets to keep your options fresh.
2.4 Soundboards & music tools
Sound can dramatically enhance the atmosphere of your gaming sessions, and using soundboards or music tools can help create an immersive experience. Tools like Syrinscape and Tabletop Audio allow you to set the mood with ambient sounds, combat effects, and thematic music. Hotkey setups can streamline the process, enabling you to trigger sounds with a single keystroke.
Here’s how to integrate sound into your session:
- Choose a soundboard or music tool that suits your needs.
- Create playlists for different scenarios (e.g., ambient music for exploration, tension for combat).
- Set up hotkeys for quick access to key sound effects (like tension cues or victory music).
- Test your sound setup before the session to ensure everything works smoothly.
- Use sound to enhance key moments, like triggering a suspenseful track during a critical encounter.
One-Page Session Engines: 3 Ready-to-Use Blueprints
One-page session engines are invaluable for Lazy DMs, providing quick templates to structure your sessions. These blueprints allow you to run engaging scenes with minimal prep, ensuring that you can keep the game flowing smoothly. The three main types of engines are the 20-minute Flash Scene, the 30-minute Dungeon Loop, and the 60-minute Session Arc.
The **20-minute Flash Scene** is perfect for quick engagements, whether a combat scenario or social interaction. It typically consists of a hook, escalation, climax, and resolution. For example, you might start with a rumor that leads to a sudden ambush, escalating to a fierce battle, and resolving with the players uncovering valuable information.
3.1 20-minute Flash Scene (combat or social)
The 20-minute Flash Scene is designed for quick, high-stakes encounters that can be resolved in a short timeframe. This structure consists of a hook, escalation, climax, and resolution, allowing you to create engaging scenes without extensive preparation.
Here’s how to structure a 20-minute Flash Scene:
- Hook: Present a compelling reason for the players to engage (e.g., a mysterious figure offers a quest).
- Escalation: Introduce complications or challenges that heighten tension (e.g., the figure is being pursued by guards).
- Climax: Lead to the peak of the action, such as a confrontation or major decision point (e.g., players must choose to help or flee).
- Resolution: Wrap up the scene with consequences or rewards based on player actions (e.g., gaining favor with a powerful ally).
- SFX: Consider integrating sound effects to enhance the atmosphere during critical moments.
3.2 30-minute Dungeon Loop
The 30-minute Dungeon Loop is a structured approach to running a mini-adventure within a dungeon setting. This blueprint allows you to combine exploration, combat, and problem-solving, keeping players engaged while maintaining a brisk pace.
To execute a 30-minute Dungeon Loop effectively:
- Entrance: Begin with a brief description of the dungeon entrance and any initial challenges (e.g., a locked door or puzzle).
- Skill/RP Beat: Encourage players to engage with their environment through skill checks or roleplay (e.g., gathering information from a local NPC).
- Combat Encounter: Introduce a combat scenario that challenges the players (e.g., a group of goblins guarding treasure).
- Twist/Puzzle: Add a surprising element, like a hidden passage or a magical trap that requires problem-solving (e.g., a riddle to unlock a treasure).
- Exit Hook: Conclude with an enticing lead into the next adventure segment (e.g., a map leading to a greater treasure).
3.3 60-minute Session Arc (modular segments)
The 60-minute Session Arc is designed to interweave multiple shorter segments into a cohesive narrative. This approach allows you to create a satisfying hour-long session that feels complete while offering flexibility for player choices and unexpected developments.
To structure a 60-minute Session Arc:
- Modular Segments: Combine three to five shorter segments (like the 20-minute Flash Scenes) that can stand alone or connect to a larger story.
- Running Hook: Create a central narrative thread that ties the segments together (e.g., an artifact that players must retrieve).
- Interlude Beats: Include optional downtime or roleplay moments between segments to let players develop their characters and discuss strategies.
- Escalating Stakes: Gradually increase the tension or complexity of challenges as players progress through the segments (e.g., introducing a rival faction).
- Cliffhanger: End with a suspenseful moment that sets the stage for the next session (e.g., the players are ambushed just as they retrieve the artifact).
On-the-Fly Encounter Design
Designing encounters on the fly is a key skill for any Lazy DM. It allows you to adapt to player choices and maintain the momentum of your game without getting bogged down in preparation. With a few simple steps, you can create balanced and engaging encounters that fit seamlessly into your session.
To design an encounter quickly, follow these steps:
- Pick a Map: Choose an appropriate map for the encounter, whether it’s a pre-made battleground or a quick sketch based on the current setting.
- Choose Foes: Select enemies based on the party’s level and the desired challenge. Use a quick resource like Kobold Fight Club to gauge enemy difficulty.
- Add a Twist: Include an unexpected element to keep players on their toes, such as environmental hazards or reinforcements arriving mid-fight.
- Place Tokens: Position your tokens on the map, ensuring they are visible and appropriately scaled.
- Start the Encounter: Begin the encounter, keeping track of initiative and player actions.
4.1 Rapid encounter composition (3–6 step procedure)
Creating encounters on the fly can be simplified into a rapid composition process. This allows you to quickly assemble engaging scenarios that fit seamlessly into your game. Here are the steps to follow:
- Select a Map: Choose a map that fits the current narrative context and enhances the encounter.
- Determine Foes: Select a group of enemies that match the party’s level and desired challenge rating.
- Incorporate a Twist: Add an unexpected element, such as a collapsing structure or an environmental hazard, to increase tension.
- Place Tokens: Position your tokens on the map, ensuring clarity for players.
- Review CR: Check the Challenge Rating (CR) to ensure it’s balanced for your party size; adjust as needed by adding or removing foes.
4.2 Balancing on the fly: a quick math trick
Balancing encounters can be daunting, but it doesn’t have to be complicated. By using a simple math trick, you can quickly assess if your encounter is appropriately challenging for your players. Here’s how to do it:
1. **Calculate the Target XP:** Use the total XP threshold for the party level and multiply it by 1.2 for a balanced encounter.
2. **Enemy Count:** Use the formula: enemy count ≈ party level × 1.2, adjusting based on player resources (like healing potions or strong abilities).
3. **Adjust as Necessary:** If the encounter feels too easy or hard, you can add minions, reduce enemy HP, or call for reinforcements on the fly.
4. **Monitor Players:** Keep an eye on how quickly players are dispatching foes; if they’re breezing through, consider introducing additional challenges.
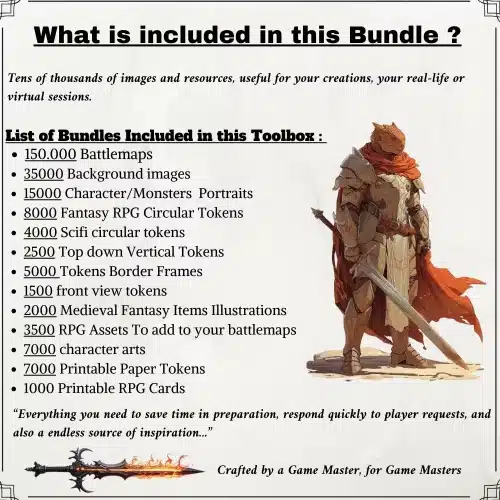
✨ Discover the Ultimate Tavern Bundle ✨
Stop prepping for hours. Get 350,000+ digital assets to create immersive campaigns instantly.
🎲 Get the Ultimate Toolbox Now
Instant Download • Lifetime Access
5. **Use Feedback:** After the encounter, ask players how they felt about the difficulty to gauge future balancing.
4.3 Example: turn a market argument into a chase
Transforming an everyday scene, like a market argument, into an exciting chase can quickly elevate the tension and engagement of your session. Here’s a step-by-step approach to creating this transformation:
- Create NPCs: Introduce key NPCs involved in the argument, each with distinct motives and personalities.
- Escalate the Conflict: As the argument heats up, introduce a complication, like one NPC throwing an object that triggers a reaction from the crowd.
- Shift to a Chase: Once the argument escalates, pivot to a chase scene where players must navigate through the bustling market to catch the fleeing NPC.
- Set the Scene: Use your map to illustrate the chase, placing obstacles and potential shortcuts for players to consider.
- Include SFX: Enhance the atmosphere with sound effects, like the commotion of the market and the sound of footsteps echoing as players pursue their target.
Instant NPCs and Voices
Creating interesting NPCs (non-player characters) on the fly is crucial for maintaining the pace of your game. With a few techniques, you can generate compelling characters quickly, enhancing the depth of your storytelling without lengthy preparation.
One effective method is to use AI prompt templates to generate NPCs. For example, you might use a prompt that specifies the NPC’s role, personality traits, and a secret they’re hiding. This can help create a character that feels fleshed out even if you only have a moment to prepare.
5.1 AI prompt templates for NPCs
Using AI to generate NPCs can save you precious time during your sessions. Here are three tailored prompts designed for different NPC roles, allowing you to create varied personalities quickly:
- Ally/Quest-Giver: “Create a helpful ally named [Name]. They have three traits: [Trait 1], [Trait 2], and [Trait 3]. Their secret is [Secret]. Include dialogue hooks for players.”
- Antagonist with Secret: “Design an antagonist named [Name] who is secretly [Secret]. They exhibit traits like [Trait 1], [Trait 2], and [Trait 3]. What do they want from the players?”
- Rumor-Monger: “Generate a rumor-monger named [Name] with traits [Trait 1], [Trait 2], and [Trait 3]. What type of rumors do they share, and how do they interact with players?”
5.2 Three-line portrait method (stats, quirk, goal)
The three-line portrait method is an excellent way to quickly summarize your NPCs, making it easier to remember key details during gameplay. Each NPC can be distilled into three lines that cover their stats, a unique quirk, and their main goal. This method allows you to create characters that feel alive and engaging, even if you only have a moment to prepare.
To create a three-line portrait for your NPC:
- Stats: Briefly outline the NPC’s relevant stats, such as their level, class, and abilities.
- Quirk: Identify a unique quirk that makes the NPC memorable (e.g., a nervous laugh or a tendency to fidget).
- Goal: Define their primary goal or motivation, which drives their interactions with players (e.g., seeking revenge or looking for lost treasure).
5.3 VTT macros for NPC reveals and secrets
Using VTT (Virtual Tabletop) macros can streamline the process of revealing NPCs and their secrets during gameplay. This automation allows you to enhance the dramatic impact of your storytelling without needing to memorize every detail.
To set up effective macros for NPC reveals:
- Create a Reveal Macro: Program a macro that reveals an NPC token on the VTT and plays an accompanying sound effect (like a dramatic chord).
- Apply Conditions: Set up macros that apply specific conditions to NPCs when they are revealed (e.g., making them hostile or friendly).
- Whisper to GM: Include a function that allows you to send secret messages to yourself, detailing the NPC’s hidden motives or secrets.
- Swap Portraits: Create macros that can change the NPC’s portrait image when they reveal a secret or when their demeanor changes.
- Test Your Macros: Before the session, ensure your macros function as intended to avoid hiccups during gameplay.
Maps, Tokens, and Visuals — Zero Prep Techniques
Integrating maps, tokens, and visuals effectively into your sessions can significantly enhance the overall experience for your players. By utilizing premade battlemaps and efficient token management techniques, you can create engaging scenarios with minimal prep time.
One effective approach is to use premade battlemaps and tilesets. Websites like Etsy offer a wide variety of options, allowing you to quickly access high-quality visuals. By organizing your maps and tokens in a way that makes them easily accessible, you can set up your encounters in a matter of minutes.
6.1 Using premade battlemaps and tilesets (fast file workflows)
Using premade battlemaps and tilesets is a fantastic way to enhance your sessions quickly. The key to success lies in efficient workflows that allow you to import and manipulate these assets easily during play.
Here’s a step-by-step guide to ensure a smooth import process:
- Download High-Quality Maps: Choose battlemaps from reputable sources, ensuring they are high-resolution and compatible with your VTT.
- Standardize Scaling: Pre-scale your maps to common grid sizes (70-100 ppi) to avoid resizing issues during play.
- Organize Your Files: Create a folder structure that categorizes maps by theme and intended use, making it easier to find what you need.
- Import the Map: Drag the map file into your VTT and check for correct scaling and alignment.
- Add Fog of War: Use the fog of war feature to conceal unexplored areas, gradually revealing them as players progress.
6.2 Token management and quick reskinning macros
Efficient token management is crucial for maintaining the pace of your game. Using quick reskinning macros can help you adapt tokens on the fly, allowing for a dynamic experience that keeps players engaged.
To streamline your token management process:
- Organize Token Packs: Keep your tokens sorted by type (e.g., creatures, NPCs, vehicles) for easy access.
- Batch Reskinning: Create macros that allow you to change the appearance of multiple tokens at once, such as changing colors or adding borders.
- Use Generic Silhouettes: Have a fallback set of generic silhouettes for immediate play if specific artwork is unavailable.
- Apply Size Scaling: Ensure that your tokens are appropriately scaled for the VTT grid, adjusting as necessary.
- Integrate with Combat: Use your reskinning macros to change token appearances based on in-game events (e.g., a character transforming).
6.3 Example: building a battle space in 60 seconds
Building a battle space quickly can be a game-changer for keeping your session flowing smoothly. With a streamlined process, you can set up an engaging combat environment in just 60 seconds.
Follow these steps to create a battle space:
- Import the Map: Drag and drop your chosen battleground map into your VTT.
- Scale the Map: Ensure the map is set to the correct grid size for your players.
- Place Tokens: Quickly arrange your enemy and player tokens on the map.
- Add Environmental Elements: Include obstacles or hazards that can affect the battle, such as walls or pits.
- Prepare for Combat: Make any necessary adjustments, such as setting up fog of war, and you’re ready to start.
Sound & Atmosphere: Fast SFX and Music Cues
Incorporating sound and atmosphere into your sessions can dramatically enhance the gaming experience, even with minimal prep time. By utilizing soundboards and pre-made playlists, you can set the mood for various scenes without missing a beat. Start by selecting a tool like Syrinscape or Tabletop Audio, which allows for quick access to sound effects (SFX) and background music. These platforms often feature categorized sounds for different environments, such as battle music, ambient nature sounds, or tense combat cues.
To ensure a smooth experience, create a few essential playlists based on common scenarios: an ambient playlist for exploration, a combat playlist for battles, and a tension playlist for when players are investigating or facing uncertainty. For example, your ambient playlist might include soft forest sounds, while your combat playlist could ramp up with battle drums. Set hotkeys for each playlist to allow for quick transitions during gameplay.
7.1 Quick soundboards and triggers for mood
Using quick soundboards and triggers can greatly enhance the atmosphere of your sessions. The key is to create a disciplined approach to when and how to trigger sounds so that they complement the gameplay without overwhelming it. For instance, assign specific hotkeys to different sound effects based on in-game events. You might set a hotkey to play a suspenseful sound when players enter a dark room or trigger an explosion sound when a character casts a fireball.
To avoid audio overload, establish a simple rule-set for sound usage: use one-shot sounds for impactful moments (like a character hitting an enemy), and loop ambient sounds for background effects (like wind or distant thunder). This balance ensures that your players remain engaged without distraction.
7.2 Three essential playlists and how to use them
Creating three essential playlists can simplify your sound management during sessions. These playlists should cover the main moods you’ll encounter: Ambient, Combat, and Tension. Your Ambient playlist can include sounds like nature, city life, or soft music, suitable for exploration scenes. The Combat playlist should feature high-energy tracks that match the intensity of battles, while the Tension playlist can provide suspenseful music or sound effects to heighten the drama during critical moments.
To make these playlists effective, define their length and looping behavior. For instance, your Ambient playlist might be set to play continuously, while the Combat playlist should have tracks that can easily transition into one another to maintain momentum during battles. Additionally, establish trigger moments for switching playlists, like moving from an exploration scene to combat.
7.3 Macro examples for automatic SFX on combat events
Implementing macros for automatic sound effects can streamline your gameplay significantly. By setting up trigger actions for specific combat events, you can enhance the atmosphere without needing to manually play sounds during the heat of battle. For example, you might create a macro that automatically plays a “tension” sound when initiative is rolled and then switches to a “clang” sound when a character hits an enemy.
To create these macros, you can use your VTT’s built-in macro system. Set one macro to trigger sound effects for initiative rolls, another for successful hits, and a third for character deaths. This automation allows you to focus on storytelling and player engagement instead of managing sound cues during combat.
Automation & Macros (VTT and Local)
Automation and macros are essential tools for any lazy DM looking to streamline their game sessions. By using macros, you can automate repetitive tasks, such as rolling initiative, tracking hit points, and applying conditions. This not only saves time but also keeps the focus on the narrative rather than bookkeeping. For instance, in Roll20, you can set up a macro that rolls initiative for all monsters at once, reducing the time spent on this task during combat.
In addition to initiative management, you can create macros for common actions like damage rolls or status effects. For example, you could create a macro that automatically rolls damage and adjusts the hit points of a target token based on the roll. This automation can significantly reduce the time it takes to resolve actions during encounters, allowing you to keep the game flowing smoothly.
8.1 Automated initiative, HP, and condition handling
Automating initiative, hit points (HP), and condition handling can take a lot of stress off your shoulders as a DM. In platforms like Foundry and Roll20, you can set up automated systems to roll initiative for all characters and monsters, allowing you to focus on the narrative instead of managing turn order. For example, in Roll20, you can create a macro that rolls initiative for all monsters at once and sorts them into the correct order.
In addition to initiative, you can automate HP tracking and condition application. For instance, you can set up macros that automatically apply damage to characters or monsters when they are hit, saving you from manual calculations. This can be particularly helpful during complex battles with multiple characters involved.
8.2 Simple macros for recurring moves and skill checks
Creating simple macros for recurring moves and skill checks can streamline your gameplay, especially in a zero-prep environment. By setting up these macros, you can quickly execute common actions without needing to roll dice manually every time. For example, you can create a macro for a character’s standard attack that automatically rolls the necessary dice and applies any modifiers.
Additionally, you can set up macros for skill checks, such as perception or stealth, allowing players to call on them easily when needed. This way, you can keep the game moving quickly, without getting bogged down by repetitive rolls.
8.3 Example automated combat sequence (4 steps)
An automated combat sequence can greatly enhance the efficiency of your sessions. Here’s a simple four-step process you can follow to set up an automated combat flow. First, select your enemies and place them on the battle map. Next, roll initiative for all characters and monsters using your automated macro.
Once the initiative is sorted, apply any statuses that need to be tracked, such as conditions or buffs. For the final step, trigger your sound effects and background music to set the atmosphere for the battle. This streamlined process not only saves time but also allows you to focus more on storytelling and player engagement during combat.
Loot, Rewards, and Downtime — Fast Generation
Generating loot and rewards quickly can enhance player engagement and keep your sessions rolling smoothly. One effective way to create loot is to use quick loot tables that are themed based on the encounter or setting. For instance, if your players have just defeated a band of goblins, you could have a loot table that includes items like gold coins, crude weapons, and minor magical trinkets. This allows you to provide relevant rewards without extensive preparation.
Additionally, consider using AI prompts to generate magical item descriptions or unique loot with hooks. This can add flavor to the items and create opportunities for future adventures. For example, a magical sword might have a backstory that ties into the campaign, encouraging players to pursue its history.
9.1 Quick loot tables with thematic weights
Creating quick loot tables with thematic weights can significantly speed up your reward generation process. Start by categorizing loot into different rarity levels: common (like gold or simple items), uncommon (such as unique weapons or potions), and rare (powerful artifacts). For example, a level 3 encounter in a forest might yield a table like this:
| Rarity | Item | Weight |
|---|---|---|
| Common | 50 gold coins | 50% |
| Uncommon | Healing Potion | 30% |
| Rare | Enchanted Bow | 20% |
When players defeat enemies, you can roll on this table to determine what loot they find, ensuring that the rewards feel appropriate for the encounter’s challenge. This method keeps the rewards exciting and varied, enhancing the players’ sense of accomplishment.
9.2 Instantly generating magical item descriptions
Generating magical item descriptions instantly can add depth and intrigue to your game. To do this, use an AI prompt that yields not just the item’s physical properties but also its lore and potential hooks. For instance, you might use a prompt like: “Generate a description for a magical sword that grants its wielder the ability to speak to animals.”
The output might include details about the sword’s appearance, its history, and a drawback, such as a curse that compels the wielder to always help animals in need. This approach allows you to create rich, engaging items on the fly, keeping your players invested in their rewards.
9.3 Using asset packs to illustrate rewards
Using asset packs to visually represent loot and rewards can greatly enhance player engagement. When players discover a magical item or treasure, having a visual representation can make the moment more tangible. Start by selecting an appropriate asset from your library that matches the item description. For instance, if players find a magical amulet, use a transparent PNG of the amulet to display in your VTT’s journal or on the map.
Once you have the image, upload it to your VTT’s journal and create a macro that reveals it when players find the item. This can be as simple as a command that shows the image and plays a sound effect to enhance the moment.
Player-Facing Tech: Engagement without Prep
Engaging players without extensive prep work can be achieved through various player-facing technologies. Tools like shared documents, voting mechanics, and co-GM techniques can empower players to contribute to the narrative while reducing the DM’s workload. For example, consider using Google Docs or a similar platform to allow players to keep notes and track their characters’ development collaboratively.
In-game voting systems can also enhance engagement. You can set up polls for players to decide on the next course of action, like which path to take or which NPC to trust. This not only gives players agency but also helps you gauge their interests and tailor the storyline accordingly.
10.1 One-line session hooks to hand players
One-line session hooks are a simple yet effective way to spark player interest and drive the narrative forward. These hooks should be concise and connected to the current location, an inciting incident, or a character’s backstory. For example, you might say, “You overhear rumors of a mysterious stranger in town who knows secrets about your past.” This kind of prompt encourages players to engage with the story and take action.
To facilitate this, prepare a list of 12 one-line hooks across genres that you can easily reference during gameplay. Not only does this save time, but it also provides you with ready-to-use material that can enhance your sessions.
10.2 Shared documents, vote mechanics, and on-the-fly choices
Utilizing shared documents and vote mechanics can significantly enhance player engagement. Platforms like Google Forms or Miro can be used for quick polls, allowing players to make decisions about the game in real-time. For instance, you could set up a poll asking players to choose between two different quests or routes to take, giving them a sense of agency in the story.
Incorporating these tools into your sessions also encourages collaboration and discussion among players. Shared documents can serve as a repository for notes, character backstories, and session summaries, allowing everyone to stay informed and involved.
10.3 Letting players drive details: co-GM techniques
Co-GM techniques can be a valuable approach to reducing the burden on yourself while still enriching the narrative. One effective method is to hand off certain aspects of NPC creation or world-building to your players. For example, you might ask a player to name a rival character and describe their worst trait, which can help build tension and depth in the story.
It’s essential to provide guidelines for players to ensure their contributions align with the game’s tone and safety. For instance, you can frame prompts like, “What’s one secret your character would keep from the others?” This not only fosters player creativity but also enriches the story without requiring extensive prep from you.
Safety, Flow, and Time Management
Managing safety and flow during your sessions is crucial for maintaining a positive gaming environment. Using tools like the digital X-Card can help ensure that all players feel comfortable expressing their boundaries. A simple phrase can be used to check in with players before or during the session, such as, “If anyone needs a break or feels uncomfortable, please let me know.” This creates a supportive atmosphere where everyone feels safe to participate.
In terms of pacing, consider using timers to keep segments of your game on track. Establish a three-tier time management plan that includes soft warnings, hard warnings, and a timeout for sessions that may be dragging. This will help you manage the table’s time effectively while ensuring that the game remains engaging.
11.1 Quick safety-check phrasing and signals
Implementing quick safety-check phrasing can help create a supportive environment for your players. Before starting a session, you might say, “If at any point you need to pause or change the topic, just raise your hand or use the X-Card.” This establishes a clear signal for players to communicate their needs without feeling awkward.
During the game, if a sensitive topic arises, remind players of the safety signals. A simple phrase like, “Let’s take a moment to check in—does anyone need a break or want to adjust anything?” can go a long way in maintaining comfort at the table.
11.2 Managing table time and pacing with timers
Using timers effectively can help you manage pacing during your sessions. Start by selecting a reliable timer app that allows you to set countdowns for different segments of gameplay. Implement a three-tier time management plan: soft warning (a gentle reminder that time is running out), hard warning (a more direct prompt that time is nearly up), and timeout (a signal that it’s time to wrap up a segment).
When introducing this system to your players, explain how it works and emphasize that it’s designed to keep the game moving smoothly. This will help set expectations and ensure that everyone is on board with the pacing.
11.3 Handling rules disputes in 3 steps
Managing rules disputes effectively is key to maintaining flow during your sessions. When a disagreement arises, follow a simple three-step procedure: (1) provide an immediate outcome that feels fun and fair, (2) record the dispute for later review, and (3) promise to follow up and revert if needed. This approach allows you to keep the game moving while ensuring that players feel heard and respected.
For example, if a player questions the effectiveness of a spell, you might say, “Let’s go with your interpretation for now, but I’ll check the rules after the session.” This method not only resolves the immediate issue but also opens the door for productive discussions later.
Post-Session Workflows & Recap Automation
Creating efficient post-session workflows can help you maintain continuity and organization between your games. One effective strategy is to use AI tools to auto-generate session recaps and experience points (XP) notes. For instance, after a session ends, you can run a simple AI prompt that summarizes the key events and decisions made during the game. This recap can then be shared with players to remind them of what transpired and keep everyone engaged with the story.
Additionally, consider developing a system for storing and indexing your assets for reuse. By tagging items by theme, grid size, and intended use, you can quickly locate the materials you need for future sessions. This organization will save you time in the long run and allow you to focus more on storytelling.
12.1 Auto-generating session recaps and experience
Auto-generating session recaps can greatly enhance your post-game workflows. To do this, use a simple AI prompt that summarizes the key events of your session, such as, “Summarize the main events from our last session, including character actions and important decisions.” This will provide you with a concise recap that you can share with players, reminding them of what they accomplished and where the story is headed.
Additionally, consider implementing a mini-template for calculating XP based on the challenges faced during the session. You might create a simple format where players receive XP based on the difficulty of encounters and their contributions to the story. This can help keep everyone motivated and engaged.
12.2 Storing assets and indexing for reuse
Organizing your assets effectively can save you time and frustration in future sessions. Start by creating a structured folder system where you categorize your maps, tokens, and sound effects. Use clear naming conventions that include the asset type and theme—for instance, “forest_battlemap_70ppi.png” or “goblin_token_transparent.png.”
In addition to naming, develop a tagging system that allows you to quickly search for assets based on criteria like genre, mood, or grid size. This way, you can find what you need in seconds rather than sifting through unorganized files.
12.3 Example Zapier/IFTTT automation ideas
Using automation tools like Zapier or IFTTT can streamline your post-session processes and enhance your overall efficiency as a DM. One effective automation idea is to set up a workflow that automatically generates a recap from your VTT chat logs. This could involve creating a Zap that takes chat messages from your VTT and compiles them into a Google Doc or Notion page for easy access.
Another useful automation is to save used assets at the end of each session. You can create a Zap that takes the assets you used during gameplay and moves them to a “used” folder, tagging them in a spreadsheet for future reference. This ensures that you have a record of what you’ve used, making it easier to track which assets need to be replaced or updated.
Templates, Prompts, and Macros (Copy-Paste Ready)
Having templates, prompts, and macros readily available can significantly enhance your efficiency as a DM. Start by creating a library of AI prompts that cover various aspects of gameplay, such as NPC generation, scene setup, and loot descriptions. For instance, a prompt for NPC creation might look like this: “Generate a quirky tavern keeper who loves gossip.” This allows you to generate characters on the fly without extensive prep work.
In addition to prompts, develop a collection of macro snippets for common tasks in your VTT. For example, you could create a macro for rolling initiative, applying damage, or triggering sound effects. This will allow you to execute these actions quickly during gameplay, keeping the flow of the session intact.
13.1 AI prompts: NPC, scene, loot, and twist
Creating a set of AI prompts for different aspects of your game can be incredibly useful. For NPCs, you might use prompts like: “Generate a quirky tavern keeper who loves gossip.” For scenes, consider a prompt such as, “Describe a dark forest with eerie sounds and hidden dangers.” When it comes to loot, you could use: “Create a magical ring that grants its user the ability to speak to animals.” Lastly, for plot twists, try: “Generate a twist where the ally turns out to be a traitor.”
These prompts allow you to generate rich content quickly, enhancing your storytelling and keeping players engaged. You can easily adapt them to fit your campaign’s themes and settings.
13.2 VTT macro snippets for initiative, SFX, and tokens
Having a collection of VTT macro snippets can save you time and streamline your gameplay. For initiative, you can create a macro that rolls for all characters and monsters and sorts them automatically. An example might look like this: “Roll initiative for all players and sort” in Roll20.
For sound effects, set up a macro that triggers specific audio cues when certain events happen. This could look like: “On hit, play the ‘sword clash’ sound” can enhance the immersion during combat. Lastly, consider macros for swapping token images or applying effects, such as changing a token’s appearance when it takes damage.
13.3 One-page 30-minute encounter template (ready to print)
Using a one-page template for 30-minute encounters can help you run quick and engaging sessions with minimal prep. Your template should include sections for the hook, map, foes, twists, loot, and exit hooks. For instance, you might set up a format like this:
- Hook: A villager approaches the party with a plea for help.
- Map: Use a forest battle map.
- Foes: 2 goblins and a goblin chief.
- Twist: One of the goblins is secretly working for a higher power.
- Loot: A magical item with a drawback.
- Exit Hook: The villager offers to lead the party to a secret treasure location.
This structure allows you to quickly fill in details and adjust based on your players’ actions, keeping the encounter dynamic and engaging.
Fox’s take
The Lazy DM’s Digital Toolkit emphasizes the importance of being prepared for spontaneity and creativity. By leveraging technology and structured templates, you can create a rich and engaging experience for your players without the stress of extensive preparation. Remember, the heart of any great session lies in storytelling and player engagement, and with the right tools, you can focus on what truly matters: the adventure!
FAQ
Can I really run a satisfying session with zero prep?
Yes, by using digital tools and frameworks to enhance spontaneity.
What are the must-have digital tools for a Lazy DM?
Essential tools include a VTT, AI tools, and asset libraries.
How do I create compelling NPCs in under 60 seconds?
Use AI prompts for quick generation and summarize in a three-line portrait.
Which asset packs offer the most prep-time savings?
Look for versatile packs on platforms like Etsy or DriveThruRPG.
How can I automate bookkeeping during sessions?
Utilize VTT macros for HP, XP, and loot tracking to streamline gameplay.
Continue reading
- How to Save Time When Organizing DnD Sessions: Practical Systems, Tools & Templates
Save time organizing DnD sessions with proven workflows, templates, tools and ready-made maps you can adapt fast. - How to run engaging one-shots for mixed-experience groups
Practical strategies to run engaging one-shots for mixed-experience groups: fast prep, pregens, pacing, and VTT tips.