
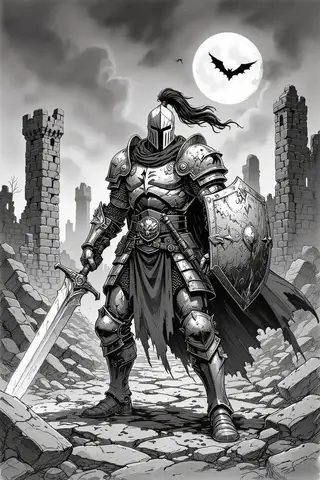
Running engaging one-shots for mixed-experience groups can be a rewarding yet challenging endeavor. This article provides practical strategies to help Game Masters (GMs) navigate the complexities of managing players with differing skill levels while ensuring everyone has an enjoyable experience.
By focusing on preparation, character options, pacing, and the use of virtual tabletop tools, you can create memorable sessions that cater to both new players and veterans alike.
…
What you’ll learn in this article
- 🎲1How to balance player skill levels in engaging one-shots.
- ✅2Effective one-shot tips for newcomers and veterans alike.
- 🔎3Quick pregens: How to create characters that fit your narrative.
- 🧙3♂️ Session zero one-shot: Setting expectations for your group.
- 🎯4Strategies for pacing and time management in short RPG adventures.
- 💻5Utilizing virtual tabletop (VTT) tools like Roll20 and Foundry for seamless gameplay.
- 🕒6Fast one-shot prep: 60/30/10 minute planning techniques.
- 📚7Resources for ready-made assets to enhance your game sessions.
- 🎲8Giving veterans satisfying moments in 4 steps
- 🎲9Designing modular encounters for variable skill
- 🎲10Pacing and time management techniques
- 🎲11Tools, VTT tips and small automations
- 🎲12Visual aids and maps: when to use them
- 🎲13NPCs on a page: 3 sample quick NPC statblocks
- 🎲14Handling rules disputes and table friction
- 🎲15Win conditions and meaning of ‘success’
- 🎲16Post-game feedback and iterative improvement
- 🎲17Resources & complementary tools
1. Quick rules for mixed-experience one-shots
When running engaging one-shots for mixed-experience groups, it’s essential to simplify the rules while keeping the game enjoyable for everyone. Start with 5 to 7 core actions that all players can understand, such as moving, attacking, performing skill checks, interacting with objects, and resting. Create a one-page cheat sheet that defines key terms like Difficulty Class (DC), Armor Class (AC), and advantage, along with sample rolls. This approach reduces cognitive load on new players and allows veterans to focus on strategy rather than learning the basics mid-game.
Tip: Consider implementing a default “house rule” policy where you make simple rulings during play and log them for later review. This helps maintain the flow of the game and encourages a collaborative environment. If you notice that advanced rules are overwhelming for newcomers, you can always poll the group after the first encounter to see if they want to keep those rules or simplify further.
What ‘mixed-experience’ means in practice
Mixed-experience groups consist of players with varying levels of familiarity with tabletop RPGs. You may have novices who need clear guidance and concrete choices, while veterans may seek optimization and deeper engagement. This disparity can manifest in stalled decisions, spotlight imbalances, and different preferences for social versus mechanical gameplay. To help bridge this gap, consider conducting a quick pre-session poll to identify player priorities, such as whether they prefer roleplay, combat, or puzzles.
Warning: Be mindful of the behavioral impacts of mixed experience. If your veterans dominate the conversation or decision-making, it can lead to frustration for newer players. Keep an eye on how players are engaging with each other and adjust your facilitation accordingly.
Goals for a single session: fun, clarity, resolution
When planning your one-shot, focus on three primary goals: fun, clarity, and resolution. Fun is about keeping the players engaged and entertained, while clarity ensures that everyone understands what matters in the game. Resolution means providing a satisfying ending that ties up loose ends and gives players a sense of accomplishment. Clearly define stakes and set a time limit to maintain focus during play.

Example: You might tell players during your Session Zero that the goal is to complete a heist in a specified time frame, with the stakes being the potential loss of a valuable artifact. By communicating these goals early on, you align expectations and help players understand what they should be focusing on throughout the session.
2. Choosing a one-shot format that fits the table
Selecting the right format for your one-shot is crucial for accommodating mixed-experience players. Popular formats include heists, mysteries, and combat-skirmishes. Each format has unique pacing and risk/reward profiles that can cater to different player preferences. For example, a heist allows players to collaborate and strategize, making it easier for veterans to lead while newcomers follow along with defined roles. A mystery can engage players intellectually, offering a chance for all to contribute by piecing together clues at their own pace.
Tip: Use a decision checklist to help you assess which format fits your table best. Consider factors such as player preference, time available, desired difficulty, and how spotlight time will be distributed among players. This will help ensure that everyone is engaged and gets a chance to shine during the session.
Heist: structure and why it helps mixed groups
The heist format is particularly effective for mixed-experience groups because it provides clear roles and a structured narrative. The typical structure involves planning, infiltration, complications, and escape. This allows veterans to take the lead in devising tactics while newer players can follow along with simpler tasks. For instance, you can assign roles such as the planner, the infiltrator, the lookout, and the getaway driver, giving everyone a chance to contribute based on their experience level.
Example: Let’s say your heist involves stealing a magical artifact from a guarded vault. You can scale the complexity of the planning phase by offering three options: a stealthy approach, a distraction, or a brute-force entry. This way, veterans can choose to delve deeper into tactics, while newcomers can comfortably pick a straightforward path.
Mystery: pacing clues for players of different skill
Mysteries engage both veterans and novices by allowing them to work together to solve puzzles and uncover secrets. The key to pacing clues effectively is to use layered clues that vary in clarity. For instance, you might present an obvious clue, such as a bloody handkerchief, alongside interpretive clues that require more thought, like an overheard conversation. This way, veterans can enjoy the deduction process while newbies can grasp the plot without feeling lost.
Tip: To maintain engagement, consider drip-feeding one obvious clue every 10 to 15 minutes. Balance these clues with physical or social beats to keep the pace lively. For instance, after a clue is discovered, you might introduce a time-sensitive social interaction that forces players to act quickly.
Combat-skirmish: keep fights dynamic and short
In a mixed-experience group, combat can often become a point of confusion. To keep fights dynamic and engaging, aim for encounters that last 6 to 10 minutes. Use fewer but smarter foes and incorporate environmental mechanics to add interest. Simplifying initiative and damage resolution can also speed up play, allowing everyone to participate without getting bogged down in rules.
Example: Consider designing encounters where players face a group of three enemies and an environmental hazard, such as a collapsing ceiling. By keeping the enemy count low and introducing a dynamic element, you can maintain momentum while allowing for strategic choices.
3. Fast prep: 60 / 30 / 10 minute plans
When preparing for a one-shot, time is often of the essence. Using a 60/30/10 minute prep plan can help streamline your preparation process. In the 60-minute plan, focus on high-impact tasks: outline your theme or hook, sketch out four encounters, create five pregenerated characters (pregens), draft a simple map, and set clear stakes. This gives you a thorough foundation to build your session around.
Tip: If you’re short on time, the 30-minute essentials-only plan can be an effective alternative. In this scenario, grab a module or template, select your pregens, note three encounters, and define your hook and ending. This plan prioritizes the most critical components to ensure you have a playable session.
60-minute plan: high-impact prep tasks (5 items)
- One-sentence hook: Craft a compelling premise that captures players’ attention.
- Outline 4 encounters: Create engaging encounters tied to the story’s progression.
- Create 5 pregens: Design characters that fit your narrative and provide options for different play styles.
- Sketch map: Prepare a simple visual aid to facilitate understanding of spatial dynamics.
- Set stakes/twist: Define clear stakes for the players and consider adding a twist to surprise them.
Example: If your one-shot involves a heist, your hook might be “Infiltrate the Grand Vault to steal the Crown Jewels before the gala ends.” Each encounter could represent a different phase of the heist, leading to a climactic confrontation at the vault.
30-minute plan: essentials-only (4 items)
- Template/module: Choose a pre-existing module that aligns with your desired theme.
- Pick pregens: Select pregenerated characters that offer variety in play styles.
3 encounters:
Identify three key encounters that will drive the narrative forward.
- Define hook and end: Clearly articulate your hook and how you envision the session concluding.
Example: For a mystery one-shot, you might choose a module that focuses on solving a theft. Your hook could be “Uncover the truth behind the stolen artifact before the thief escapes,” and you can plan three investigative encounters that lead to the final reveal.
10-minute plan: ready-to-run actions (3 items)
- Pick system & pregens: Quickly select a system and characters that fit your narrative.
- Improv hook: Use your creativity to come up with an engaging hook on the spot.
- Plan 2–3 loose scenes: Outline a few key scenes that will guide the session.
- Set clear win: Define what success looks like for the players.
Example: If you’re running a combat-skirmish one-shot, you might say, “Your characters are mercenaries hired to take down a notorious bandit camp. Your goal is to retrieve the stolen goods and escape without drawing attention.” This gives players a clear objective to focus on as they navigate the session.
4. Quick character options and pregens
Creating fast character options is vital for mixed-experience one-shots. Use 5 to 6 pregenerated characters that cover a range of play styles: tank, damage dealer, support, skill expert, and face (the character who handles social interactions). Each character should come with a brief backstory, a hook that ties them to the story, and one special ability to provide variety in gameplay. Allow veterans to make one minor swap or tweak to their characters after selection to add personal touch.
Tip: Consider sharing pregens in a PDF format 24 hours ahead of time, allowing players to review and choose characters that resonate with them. This can help ease the onboarding process and make everyone feel more comfortable at the table.
Two sample one-line pregens with hooks
- Elara the Elven Ranger: A keen-eyed scout with a hawk companion, haunted by her lost clan. She seeks to uncover the truth behind their disappearance.
- Grom the Dwarven Fighter: A stalwart shield-bearer who loves to taunt enemies, driven by a desire for revenge against the orc leader who wronged him.
Example: You can also create alternate versions of these characters for different tones. For a comic twist, you might have “Jinx the Pickpocket,” who owes money to a local mafia and picks locks for fun, making her a quirky addition to the team.
Fast shared backstory prompts (3-step method)
To foster camaraderie among players, use a simple three-step method for shared backstory creation:
- Choose a relationship: Decide how the characters know each other (e.g., childhood friends, rivals, or former teammates).
- Pick a secret: Assign each character a secret that ties into the story (e.g., one character has stolen from the other).
- Assign a shared goal: Have the characters work towards a common objective (e.g., clearing a debt together).
Tip: As an example, you might say, “You two share a past debt to a local crime lord, and you both want to clear it before it catches up with you.” This not only builds a connection between players but also creates immediate stakes for their characters.
5. Session-zero-lite for one-shots (3–5 sentences)
A quick Session Zero can set the tone for your one-shot and align expectations. Start with a brief script that covers the theme of the adventure, the pregenerated characters available, and your guidance as the Game Master (GM). Define what success looks like in the session and encourage players to ask any questions. Use a round-robin “one word” motivation exercise where each player shares a single word that describes their excitement for the game.
Example: You might say, “Today, we’re embarking on a thrilling heist to steal a magical artifact. You’ll each choose a character from the provided pregens, and our goal is to complete the heist successfully before time runs out. What’s one word that captures your excitement for this adventure?”
Table expectations & safety words
Setting expectations early can help create a comfortable environment for all players. State basic guidelines such as the expected time commitment, tone of the game, and any rules regarding character death (such as no permanent death unless warned). Introduce safety tools, including one or two safety words that players can use to signal when they need to pause or adjust the content of the game.
Tip: For example, you might say, “If anyone feels uncomfortable, please use the safety word ‘pause’ to let us know we need to take a break or change the topic.” This encourages open communication and ensures that everyone feels safe at the table.
Simple mechanical clarifications
To minimize confusion during play, clarify the mechanics you’ll be using from the outset. Specify whether you’ll use a theater-of-the-mind approach (imaginative description without maps) or a grid system for movement and combat. Explain how combat rounds will run and how players should handle any unfamiliar rules they encounter.
Tip: Consider adding a short FAQ to your player handout, addressing common questions like, “What if I don’t know my spells?” with a simple answer: “Ask a buddy or use a default action.” This proactive approach can ease anxiety for new players and keep the game flowing smoothly.
6. Balancing spotlight time and contribution
Balancing spotlight time is crucial for ensuring that all players have the opportunity to contribute to the game. Use a spotlight timer to track around 2 to 3 minutes of focus per player during each scene. Incorporate prompts that encourage quieter players to engage more actively, and use NPCs (non-player characters) or scene starters to pass the focus around. Ending scenes with a group vote can also help ensure everyone has a say in the direction of the story.
Tip: Implement a 4-step rotation method where you start scenes with the quietest player, prompt sidelined players for input, use NPCs to pass the ball, and summarize the scene before pivoting to the next. This method ensures equitable engagement and fosters a collaborative atmosphere.
4-step method to rotate and share spotlight
- Start with the quietest player: Begin scenes by inviting the player who has been less vocal to take the lead.
- Prompt sidelined players: Ask other players for their input or ideas to encourage participation.
- Use NPCs to pass the focus: Introduce NPCs as a way to shift attention and give all players a chance to respond.
- Summarize & pivot: At the end of the scene, summarize what happened and transition smoothly to the next scene.
Example: For a social encounter, you might start by asking the player who has been quieter, “Mira, your character notices something unusual in the tavern—what do you do?” This approach not only gives that player the spotlight but also encourages everyone else to stay engaged and ready to contribute.
7. Onboarding new players in 4 steps
Welcoming new players to your tabletop RPG can be a rewarding experience, but it requires a thoughtful onboarding process to ensure they feel comfortable and engaged. The key is to pair each novice with a veteran player who can guide them through the game mechanics and narrative. This buddy system allows new players to learn in a supportive environment, reducing any anxiety they might feel about participating.
Here’s a straightforward 4-step onboarding sequence:
- Pair Novice with Veteran: Assign a veteran player to help a new player with rules and gameplay. This allows novices to learn from someone who has experience.
- Demo a Sample Action: Run a quick demonstration of a basic action, like an attack or skill check. For example, roll a d20 and explain the process of adding modifiers and comparing the result to a target number.
- Run a 2-Minute Practice: Let new players practice their first action with their buddy’s guidance. This could be as simple as attacking a training dummy.
- Give Positive Feedback After First Real Choice: After they make their first decision in the game, offer encouraging feedback to reinforce their confidence.
Example: “Awesome job, Sarah! You rolled really well on that attack, and you hit the goblin!”
By following this onboarding sequence, you create a welcoming atmosphere that encourages new players to engage with the game. It also helps to manage the mixed-experience dynamics by fostering camaraderie among players.
8. Giving veterans satisfying moments in 4 steps
Veteran players bring a wealth of experience to the table, and it’s essential to provide them with opportunities that allow their skills to shine during a one-shot. Crafting satisfying moments for veterans not only enhances their enjoyment but also keeps them engaged without sidelining newer players. One effective way to do this is to create layered challenges that offer additional depth for those who seek it.
Here’s a 4-step approach to ensure veterans have their moments:
- Note Veteran Styles Pre-Game: Before the session, take a moment to ask your veterans about their preferred play styles, whether they enjoy combat, roleplay, or puzzles. This insight will help you tailor the experience to suit their preferences.
- Build One Shine Encounter Per Veteran: Design encounters that allow each veteran to showcase their strengths. For example, if one player is skilled in negotiation, create a scenario where they must broker peace between two factions.
- Signal Turns: Clearly indicate when it’s time for veterans to take the lead in a scene. You might say, “Okay, Alex, this is your moment to shine—how do you want to approach the negotiation?”
- Debrief After Shines: After each encounter, take a moment to discuss what worked well and how players felt about their contributions. This feedback loop can enhance their experience and provide valuable insights for future sessions.
Warning: Be mindful of balancing the spotlight in these moments. Ensure that while veterans have their opportunities, newer players are still encouraged to participate and contribute.
By implementing these steps, you create a rich gaming experience that rewards veterans for their skills while maintaining an inclusive atmosphere for all players.
9. Designing modular encounters for variable skill
Creating modular encounters allows you to adapt to the varying skill levels of players in your mixed-experience group. This approach ensures that everyone can engage with the game without feeling overwhelmed or sidelined. Modular encounters typically consist of easy, medium, and hard variants, which you can scale based on your players’ experience and confidence.
Here’s how you can design modular encounters:
- Create Easy, Medium, and Hard Variants: For each encounter, outline three versions that differ in difficulty. For example, an easy encounter might feature a single weak enemy, while a hard encounter could involve multiple foes with special abilities.
- Use Fail-Forward Mechanics: This means that even if players fail a check, they still make progress in the story. For example, if a character fails to pick a lock, they might accidentally trigger a trap that leads to a new clue.
- Provide Two Quick Encounter Outlines:
- Combat Encounter: A tavern brawl where players must deal with four thugs. Timing: 6-10 minutes. If they fail, they can gather information from a frightened patron.
- Social Encounter: A trapped hallway where players must work together to disarm the traps while negotiating with a frightened NPC. Timing: 6-10 minutes. If they fail, they might trigger an alarm that brings in guards.
- Encourage Collaboration: Design challenges that require players to work together, leveraging their unique skills to succeed. This can create a sense of teamwork and camaraderie among players of different experience levels.
Tip: Consider using visual aids, like maps or tokens, for encounters to help players better understand their options and the environment.
10. Pacing and time management techniques
Effective pacing and time management are crucial for running engaging one-shots, especially with mixed-experience groups. By managing the flow of the game, you can ensure that all players remain engaged and that the story progresses smoothly. A good rule of thumb is to aim for one encounter every 45 minutes in a 3–4 hour session. This keeps the narrative moving while allowing for moments of exploration and roleplay.
Here’s how to implement pacing and time management techniques:
- Use Soft Time Checks: Introduce gentle reminders about time limits, such as saying, “We have about 10 minutes left in this scene, so let’s wrap it up.” This encourages players to focus and make decisions without feeling rushed.
- Narrate Brief Travel Transitions: Whenever the party moves from one location to another, use concise descriptions to maintain momentum. For example, “After a quick journey through the forest, you arrive at the ancient ruins.”
- Incorporate Timers for Scenes: Use a timer for each scene to keep track of how long players are spending on specific encounters. For instance, allocate 15 minutes for a social interaction and 10 minutes for a combat scenario.
- Identify Cut Points: Be prepared to cut optional content if time runs short. For example, if players are behind schedule, consider simplifying a puzzle or reducing the number of enemies in a combat encounter.
Example: If you’re using a puzzle encounter that’s taking too long, you might say, “You realize the answer is simpler than you thought; you can solve it with a basic skill check instead.”
By adopting these pacing and time management techniques, you can create a smooth and engaging one-shot experience for all players, ensuring that everyone stays involved and invested in the story.
11. Tools, VTT tips and small automations
In the digital age, utilizing virtual tabletop (VTT) tools can significantly enhance your one-shot experience, especially for mixed-experience groups. Automating certain tasks can save you time and allow you to focus on storytelling and player engagement. Here’s a simple 4-step automation setup to streamline your VTT experience:
- Import Tokens and Maps: Start by uploading your maps and tokens into the VTT platform. This gives players a visual reference and helps them understand their surroundings.
- Create Token Macros: Assign macros (automated commands) to your tokens for common actions, like rolling for attacks or skill checks. For instance, a macro for a fighter might automate their melee attack roll.
- Enable Initiative Tracker: Use the initiative tracker feature to streamline combat turns. This keeps track of player and enemy actions, ensuring everyone knows when it’s their turn.
- Set Up Damage Templates: For area-of-effect attacks, use damage templates to visually represent the affected area on the map. This helps players understand the impact of their actions.
Tip: Consider using physical aids such as index cards for player abilities and sticky notes for initiative. These can help keep track of actions without cluttering your VTT interface.
By leveraging VTT tools and small automations, you can create a more engaging and efficient one-shot experience. This allows you to focus on the fun of storytelling and player interaction, making the session enjoyable for everyone.
12. Visual aids and maps: when to use them
Using visual aids and maps can greatly enhance the gameplay experience in one-shots, particularly for mixed-experience groups. They provide players with a tangible reference point and help to clarify the game’s environment. However, it’s essential to know when and how to use these aids effectively.
Here’s a quick guide on using visual aids and maps:
- Use Maps for Tactical Scenes: For encounters that involve combat or strategic planning, maps are invaluable. They allow players to visualize their positioning and make informed decisions.
- Employ Theater-of-the-Mind for Social or Fast Scenes: In contrast, for social interactions or quick scenes, consider using theater-of-the-mind. This approach encourages imagination and keeps the pace moving without the need for detailed maps.
- Map Style Recommendations:
- Heist: Use top-down floorplans that clearly indicate entry and exit points.
- Mystery: Create area maps with clue locations marked for easy reference.
- Combat: Design tactical grids that include hazards or obstacles to add excitement to encounters.
- Decision Rule: If a grid or map benefits player choices and engagement, use one. If not, opt for a more narrative approach.
Example: When running a heist, a multi-room layout can help players strategize their infiltration, while a simple sketch for a social gathering can keep the focus on dialogue rather than positioning.
Quick map styles by format (heist/mystery/combat)
When planning your one-shot, choosing the right map style can greatly enhance the experience for both new and veteran players. For a heist scenario, consider using top-down floorplans that clearly outline sightlines and pathways. This helps players strategize their movements and plan their actions effectively. A straightforward single-room map can also work well for quick infiltration scenes, providing a clear view of the area without overwhelming players.
For mystery adventures, an area map combined with specific clue locations helps players visualize the space while focusing on gathering information. A flowchart map can be particularly useful for indicating how different locations relate to one another, guiding players as they piece together the mystery. In contrast, combat scenes benefit from tactical grids that showcase hazards and environmental elements, allowing for dynamic encounters. A narrow battlefield with choke points can add tension and excitement, ensuring that players remain engaged.
Tip: Always keep maps simple and functional. If grid benefits choices, use a map; otherwise, opt for theater-of-the-mind to maintain a fast pace.
Where to get ready-made assets (paid & free)
Finding the right assets for your one-shot can save you time and enhance the gaming experience. For paid resources, I recommend checking out high-volume packs on platforms like Etsy. A few excellent options include the Game Master Toolbox which provides a vast array of assets for rapid scene-building, or the 165,000 Battlemaps pack for quick tactical scenes. These resources can streamline your prep time significantly and provide high-quality visuals to captivate your players.
If you’re looking for free options, consider community-driven platforms like Roll20 or Owlbear Rodeo, which offer importable files and assets created by fellow gamers. DriveThruRPG also has a selection of free modules that can be useful for one-shots. When evaluating assets, check their resolution, scope, and licensing terms to ensure they fit your needs for either virtual tabletop (VTT) play or printed materials.
Warning: Always verify the licensing of any asset you plan to use, especially if you intend to distribute materials or play online.
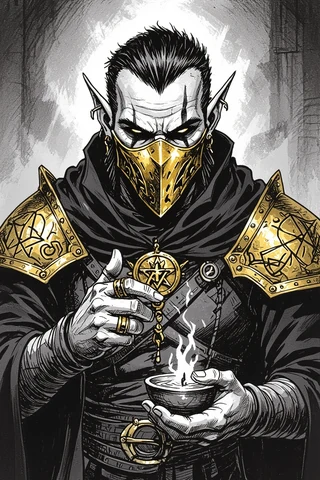
13. NPCs on a page: 3 sample quick NPC statblocks
Creating NPCs (non-player characters) that are easy to integrate into your game can enhance player engagement. Here are three quick NPC statblocks that you can use in your one-shot:
- Mira the Barkeep
Skills: Insight +5
Motivation: Secret spy gathering information for a local guild
Quirk: Always has a drink ready for newcomers - Elder Thorne
Skills: Arcana +7
Motivation: Protecting ancient secrets from outsiders
Quirk: Speaks in riddles to test the cleverness of those who approach him - Gritch the Goblin Scout
Skills: Stealth +6, HP: 7
Motivation: Seeking treasure to impress his tribe
Quirk: Collects shiny objects and wears them as jewelry
These NPCs are designed to be plug-and-play, allowing you to drop them into various scenarios with minimal preparation. Each character has a clear motivation and quirk, making them memorable and engaging for players.
Example: For Mira, if players ask for information, you can use her quirk to make her more approachable—she might offer a drink while revealing secrets, drawing players into the narrative.
14. Handling rules disputes and table friction
In any game session, rules disputes and table friction may arise, especially in mixed-experience groups. To handle these situations effectively, use a three-step conflict resolution process:
- Pause Privately: If a dispute arises, take a moment to pause the game and address the issue outside the immediate pressure of the gameplay.
- Redirect Positively: Reframe the discussion positively, focusing on how to move forward rather than dwelling on the disagreement.
- Sidebar Post-Session: If necessary, note the dispute for later discussion, allowing gameplay to continue smoothly without lingering tension.

For example, if players disagree about how a rule applies during combat, you can say, “Let’s pause for a moment to clarify this. I’ll make a quick ruling, and we can discuss it more after the session.” This keeps the game flowing while ensuring everyone feels heard.
Tip: Encourage open communication at the table. Establishing a culture where players feel comfortable voicing concerns can prevent conflicts from escalating and maintain a positive atmosphere.
15. Win conditions and meaning of ‘success’
Defining success in your one-shot is crucial for player satisfaction, especially in mixed-experience groups. Instead of a binary win/lose outcome, consider implementing multiple success tiers to recognize different contributions. For example, you might define three tiers:
- Partial Success: Players achieve some objectives but face setbacks.
- Success: Players complete most objectives with minimal issues.
- Epic Success: Players not only achieve their goals but also uncover bonus content or rewards.
For instance, in a heist scenario, if players manage to steal the artifact but alert the guards, they might achieve a “Partial Success.” If they escape without being detected, that’s a “Success,” while uncovering a hidden treasure in the process would qualify as “Epic Success.”
Tip: Communicate these success tiers during your Session Zero-Lite to align expectations. This helps players understand that their contributions, whether small or large, are valued.
16. Post-game feedback and iterative improvement
Gathering feedback after your one-shot is crucial for improving future sessions. Utilize a simple feedback method with three prompts to gauge player satisfaction and areas for improvement:
- What worked well? This allows players to highlight positive aspects of the session.
- What didn’t work? This helps identify areas that may need adjustments.
- One suggestion? Encouraging players to provide constructive feedback can yield valuable insights.
Consider sending a brief survey through Google Forms or conducting a quick verbal debrief after the session. This not only encourages participation but also creates a culture of open communication.
Example: After a session, you might ask, “What did everyone enjoy the most? Was there anything that felt off? And if you could change one thing for next time, what would it be?” This structure ensures that feedback is actionable and focused.
Simple feedback prompts (3 questions)
To streamline your feedback process, use these three simple prompts:
- What worked? (Rating: 1-5)
- What didn’t work? (Rating: 1-5)
- One suggestion? (Open-ended)
This approach allows players to provide both quantitative and qualitative feedback, which can be easily analyzed. By encouraging players to rate their experiences, you can identify areas of success and those that require further attention.
Tip: Incorporate an anonymous comment box to allow players to voice concerns without hesitation, fostering a more comfortable feedback environment.
17. Resources & complementary tools
To effectively run engaging one-shots for mixed-experience groups, having the right resources is vital. Consider utilizing curated asset bundles from GM Craft Tavern on Etsy. Some recommended packs include:
- Game Master Toolbox — a comprehensive collection of assets for rapid scene-building: Game Master Toolbox.
- 165,000 Battlemaps — ideal for quick tactical scenes: 165,000 Battlemaps.
- 35,000 Fantasy Art HD Backgrounds — great for polished scene visuals: 35,000 Fantasy Art HD Backgrounds.
Additionally, explore free resources like community assets on Roll20 and DriveThruRPG for budget-friendly options.
Tip: Always evaluate the resolution and licensing of any assets before use to ensure compatibility with your gaming platform and respect for creators’ rights.
…
Fox’s take
Running one-shots for mixed-experience groups can be incredibly rewarding. By focusing on preparation, pacing, and engagement strategies, you can create an atmosphere where players of all skill levels feel welcome and engaged. Remember to adapt your approach based on player feedback and the dynamics of your group to ensure a memorable gaming experience.

FAQ
- How do I make one-shots fun for both new players and veterans?
- Simplify rules while maintaining depth, focus on core actions, and encourage collaboration.
- What’s the fastest way to prepare a playable one-shot in under 30 minutes?
- Use a pre-existing module, select pregens, and outline three key encounters.
- Should I use pregenerated characters or let players build quickly?
- Pregenerated characters reduce decision fatigue for newcomers while allowing tweaks for veterans.
- How can a GM keep combat short and engaging for mixed groups?
- Design encounters lasting 6 to 10 minutes with fewer foes and simplified mechanics.
- What virtual tabletop automations are worth setting up for one-shots?
- Set up token macros, initiative trackers, and damage templates to streamline gameplay.
Continue reading
- How do you run a DnD game using only Discord
Learn how to run DnD on Discord with step-by-step setup and best practices. - How to use DnD Beyond?
Learn how to use D&D Beyond: step-by-step character builds, campaign management, and VTT integrations like Beyond20 in one practical guide.