

What you’ll learn in this article
- 🎲1Understand the importance of player-facing vs session-side goals for effective dungeon master session prep.
- ✅2Discover timeboxing techniques to maintain pacing in your sessions.
- 🔎3Explore a structured weekly workflow for efficient DM preparation.
- 🧙4♂️ Learn about essential physical and digital tools to enhance your DM workflow.
- ⚔5️ Get best practices for using Virtual Tabletops (VTT) like Foundry and Roll20.
- 🗺6️ Master the art of creating and exporting high-quality battlemaps for online play.
- 📦7Find out how to integrate purchased assets from Etsy into your campaigns effectively.
- 📝8Streamline your session-day setup with a pre-session checklist.
- 💰9Create engaging loot tables and treasure management systems for your players.
- 📊10Utilize automation and macros to reduce bookkeeping during sessions.
- 🎲11Automation, Macros & Scripting for Faster Play
- 🎲12Archiving, Feedback and Follow-Up
- 🎲13Integrating Purchased Assets (Etsy Bundles and Packs)
- 🎲14Sample File/Folder Naming Conventions & Templates
- 🎲15Resources & Complementary Tools (Detailed List with URLs)
1. Session Planning Philosophy for Professional DMs
Setting Objectives: Player-Facing Goals vs Session-Side Goals
When planning your sessions, it’s crucial to distinguish between player-facing goals and session-side goals. Player-facing goals are the experiences you want your players to have, such as engaging with rich narratives, facing thrilling challenges, or exploring intriguing environments. For example, if you’re running a story-driven game, a player-facing goal might be to reveal a character’s secret lineage during a climactic moment. Session-side goals, on the other hand, focus on what you want to achieve as the DM during the session, like ensuring that the players reach a specific location or complete a quest. A clear session-side goal could be: “By the end of this session, the players should infiltrate the villain’s lair.”
Remember the rule of thumb: if an item or story element hasn’t been used in the last three sessions, consider moving it to your evergreen toolbox or dropping it altogether. This helps streamline your prep and keeps the focus on what matters most. As a DM, I’ve often found that less is more; simplifying objectives can lead to more impactful sessions.
Timeboxing and Pacing Targets (Minutes per Scene/Encounter)
Timeboxing is a technique that involves allocating a specific amount of time to each scene or encounter during your session. For a typical 3–4 hour session, aim for about 45–60 minutes per major scene. This structure allows you to plan for 3–5 scenes total, keeping the game dynamic and engaging. For instance, if you have a 3-hour session, you might break it down as follows: 45 minutes for the introduction, 90 minutes for the main conflict, and 45 minutes for resolution and cooldown.
2. Weekly Workflow: How Pros Structure Prep Time
The 3-Tier Prep Model: Long-Term, Mid-Term, Session-Level
Professional Dungeon Masters often utilize a three-tier prep model to structure their preparation time effectively. The long-term tier focuses on overarching story arcs and world-building, ensuring that the foundation of your campaign is solid. The mid-term tier addresses upcoming sessions and specific situations, while the session-level tier is all about the nitty-gritty details, such as boxed text, maps, and micro-NPCs (non-player characters).
For instance, if you have a campaign arc planned out, spend time each week fleshing out the mid-term details—like upcoming quests or character arcs—while keeping session-level prep focused on immediate needs. You might allocate 60% of your time to long-term planning, 30% to mid-term prep, and 10% to the session level, adjusting based on your players’ dynamics and interests.
A Weekly Schedule Example (3–6 Step Routine)
Creating a structured weekly prep routine can help you stay organized and focused. Here’s a simple 6-step routine you can follow for session prep:
- Review Last Session Notes: Reflect on what worked and what didn’t. This can help you adjust your approach for the next session.
- Strong Opening: Plan a compelling hook to grab your players’ attention right from the start.
- Outline 3–5 Scenes: Sketch the major scenes you want to cover, including key NPCs and important plot points.
- Prepare Clues and Encounters: Gather any clues or encounters needed for the session and ensure they align with the pacing you’ve set.
- Set Timers: Decide on pacing targets for each scene to keep the session moving smoothly.
- Final Review: Go over your notes and assets to ensure everything is in place for game day.
3. Tools of the Trade — Physical and Digital Essentials
Must-Have Physical Tools (DM Screen, Printouts, Tokens)
Having the right physical tools can significantly enhance your session preparation and execution. A DM screen is essential for keeping important information at your fingertips and maintaining the mystery of your campaign. Additionally, printed handouts, such as maps or NPC profiles, can help players engage more deeply with the game.
For example, you might print out a map at 300 DPI (dots per inch) for clarity and detail, ensuring that players can see crucial elements. Tokens or miniatures are also vital for visual representation during encounters. I find that having a small selection of tokens ready for immediate use helps keep the flow of the game smooth.
Core Digital Tools (VTTs, Campaign Managers, Art Tools)
Digital tools are just as important as physical ones for effective session prep. Virtual Tabletops (VTTs) like Foundry or Roll20 provide a platform for running your sessions online, allowing you to manage maps, tokens, and player interactions seamlessly. Campaign managers like Notion or Obsidian help you keep all your notes organized and accessible. Art tools such as Procreate, Inkarnate, or Photoshop are essential for creating custom maps and visuals.
For instance, if you’re using Procreate to create a battlemap, utilize a brush kit to speed up the process. You can find excellent options on platforms like Etsy, such as the Procreate Fantasy Map Making Brush Kit. This can make your map creation much faster and more efficient.
4. Virtual Tabletops & Platforms: Best Practices
When to Use Foundry vs Roll20 vs Tabletop Simulator
Choosing the right Virtual Tabletop (VTT) can dramatically affect your gaming experience. Foundry is ideal for those who want deep automation and custom modules, making it great for complex campaigns. Roll20, on the other hand, offers quick setup and broad accessibility, making it easier for new players to join. Finally, Tabletop Simulator excels in physics-based interactions and 3D environments, perfect for prototyping game mechanics.
To decide which platform to use, consider your players’ technical comfort levels, the required automation, and your hosting costs. For example, if you have a group of players unfamiliar with VTTs, Roll20’s user-friendly interface may be the best choice. Alternatively, if your players enjoy creating custom content, Foundry could enhance their experience.
Importing Assets, Scene Management and Compendium Use
Importing assets into your VTT can initially seem daunting, but following a simple process can make it straightforward. Start by importing your battlemaps and setting the appropriate grid size. For tokens, use PNG files for transparency. Compendiums allow you to store NPC and monster stat blocks and macros, making them easily accessible during play.
Here’s a quick step-by-step guide to importing assets:
- Unzip your asset files and check for resolution and filenames.
- Convert tokens to the correct PNG size (256–280 px).
- Place maps in the appropriate folder within your campaign directory.
- Set the scene size and grid on your VTT, ensuring it aligns correctly with any doors or features on the map.
- For handouts, overlay text on a parchment background and export as a PDF for printing.
5. Mapping Workflow: From Concept to Playable Battlemaps
Map Creation Tools and Asset Pipelines (Procreate, Inkarnate, Photoshop)
Creating quality battlemaps is essential for a professional Dungeon Master. Tools like Inkarnate are perfect for quickly generating maps, while Procreate allows for more detailed, hand-drawn designs. Photoshop is excellent for layered editing and exporting final versions.
To streamline your map creation, consider using asset pipelines. For instance, when using Procreate, you can start by sketching a rough layout, then use specific brush kits to add details. I often recommend using the Procreate Fantasy Map Making Brush Kit for a variety of textures and elements that can speed up the design process.
Map Export Settings, Resolutions and Grid/Token Sizing
When preparing your maps for use in a VTT, it’s crucial to understand the proper export settings. Generally, battlemaps should be created at 70–140 pixels per 5-foot grid, depending on the level of detail you want. For high-resolution prints, aim for 300 DPI (dots per inch). Tokens should be sized around 256–280 px with transparency for best results.
Here’s a quick guide for exporting your maps:
- Export your VTT battlemaps at 100 px per grid as JPG or PNG.
- For print versions, create high-resolution exports at 300 DPI.
- Name your files clearly, using a format like `_v1_NoGrid_2500px.jpg` for easy identification.
6. Tokens, Minis & Visuals: Standards and Tips
Token Sizing Conventions, File Formats and Naming
When it comes to preparing tokens for your tabletop RPG sessions, consistency is key. The standard size for tokens is between 256 and 280 pixels (px) in PNG format, which allows for a transparent background. This sizing is ideal for most virtual tabletop (VTT) platforms, where the tokens will fit seamlessly on a 70 px grid. A well-organized naming convention will also help you keep your assets easily accessible and identifiable. For example, you might use a format like `____.png` (e.g., `C01_Token_OakBeast_01_280px_v1.png`). This structure provides critical information at a glance, making it easier to locate the right token when you need it.
Batch processing can save you a lot of time when preparing your tokens. Using tools like Photoshop or GIMP, you can create scripts to resize and export multiple tokens at once. This way, you can ensure that all your tokens are uniform in size and format, which is crucial for maintaining visual consistency during gameplay. Remember to store your tokens in clearly labeled folders within your VTT asset directories. This organization will help you quickly find and use your tokens, enhancing your overall DM workflow.
Animated Tokens vs Static: Tradeoffs and Performance
Animated tokens can add a dynamic flair to your game, allowing for visually engaging moments during combat or special events. However, they come with performance considerations. Animated tokens usually require more processing power, which can lead to lag, especially in larger sessions or when players have slower internet connections. As a rule of thumb, limit the number of animated tokens per scene to around six, and reserve them for significant moments, such as boss fights or climactic encounters. Always have static fallback versions ready to go in case the animations cause any performance issues.
To manage your animated tokens effectively, keep them organized in a separate folder labeled “Animated Tokens.” Test their performance in your VTT prior to the session, especially if you know your players have varying levels of internet speed. For instance, you might showcase a subtle breathing animation for a dragon token while keeping common enemy tokens static. This balance will help maintain the visual engagement without compromising the flow of gameplay.
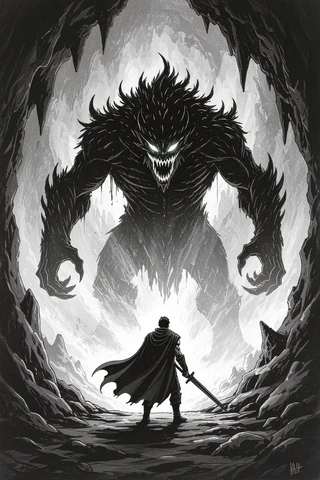
7. Encounter Design & Balancing Workflow
Building Encounters Fast (3–5 Step Method)
Creating engaging encounters can be a streamlined process when you use a structured approach. I recommend a simple five-step method for building encounters quickly:
- Define Purpose: What do you want to achieve with this encounter? Is it to challenge the players, advance the story, or introduce a new NPC?
- Pick Creatures/Roles: Select the creatures that will fill the roles needed for the encounter. Consider their challenge rating (CR) to ensure they are appropriate for your party’s level.
- Choose or Build a Map: Select a pre-made map that fits your encounter or create a new one that enhances the scene’s atmosphere.
- Add Mechanics: Think about any special rules or mechanics that will make this encounter unique, such as environmental hazards or objectives.
- Prepare Quick Reference: Create a concise reference sheet for the encounter that includes key stats, objectives, and any special abilities.
This method not only speeds up your preparation but also ensures that you have a well-rounded encounter that meets your game’s needs. It’s helpful to keep a library of encounter templates that you can reuse or modify as needed, allowing you to focus on crafting unique moments for your players.
On-the-Fly Tuning: Quick Math and Pacing Hacks
During a session, you may find that an encounter is either too easy or too difficult for your players. Quick adjustments can keep the pacing smooth and the tension high. First, assess the encounter by round two or three. Look for signs such as the players breezing through the enemies or struggling excessively. If you find the encounter is too easy, consider reducing the health points (HP) of the monsters by 25-50% or increasing their damage output slightly. Conversely, if the encounter is too challenging, you can add minions to provide additional targets for the players or reduce the damage that enemies inflict.
In addition to adjusting creature stats, you can introduce environmental hazards or reinforcements to change the dynamics of the encounter mid-session. For example, if players are facing a tough enemy and seem overwhelmed, you could narrate that the ground starts to shake, causing a landslide that creates cover or forces the enemy to reposition. Always log these changes for future reference; tracking what worked and what didn’t will help you better balance encounters in subsequent sessions.
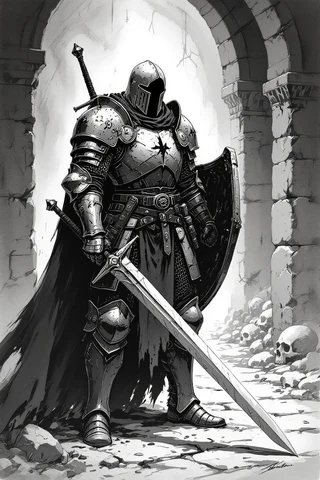
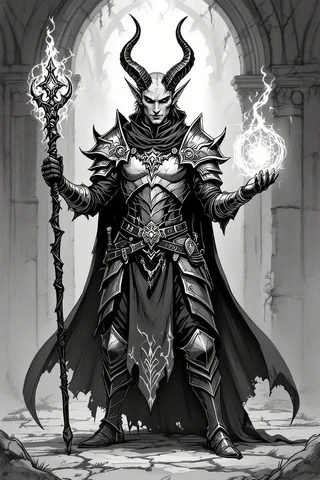
8. NPCs, Voices and Cheat-Sheets
NPC Micro-Sheets: What to Include (Stats, Goals, Quirks)
Creating micro-sheets for your NPCs (non-player characters) helps streamline your prep and keeps vital information at your fingertips during the session. Each micro-sheet should ideally fit on a single page and include the following headings: role/function, physical snapshot, voice/mannerism, motivation, leverage/vulnerabilities, secrets, relationships, and session appearances. This format allows you to quickly reference essential details without getting bogged down by excessive information.
When preparing NPCs, think about their role in the story and how they interact with the players. For instance, if an NPC is a merchant, you might note their physical appearance and a unique mannerism, like a tendency to fidget with coins while speaking. Additionally, include their motivations and any secrets that could create interesting plot twists. This concise information will help you portray the NPC convincingly and keep the game flowing smoothly.
Quick Lookup Cards and Index Systems
To make your game run more smoothly, consider maintaining an NPC index file. This file should include quick reference tags, such as Name, Role, File, First Appearance, and Status. This index will allow you to quickly locate NPC details during the session without flipping through multiple pages. For example, you might have a digital index in Notion or a simple CSV file that filters NPCs by their status (alive, ally, enemy) or location.
You can also create quick lookup cards for your DM screen. These cards should contain the most relevant information about your key NPCs, such as their name, a short description, and one or two bullet points summarizing their motives or secrets. This way, you can quickly pull up the information you need without losing the flow of the game. Linking your index entries to VTT tokens and compendium entries can further streamline your lookup process.
9. Loot, Rewards and Treasure Management
Loot Tables and Distribution Workflows
Creating effective loot tables is essential for rewarding your players while keeping the story engaging. Use a d100 or d20 table for quick loot generation, and store both generic and campaign-specific tables in well-structured folders. Remember that the purpose of loot should align with the narrative—focus on items that advance the story or provide character development opportunities rather than just increasing power levels. For instance, a magical artifact might reveal a hidden lineage or unlock a new quest.
When distributing loot, consider various methods to ensure fairness and enhance player engagement. You might split the loot evenly, create a party chest for shared resources, or tailor rewards to individual characters based on their contributions. A quick fairness check can help you decide who gets specific items—ask yourself who last used a similar item or who might benefit most from a particular reward. This approach not only keeps players invested but also encourages teamwork.
Converting Digital Loot to Printable Handouts
Transforming digital loot into physical handouts can bring an exciting tactile element to your sessions. Start by using a parchment-style PNG background for your handouts. Add text in a word processor or graphic design software, ensuring you export the final product at 300 DPI (dots per inch) for high-quality printing. This resolution is essential for clear, readable handouts that players will enjoy.
For batch creation, consider using mail-merge features in software like Microsoft Word or design templates in Photoshop. This allows you to overlay text on a PNG background for multiple handouts in one go. Be sure to test the legibility of your fonts, especially if they will be printed in smaller sizes. You want your players to be able to read the handouts easily without straining their eyes.
10. Session-Day Setup & Execution
Pre-Session Checklist (3–6 Step Preparation Before Players Arrive)
Proper preparation on session day can set the tone for a smooth and enjoyable gaming experience. Start with a brief review of your last session notes to remind yourself of key plot points and player actions. Next, set a strong opening scene that hooks your players right from the start. Load your maps and tokens into the VTT, ensuring everything is in place for a seamless transition into gameplay. Don’t forget to check your macros (automated commands in VTT) to ensure they function as expected and prepare any handouts that players will need.
I recommend establishing a timed routine to keep your setup efficient. For instance, allocate specific time slots for each task: 30 minutes before the session, load the VTT; 15 minutes for audio checks; and 5 minutes to have initiative cards ready. This structured approach will minimize last-minute scrambling and help you start the session on time.
Mid-Session Notes, Tracking Initiative, and Pacing Adjustments
During your session, keeping track of initiative and pacing is crucial for maintaining engagement. Use a simple mid-session log to document the current initiative order, resource statuses (like player health points), and pacing notes (whether you’re on schedule or falling behind). This log will help you make informed decisions about how to adjust the flow of the game if needed.
If you find that the pacing is off, don’t hesitate to make quick adjustments. For example, if a combat encounter is dragging on, consider introducing new enemies or environmental hazards to quicken the pace. You could also log any changes you make during the session to ensure you can refer back to them for future balancing. This practice not only helps you stay organized but also allows you to refine your encounter design over time.
11. Automation, Macros & Scripting for Faster Play
Common Macros (Initiative, Damage, Skill Checks) and Where to Store Them

To streamline your gameplay, using macros (small scripts that automate tasks in your Virtual Tabletop, or VTT) can significantly reduce the time spent on bookkeeping. Common macros include those for tracking initiative, applying damage, and rolling skill checks. Store these macros in your VTT’s compendium or a designated macro library to ensure they’re easily accessible during your sessions.
For instance, you might create a macro named `macro_initiative_roll` that automatically rolls for initiative for all players and enemies. This saves time during combat setup. Similarly, `macro_apply_damage` can be used to quickly apply damage to characters or creatures. Keeping a README file documenting what each macro does can also help you remember their functions, especially after updates or changes.
Using Automation to Reduce Bookkeeping
Automation can be a game-changer for reducing the tedious aspects of session prep and execution. You can automate mundane tasks like tracking experience points (XP), hit points (HP), and initiative order, allowing you to focus more on storytelling and player engagement. For example, a macro that automatically applies damage and logs it can be invaluable, helping you maintain the flow of the game without frequent interruptions.
However, it’s crucial to strike a balance with automation. While it can enhance efficiency, it shouldn’t eliminate player agency or decision-making. Use automation primarily for bookkeeping tasks, such as logging loot distribution or tracking character conditions. Regularly auditing your automation to ensure it aligns with your house rules is a good practice, especially following updates to your VTT.
12. Archiving, Feedback and Follow-Up
Post-Session Notes and Campaign Logs
After each session, it’s essential to take notes on what happened, the resources spent, NPC changes, and any secrets revealed. Store these notes in your session folder and update the overall campaign state. This not only helps you remember details for future sessions but also allows you to track the progression of your story and player interactions over time.
A simple format for your post-session notes could include an outline of the session’s events, updates on NPCs, and any adjustments made to encounters. For instance, if a particular encounter was too easy or too hard, note that down for future reference. This practice not only aids your prep for the next session but also serves as a valuable resource for evaluating the overall campaign direction.
Organizing Snapshots, Maps, and Handouts for Reuse
Keeping your assets organized is key to efficient session prep. Store your master files (like PSD or Procreate files), export variants, and handout PDFs in clearly labeled session folders. This organization will make it easy for you to find what you need when preparing for future sessions.
For example, you might create a folder structure that includes subfolders for maps, NPCs, and handouts, ensuring that each asset is easy to locate. You can also establish a versioning policy, tagging files with their session number and usage notes. This way, you can quickly reference which maps or handouts were used in previous sessions, streamlining your prep process.
13. Integrating Purchased Assets (Etsy Bundles and Packs)
Using the Whole Shop Bundle in Prep: Three Concrete Use Cases
The GM Craft Tavern offers excellent asset bundles that can save you hours of prep time. When you purchase a bundle, think of it as a library of resources. For instance, you might use the Whole Shop Bundle to quickly find tavern maps, undead tokens, and parchment backgrounds for your campaign. This approach minimizes the time spent hunting for assets and allows you to focus on crafting engaging narratives.
Here are three concrete use cases for utilizing these bundles:
- Campaign Hub Engine: Select five recurring hub maps and ten NPC portraits from the bundle to anchor every city visit. This consistency enhances immersion and aids player recall.
- Heist Toolkit: Preselect manor/vault maps, eight clue handouts, and token sets for quick heists across multiple towns, streamlining your prep for these exciting scenarios.
- Exploration Pack: Choose twenty wilderness and dungeon tiles to create random encounters and travel vignettes. Tag these by biome and difficulty to easily access them when needed.
How to Import Etsy Battlemaps/Tokens into VTTs and Print Physical Handouts
Integrating purchased assets from Etsy into your gameplay can enhance your sessions significantly. Start by unzipping the files and conducting a quick audit to check filenames and resolutions. This step ensures that you have everything in order before you begin importing them into your VTT.
Here’s a streamlined process for importing and preparing your assets:
- Unzip and Audit: Check that all files are named correctly and that their resolutions are suitable for your VTT.
- Batch-Convert Tokens: If necessary, convert token formats to PNG at 256/280 px to ensure transparency and proper sizing.
- Organize Maps: Place your chosen maps into the appropriate campaign folder, naming them descriptively (e.g., `_
- Set Up the VTT: In your VTT, configure the scene size and pixels-per-grid, aligning the grid to your map features. Save a thumbnail for easy identification.
- Prepare Handouts: For printed handouts, overlay text or clues on a parchment PNG, export it at 300 DPI, and store it in the designated handout folder.
14. Sample File/Folder Naming Conventions & Templates
Example Folder Structure for Campaigns and One-Shots
A well-organized folder structure is crucial for efficient campaign management. I recommend setting up a hierarchy that allows you to find what you need quickly, reducing prep time. Here’s a sample folder structure you can adopt:
/Campaigns/C01/
  ├── 01_Story_Arc_Notes
  ├── 02_Sessions/
  │   ├── S01_Date_Name
  │   └── S02_Date_Name
  ├── 03_Maps/
  │   ├── Battle/
  │   ├── Regional/
  │   └── Dungeons/
  ├── 04_NPCs/
  │   ├── Allies/
  │   └── Villains/
  ├── 05_Loot_Tables/
  ├── 06_Handouts/
  └── 07_VTT_Assets/
      ├── Tokens/
      └── Battlemaps/
This structure allows you to categorize your materials effectively, making retrieval straightforward during prep sessions.
File Naming Examples and Versioning
Consistent naming conventions will help you and your players recognize and locate files easily. Here are some recommended templates for various types of assets:
- Map: `C01_S05___px_v1.jpg`
- Token: `C01_Token___<280px>_v1.png`
- Handout: `S05_Handout_
_A4_v1.pdf`
Implementing versioning policies is also essential. Increment the version number for edits, and maintain a master source file (like PSD or Procreate) alongside exported versions. Tagging changes in an index file can help you keep track of the evolution of your campaign assets.
15. Resources & Complementary Tools (Detailed List with URLs)
How to Choose the Right Resource for Your Workflow
Selecting the right tools for your dungeon master (DM) workflow can make all the difference in your session prep. Start by identifying your needs: do you require automation (look to Foundry), accessibility (Roll20), or fast map creation (Inkarnate)? Asset bundles can also replace the time spent hunting for resources; aim to curate a small subset that meets your specific requirements.
For example, if you find yourself frequently needing quick maps, opt for a tool like Inkarnate. If you need deeper automation for complex campaigns, Foundry might be the better choice. A useful decision checklist could include identifying three must-have features for your sessions, testing each tool for a single session, and selecting the simplest tool that meets your needs.
Short Onboarding Steps for Each Recommended Tool
Getting started with new tools can feel daunting, but breaking it down into manageable steps can help. Here’s how to quickly onboard two popular tools:
Foundry:
- Install the host application.
- Create your world.
- Import a compendium skeleton to organize your assets.
- Test dynamic lighting features.
- Add one macro to get familiar with automation.
Procreate:
- Import a brush kit tailored for fantasy maps.
- Set your canvas size according to your grid preset.
- Save your project as a PSD for future edits.
- Export JPG/PNG variants for use in your VTT.
- Test your brushes to ensure they work as expected.
By following these steps, you can quickly become proficient with your tools, allowing for a smoother prep experience.
Fox’s Take
In conclusion, effective dungeon master session prep is all about structure, creativity, and adaptation. By implementing the tools and workflows discussed, you can streamline your preparation process and focus on delivering an engaging narrative for your players. Remember to regularly evaluate your sessions and gather feedback to refine your approach. Now, take these insights and start crafting your next adventure—your players are waiting for an experience they’ll never forget!
FAQ
How much time should I spend preparing a typical 3–4 hour session?
Aim for 3-5 hours of prep, covering scenes, maps, and resources.
What file formats and resolutions should I use for battlemaps and tokens?
Use JPG/PNG at 70-140 px per grid for VTTs, 300 DPI for print.
How can I quickly rebalance an encounter mid-session?
Assess by round two; adjust HP or add minions to maintain balance.
Is it worth buying large asset bundles like the Whole Shop Bundle for prep?
Yes, they save time and provide a variety of essential resources.
What are the essential macros every DM should have in their VTT?
Track initiative, apply damage, roll skill checks, and manage loot.
Continue reading
- How to Save Time When Organizing DnD Sessions: Practical Systems, Tools & Templates
Save time organizing DnD sessions with proven workflows, templates, tools and ready-made maps you can adapt fast. - How to Become a Digital Dungeon Master (Online & VTT Guide)
How to Become a Digital Dungeon Master — step-by-step VTT setup, tools, mapping, tokens and session workflows for running online RPGs.