
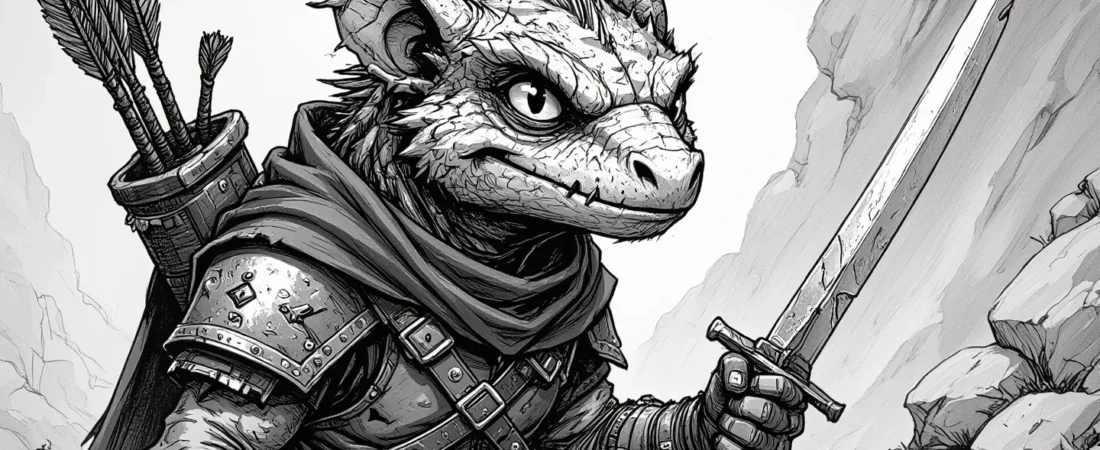
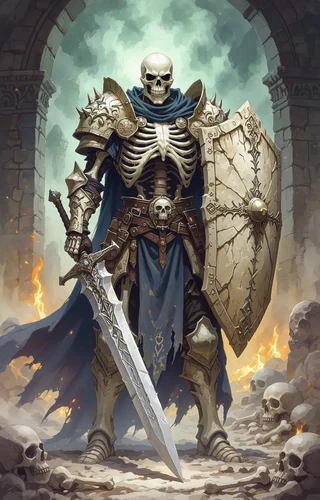
Creating round VTT tokens can significantly enhance your gaming experience, making it easier for players to recognize their characters and maintain immersion during your sessions. If you’ve ever struggled with square tokens that clutter the battlefield or make it hard to identify characters, you’re in the right place! In this guide, I’ll walk you through the steps to create stunning round VTT tokens, including tips for animated borders and portraits, using tools like GM Craft Tavern and rpgbot on Discord.
What you’ll learn in this article
- 🎲1Understand the importance of using round VTT tokens for better gameplay and immersion in games like DnD and Foundry.
- ✅2Discover various use cases for round tokens, including PCs, NPCs, monsters, and props, to enhance your RPG experience.
- 🔎3Learn the recommended token formats, specifications, and file types to ensure compatibility across platforms like Roll20 and Tabletop Simulator.
- 🧙4♂️ Explore popular token creation tools and websites, such as GM Craft Tavern and TokenTool, to streamline your design process.
- 🛠5️ Follow step-by-step procedures to create animated round tokens, from generating portraits to adding borders using rpgbot on Discord.
- 📂6Get practical tips for managing and organizing your token library effectively, including folder structures and naming conventions.
- 🎲7Creating animated borders via Discord/rpgbot and importing them
- 🎲8End-to-end procedure: make an animated round token (3–6 steps)
- 🎲9Alternative workflows and when to use them
- 🎲11Batch creation and automation techniques
- 🎲12Managing and organizing token libraries
- 🎲13Legal, attribution and asset licensing best practices
- 🎲14Troubleshooting common issues
- 🎲15Examples, presets and naming conventions
- 🎲16Resources & complementary tools (name, description, why useful, URL)
- 🎲17Appendix: sample commands, short procedures and quick references
1. Why round VTT tokens matter (use, readability, immersion)
Round VTT tokens are essential for enhancing your gameplay experience. They not only occupy grid cells more cleanly but also allow for dynamic rings and status markers to be displayed without the overlap issues that square tokens often create. This means that when you’re in the heat of battle, your players can quickly identify their characters and targets, leading to faster decision-making and smoother gameplay. Players and GMs alike have noted that using round tokens significantly improves session speed and clarity, making it easier to keep the game flowing.
Moreover, round tokens focus the viewer’s attention on the character’s portrait or face, which enhances player recognition and immersion. When players see their characters represented in a visually appealing way, it adds a layer of emotional engagement to the game. For example, adding subtle animations like breathing or blinking can make NPCs feel more alive, which enhances the overall atmosphere of your RPG sessions.
1.1 Use cases: PCs, NPCs, monsters, props
In the world of tabletop role-playing games (RPGs), round tokens serve multiple purposes. They can represent player characters (PCs), non-player characters (NPCs), monsters, and even props or stationary objects within the game world. Different sizes can be used to indicate the scale of creatures; for instance, a medium-sized token might be 400×400 pixels, while a huge creature could be 800×800 pixels. This visual hierarchy helps players quickly grasp the situation on the battlefield.
You can also get creative with how you use these tokens. For example, bosses can have animated tokens that change color or pulse to indicate their status, while props like a burning brazier can be represented with animated tokens to signal interactivity. To keep your token library organized, I recommend establishing a naming convention based on their use case, such as “Ally,” “Hostile,” or “Prop.” This will make it easier to manage your assets, especially when you need to create or find them quickly during a session.
1.2 Visual clarity: why round shapes work on grid and hex maps
Round tokens are particularly effective on both grid and hex maps because they reduce corner overlap, allowing for a more precise representation of a character’s position. On square grids, round tokens fit neatly within each cell, while on hex grids, they help avoid misinterpretation of positioning that can happen with cornered shapes. This is crucial for maintaining the integrity of your game mechanics, especially during combat scenarios where positioning matters.
To illustrate this, consider a crowded encounter where multiple tokens are placed closely together. Round tokens enhance visibility and clarity, making it easier for players to see where their characters are located without visual clutter. You might even want to conduct a simple visual test by comparing screenshots of crowded encounters using round tokens versus square tokens. The difference in clarity can be significant!
1.3 Accessibility and color/contrast considerations
When designing your round VTT tokens, accessibility should be a top priority. High-contrast borders and color-coding for different statuses can greatly assist players with visual impairments. For example, using bright colors like teal for allies and red for enemies can make it easier for everyone to quickly identify friend from foe. However, avoid using low-contrast tints or subtle hue changes that may not be visible to color-blind players.
Furthermore, consider pairing colors with iconography for even better accessibility. For instance, using dots or bars alongside color indicators can help ensure that all players, including those who are color-blind, can understand the status of each token. Incorporating these design elements not only makes your game more inclusive but also enriches the overall experience for all players involved.
2. Token formats, specs and file types every GM must know
Understanding the right formats and specifications for your tokens is crucial for ensuring compatibility across various virtual tabletop (VTT) platforms. The recommended base dimensions for medium tokens are typically 400×400 pixels, scaling up for larger creatures (e.g., 800×800 pixels for huge tokens). Using PNG format for static tokens is advisable because it supports full alpha transparency, allowing for clean edges without backgrounds. For animated tokens, WebM is preferred due to its smaller file sizes and smoother animations.
When creating your tokens, aim for an inner circle of approximately 300×300 pixels within the 400×400 canvas to avoid cropping issues during gameplay. This ensures that the character’s face remains visible and recognizable. Additionally, keep in mind that DPI (dots per inch) is irrelevant for screen-based assets; pixel dimensions are what matter.
2.1 Recommended dimensions and resolutions (example presets)
When creating your VTT tokens, it’s essential to have a set of recommended dimensions and resolutions that you can rely on. Here are some example presets you can use:
| Token Size | Resolution | Recommended Use |
|---|---|---|
| Medium | 400×400 px | Standard characters |
| Large | 800×800 px | Boss characters |
| Huge | 1024×1024 px | Special encounters |
| Small | 256×256 px | Minions or props |
Using these presets will help you maintain consistency across your tokens and ensure they fit well within the grid or hex maps you are using. For larger encounters, consider using the “battle pack” preset of 512 px WebM tokens to save bandwidth without sacrificing quality or performance.
2.2 File formats: PNG, GIF, APNG, WebM — pros and cons
Choosing the correct file format for your tokens is vital for ensuring they function correctly within your VTT. PNG is the go-to format for static tokens because it is lossless and supports full alpha channels (transparency). On the other hand, for animated tokens, GIF and WebM are commonly used. While GIFs can be larger and may stutter at high frame rates, WebM typically offers a better size-to-quality ratio, making it the preferred choice for animated tokens.
If you’re considering APNG (animated PNG), be aware that while it provides lossless animation, it has limited support across various platforms. It’s essential to check the compatibility of these formats with your chosen VTT—Roll20, for example, may prefer GIFs or have size limits for animated tokens, while Foundry is more flexible with WebM.
2.3 Transparency, alpha channels and color profiles
To ensure your tokens look clean and professional, it’s crucial to use the right transparency settings and color profiles. For static tokens, a 32-bit PNG with an alpha channel is ideal, as it allows for true transparency without any background fill. This is especially important for round tokens, as jagged edges can detract from their appearance.
When exporting your tokens, stick to the standard sRGB color profile to avoid any color shifts across different platforms. Exotic color profiles can lead to inconsistencies in how colors are rendered on various screens. Additionally, a feather mask (1-2 pixels) can help to avoid jagged or aliased edges, ensuring that your tokens have a smooth appearance.
3. Quick compatibility table for major VTTs

When creating tokens, it’s essential to understand how different VTTs handle file formats and specifications. Here’s a quick compatibility overview:
| VTT | Supported Formats | File Size Limits | Recommended Formats |
|---|---|---|---|
| Foundry | PNG/GIF/WebM | Flexible | WebM preferred |
| Roll20 | PNG/GIF | <5 MB | GIF or WebM |
| Fantasy Grounds | PNG/GIF | Varies | PNG fallback recommended |
| Tabletop Simulator | PNG/GIF | Varies | 512×512 for performance |
Each VTT has its quirks, so it’s crucial to familiarize yourself with their specific requirements. For example, Foundry allows for dynamic rings and works well with WebM animations, while Roll20 might require you to downsample GIFs to meet size limitations. Testing your tokens in a private scene is always a good idea before the actual game session.
3.1 Foundry VTT: recommended formats and limits
For Foundry VTT, you have a lot of flexibility in terms of formats. It accepts PNG, GIF, and WebM, with the latter being the preferred option for animated tokens due to its smaller file size and smoother animations. When uploading tokens, set the token scale to match the grid cells to ensure accuracy during gameplay.
To optimize your tokens for Foundry, make sure your images are around 400×400 pixels and adjust the token width and height to correspond to one grid unit. Also, enable dynamic rings to enhance gameplay mechanics. Remember to test your tokens in a private scene to confirm that they display correctly.
3.2 Roll20: token sizes, animated GIF support and workarounds
In Roll20, animated GIFs and PNGs are supported, but you need to be cautious about file size and frame rates. Aim to keep your animated files under 5 MB to ensure they upload successfully. If you find that your GIFs stutter at higher frame rates, consider downsampling them to around 12 FPS for smoother playback.
If you encounter issues with animated uploads, a workaround is to convert your GIFs or MP4s to optimized WebM files and use Roll20’s image hosting where allowed. For Plus and Pro users, API scripts can help automate the resizing of tokens upon upload, which can save time during session preparation.
3.3 Fantasy Grounds & Tabletop Simulator: guidelines
Fantasy Grounds typically prefers GIF and PNG formats for tokens, so make sure to set your inner circle appropriately (around 300 pixels) to maintain visual clarity. It’s essential to include a static PNG alongside any animated formats to maximize compatibility across different clients.
For Tabletop Simulator, using 512×512 textures is recommended to preserve performance during gameplay. Additionally, consider combining tokens into Unity-friendly sheets for heavy scenes, as this can help manage performance and loading times.
4. Overview of popular token tools & websites
When it comes to creating and managing your tokens, various tools can help streamline the process. Foundry Tokenizer (vtta-tokenizer) is an excellent in-VTT tool for applying masks and effects to your tokens. For quick borders and static overlays, TokenTool and TokenStamp can be valuable resources. If you need full control for complex layering or animated frame exports, Photoshop and GIMP are your best bets.
Marketplaces like Etsy offer large libraries of pre-made assets, including token packs that can save you time. For example, you might find a bundle with 6500 token borders or 8000 D&D-compatible tokens that can quickly enhance your library without requiring you to create everything from scratch.
4.1 TokenTool, RollAdvantage tokenizers, Photoshop/GIMP workflows
TokenTool and similar utilities are fantastic for adding borders and preparing static masks quickly. If you require more control over your animations, Photoshop and GIMP are better suited for manual compositing and animation export. You can also use batch scripts to automate some of these processes, which can save you a lot of time when dealing with large libraries of tokens.
For example, you could create a Photoshop action that automatically resizes and saves your tokens in the correct format, allowing you to focus on the creative aspects rather than repetitive tasks. This approach can significantly enhance your productivity, especially if you plan to create a large number of tokens for a campaign.
4.2 Token asset marketplaces (Etsy token packs) and when to buy
Etsy is a treasure trove for token, border, and map packs. You can find everything from 6500 token borders to multi-thousand map/token bundles that can quickly enhance your library. When considering a purchase, always check the licensing to ensure that you can use the assets for your intended purpose, especially if you plan to monetize your games.
Buying pre-made assets can be a great option when you need to scale your library quickly or lack the time to create everything yourself. However, if you have specific artistic needs or want unique portraits, it may be worth investing the time to create your tokens from scratch.
4.3 Why GM Craft Tavern stands out for animated tokens
GM Craft Tavern is particularly notable for its ability to create animated portraits and borders simultaneously. This free online editor allows you to easily compose animated tokens and export them in formats optimized for VTT use. Its user-friendly interface scores high for ease-of-use, making it accessible for both beginners and experienced GMs.
One of the standout features of GM Craft Tavern is its ability to combine animated portraits with animated borders, which can enhance visual storytelling in your game. However, be aware of occasional upload glitches or file-size limits—pre-compressing your tokens can help mitigate these issues.
5. Deep dive: GM Craft Tavern Token Maker (focus)
The GM Craft Tavern Token Maker is a fantastic tool that allows you to create animated tokens that are ready for use in your VTT. This tool lets you handle both animated portraits and borders simultaneously, providing an easy-to-use interface that simplifies the process. To get started, you simply upload your portrait or video, choose a border, and then auto-align everything before exporting.
For example, a typical workflow would involve uploading your animated portrait, selecting an animated border that matches your character’s theme, adjusting the size and FPS (frames per second), and then exporting both a WebM (for animation) and a PNG (for static fallback). This streamlined process allows you to create visually appealing tokens in a fraction of the time it would take using traditional software.
5.1 Feature list: animated portraits, animated borders, export options
The GM Craft Tavern Token Maker boasts several features that make it stand out. You can import animated portraits, select from a variety of animated borders, and adjust alignment and scale with sliders. The tool also offers multiple export options, including WebM, GIF, and PNG, ensuring your tokens are compatible with various VTT platforms.
In addition to these features, GM Craft Tavern has a library of over 200 frames for animations, allowing you to create dynamic and engaging tokens. You can also customize your borders by importing your designs, which can add a personal touch to your tokens.
5.2 Step-by-step: using GM Craft Tavern Token Maker (3–6 steps)
Using the GM Craft Tavern Token Maker is straightforward and user-friendly. Here’s a simple step-by-step guide to get you started:
- Upload your portrait: Start by uploading your animated portrait that you want to use for the token.
- Choose a border: Select an animated border from the available options that complements your character.
- Set size and FPS: Adjust the size and frames per second settings to match your desired output.
- Center and scale: Use the alignment tools to ensure your portrait is centered within the border.
- Export your token: Finally, export your token in both WebM and PNG formats for maximum compatibility.
By following these steps, you can create visually stunning tokens in just a few minutes, making GM Craft Tavern an invaluable tool for any game master.
5.3 Examples of token styles and presets available
When using GM Craft Tavern, you’ll find a variety of token styles and presets that can enhance your game. For instance, you can create a pulsing rune border combined with a breathing portrait for a magic user, or an enemy boss token that features a pulsing red frame to indicate its threat level.
Here are three examples of token styles you might consider:
- Pulsing Rune Border + Breathing Portrait: Ideal for spellcasters or magical creatures, this combination adds a dynamic feel to your tokens.
- Enemy Boss Pulsing Frame: A red pulsing frame can indicate a boss character, enhancing its presence on the battlefield.
- Ally with Teal Border: A static token with a teal border can represent allies, making it easy for players to identify their characters.
For large battles, opt for subtle loop animations to avoid lag during gameplay, ensuring that the experience remains smooth for all players involved.
6. Creating and animating portraits on Discord with Homebrew rpgbot
Using rpgbot on Discord is a practical way to generate and animate portraits for your tokens. The bot allows you to create square aspect portraits using commands, making it easy to produce high-quality images for your VTT. The workflow is straightforward: generate your portrait, add animation effects, and export in the desired format.
Here’s a simple step-by-step process to get you started with rpgbot:
- Generate a portrait: Use the command `/imagine prompt:”[character description]” –ar 1:1` to create a square portrait of your character.
- Animate the portrait: Use the command `/animate input:[URL] style:breathing idle loop frames:[number]` to add animation effects like breathing or idle movements.
- Export the image: Save the generated image as a PNG for static use or as a WebM for animated versions.
By following these steps, you can create visually appealing portraits that enhance your tokens and improve your overall gaming experience.
6.1 Setting up rpgbot on a Discord server (permissions, channels)
To get started with rpgbot on your Discord server, you first need to ensure that you have the right permissions in place. Invite the bot to your server and make sure it has permissions to send messages and attach files. I recommend creating a dedicated channel for generating images, like “#token-gen,” to keep things organized and manage the bot’s rate limits effectively. This will help prevent any overload that can occur with too many commands being sent at once.
Once your channel is set up, you can start generating tokens. Make sure to use clear naming conventions for your outputs, such as “Token_Elf_Warrior.png,” which makes it easy to identify and organize in your library. This practice will save you time when you need to pull assets for your game sessions.
6.2 Example rpgbot commands to generate portraits and animate them
When you’re ready to generate your token portraits using rpgbot, you’ll want to use specific commands to get the best results. For example, to create a portrait, you can use the command `/imagine prompt:”fantasy elf warrior portrait, detailed face, transparent background” –ar 1:1`. This command specifies that you want a 1:1 aspect ratio, which is crucial for tokens, as they are typically circular images.
To animate your portraits, you can follow up with the animation command. For instance, use `/animate input:[URL] style:breathing idle loop frames:12` to create an idle animation effect. This command will produce a looping animation that mimics breathing, making your token feel more alive on the battlefield.
6.3 Exporting portraits from Discord (best formats to use)
Once you’ve generated your portraits using rpgbot, the next step is exporting them in the right formats. I recommend saving your static portraits as PNG files, which maintain high quality and support transparent backgrounds. Animated portraits can be exported as WebM or MP4 files, as these formats provide smaller file sizes and smoother animations, which are ideal for use in Virtual Tabletop (VTT) environments.
To ensure compatibility with GM Craft Tavern and other VTTs, keep both WebM and PNG copies of your portraits. For instance, if you generated a portrait called “Elf_Warrior,” save it as “Elf_Warrior.png” for the static version and “Elf_Warrior.webm” for the animated version. This practice ensures that you have the right format for any situation.
7. Creating animated borders via Discord/rpgbot and importing them
Creating animated borders for your tokens can enhance their visual appeal and help convey important information, such as status effects or character types. To generate these borders using rpgbot, you can use a command like `/imagine prompt:”animated glowing rune circle border, transparent center” –ar 1:1`. This command will create a circular border that you can overlay on your portraits, giving them a more dynamic look.
Once you have your animated border, the next step is to import it into GM Craft Tavern. Make sure to maintain the transparency of the animated border by exporting it as a WebM or PNG file. When you upload the border, GM Craft Tavern will help you align it with your portrait automatically. This feature simplifies the process and ensures that your token looks polished and professional.
7.1 How to produce border animations with rpgbot: commands and tips
To produce effective border animations using rpgbot, start with a clear command that specifies what you want. For instance, you can use `/imagine prompt:”animated glowing rune border, transparent center” –ar 1:1`. This command will generate a border that matches the typical shape and look you want for your tokens.
When generating borders, it’s crucial to keep the frame count low, typically between 8-12 frames, to optimize file size while ensuring smooth animation. This balance helps maintain performance across your VTT while still providing a visually appealing effect. After creating your border, make sure to export it with the alpha channel preserved to maintain transparency.
7.2 Matching border animation frames to portrait frames
To achieve a seamless look for your tokens, it’s essential to match the frame rates of both your portrait and border animations. If your portrait is set at 12 frames per second (FPS), your border should also be set to the same FPS. This synchronization prevents visual drift and ensures that both animations flow smoothly together during gameplay.
To match the frame rates, you can export both assets at the same frame count or use a tool like ffmpeg to adjust one to match the other. For example, if your border animation is running at 15 FPS but your portrait is at 12 FPS, you can use ffmpeg to resample the border frames to align them. This will create a cohesive visual experience when displayed on your VTT.
7.3 Preparing border assets for GM Craft Tavern upload
When you’re ready to upload your border assets to GM Craft Tavern, ensure that the files are in the correct format and that transparency is preserved. You can upload animated borders as WebM or GIF files, or use PNG for static versions. It’s essential to name your files descriptively, such as “Rune_Border.webm,” so you can easily identify them later.
Before uploading, test your border by importing it into GM Craft Tavern to ensure it aligns well with your portrait. Use the preview feature to check for any misalignment issues. If you encounter problems, you may need to adjust the center of your portrait or the dimensions of your border to achieve the perfect fit.
8. End-to-end procedure: make an animated round token (3–6 steps)
Creating an animated round token is a straightforward process when you follow the right steps. Here’s a simple workflow you can use:
- Generate the Portrait: Use rpgbot to create your character portrait. For example, run the command `/imagine prompt:”fantasy knight portrait, detailed, transparent background” –ar 1:1`.
- Animate the Portrait: Animate the portrait with the command `/animate input:[URL] style:breathing idle loop frames:12`.
- Export the Portrait: Save your animated portrait as “Knight_Portrait.webm” and the static version as “Knight_Portrait.png.”
- Generate the Animated Border: Create a border using rpgbot with a command like `/imagine prompt:”animated glowing shield border, transparent center” –ar 1:1`.
- Upload to GM Craft Tavern: Upload both the portrait and the border to GM Craft Tavern, ensuring they align properly.
- Export the Final Token: Save the final token as “Knight_Token.webm” and “Knight_Token.png” for compatibility.
If your portrait is named “Knight_Portrait.webm,” your border could be “Shield_Border.webm,” and your final token should be named “Knight_Token.webm.”
8.1 Example workflow with exact sequence and file names
Let’s break down a specific example workflow for creating an animated round token:
- Generate the Portrait: Use `/imagine prompt:”fantasy wizard portrait, detailed, transparent background” –ar 1:1` to create a portrait.
- Animate the Portrait: Run `/animate input:[URL] style:breathing idle loop frames:12` to animate the wizard.
- Export the Portrait: Save it as “Wizard_Portrait.webm” and “Wizard_Portrait.png.”
- Create the Border: Generate a border with `/imagine prompt:”animated starry border, transparent center” –ar 1:1`.
- Upload to GM Craft Tavern: Import both “Wizard_Portrait.webm” and “Starry_Border.webm” into GM Craft Tavern.
- Export the Token: Save the final token as “Wizard_Token.webm” and “Wizard_Token.png” for compatibility.
By following this sequence, you ensure that all your assets are well-organized and easily identifiable for future sessions.
8.2 Quick checklist of settings to double-check before export
Before you export your animated token, it’s crucial to verify a few key settings to ensure everything is set up correctly. First, check the size of your assets to make sure they align with your VTT requirements, typically around 400×400 px for medium tokens. Next, confirm that the FPS is set appropriately—aim for 8-12 FPS for smooth animations.
Additionally, ensure that the alpha transparency is preserved in both your portrait and border files. This step is vital for maintaining the visual quality of your tokens on different maps. Lastly, verify that you have included a static PNG fallback alongside your animated WebM file to ensure compatibility across various VTT platforms.
9. Alternative workflows and when to use them
When creating round VTT tokens, you might find yourself needing to choose between different workflows based on your specific needs. If you want high-quality, custom tokens, manual compositing in Photoshop or GIMP is a great option. This method allows for fine-tuning and detailed animations but can be time-consuming. Alternatively, if you are looking for a quick solution, using tools like TokenTool for batch processing is a fantastic way to produce static tokens rapidly.
In scenarios where you have limited time but need a large volume of tokens, consider purchasing pre-made packs from marketplaces like Etsy. These packs often contain a wide variety of assets that can save you hours of creation time. However, always check the licensing terms to ensure they meet your needs, especially if you plan on using them commercially.
9.1 Photoshop/GIMP manual compositing and export to WebM/GIF
If you opt for manual compositing, Photoshop and GIMP are powerful tools for creating detailed and unique tokens. Start by layering your images to create the desired look. You can use masks to isolate parts of your portrait or border, allowing for more complex designs. Once your composition is complete, export your frames as PNG files to maintain quality.
After exporting your frames, you can use ffmpeg to compile them into an animated WebM or GIF. For example, use a command like `ffmpeg -i frame_%03d.png -c:v libvpx -pix_fmt yuva420p output.webm`. This command will create a smooth animation from your individual frames.
9.2 TokenTool or Batch scripts for static tokens
TokenTool is a fantastic resource for quickly creating static tokens with borders. Simply upload your images, select borders, and export them in bulk. This tool is especially useful when you need to create a large number of tokens with consistent styles and sizes.
For those familiar with scripting, batch scripts using tools like ImageMagick can automate the token creation process. For example, a simple script can resize and mask your images in a few steps, saving you time and ensuring consistency across your tokens. You might use a script like this:
for file in *.png; do
  convert "$file" -resize 400x400 -gravity center -background transparent -extent 400x400 "processed_$file"
done
Always run scripts on copies of your original files to avoid accidental loss of your assets.
9.3 Marketplaces and pre-made packs (when to buy)
Purchasing pre-made token packs can be a lifesaver, especially when time is of the essence. Marketplaces like Etsy offer a wide range of token assets, including animated and static options. When considering a purchase, check for licensing agreements to ensure you can use the tokens in your campaigns, particularly if you plan to monetize your content.
Buying packs is particularly advantageous for GMs who need a large volume of assets quickly. However, if you have specific visual requirements or want unique designs, creating your tokens may be the better route. Balance your budget against the time you have available; sometimes, investing in a quality pack can save you hours of work.
11. Batch creation and automation techniques
Using spreadsheets can be a game-changer for managing and creating tokens in bulk. By organizing your assets, sizes, tags, and outputs in a spreadsheet, you can automate the batch creation process, making it more efficient and consistent. For example, you might set up columns for `source_filename`, `target_size`, `fps` (frames per second), `border_template`, and `vtt_target`. This structure allows you to easily reference essential information while running batch scripts or automating workflows.
To create tokens using your spreadsheet, start by populating it with the necessary data. Once you have your filenames and specifications ready, you can connect it to a script that processes each row to generate your tokens. This not only saves time but also ensures that your naming conventions and metadata are consistent, reducing potential errors during the upload process. By using a CSV (Comma-Separated Values) export, you can feed this information directly into automation tools like ImageMagick or ffmpeg to create your tokens in bulk.
11.1 Naming conventions and metadata embedding
Establishing a clear naming convention is essential for maintaining an organized token library. A recommended pattern is `[Size]_[Type]_[Name]_[Status].[ext]`. For instance, you could name a medium-sized ally elf token as `Med_Ally_Elf_Warrior.webm`. This pattern helps ensure that you can quickly identify the purpose and size of each token at a glance.
In addition to naming conventions, consider incorporating tags for metadata, such as race, role, or campaign. This will enhance your ability to filter and search through your tokens efficiently. By combining a structured naming convention with effective tagging, you can streamline your token management process, making it much easier to locate the right assets when you need them.
11.2 Simple scripts and TokenTool batch exports (3–6 step example)
TokenTool is a great resource for batch exporting tokens. Here’s a simple example of how you can use it:
- Upload your images: Import all images that you want to convert into tokens.
- Select borders: Choose a border style for your tokens.
- Set dimensions: Specify the dimensions you want for your tokens.
- Export: Click the export button to generate all tokens in the selected format.
This workflow allows you to quickly create multiple tokens without having to adjust each one individually, saving you considerable time.
11.3 Using spreadsheets to drive batch token creation
Using spreadsheets can be a game-changer for managing and creating tokens in bulk. By organizing your assets, sizes, tags, and outputs in a spreadsheet, you can automate the batch creation process, making it more efficient and consistent. For example, you might set up columns for `source_filename`, `target_size`, `fps` (frames per second), `border_template`, and `vtt_target`. This structure allows you to easily reference essential information while running batch scripts or automating workflows.
To create tokens using your spreadsheet, start by populating it with the necessary data. Once you have your filenames and specifications ready, you can connect it to a script that processes each row to generate your tokens. This not only saves time but also ensures that your naming conventions and metadata are consistent, reducing potential errors during the upload process. By using a CSV (Comma-Separated Values) export, you can feed this information directly into automation tools like ImageMagick or ffmpeg to create your tokens in bulk.
12. Managing and organizing token libraries
Effective management of your token library is crucial for quick access and organization during game sessions. A well-structured folder system can significantly reduce the time spent searching for specific tokens. I recommend organizing your tokens by categories such as size (small, medium, large), type (animated vs. static), and campaign. For instance, you could create a folder structure like `Tokens/BySize/Medium/Allies/` and within that, further categorize by animated or static tokens. This makes it easy to find the right token when you need it.
Additionally, employing a tagging system within your library can enhance your organization. Using tools like Foundry Tagger can help you manage your tokens within virtual tabletops (VTTs) effectively. Tags can include information about the token’s role, race, or campaign, making it easier to filter and locate specific tokens when you’re in the heat of gameplay. Always remember to keep both static and animated versions side by side with matching filenames to ensure compatibility across different platforms.
12.1 Folder structure, tags, and versioning
Establishing a clear folder structure is essential for maintaining an organized token library. A recommended structure might look like this: `Tokens/BySize/Medium/Allies/Animated/`. This hierarchy allows you to quickly locate tokens based on size and type, ensuring that you’re not wasting precious time during your game sessions. Additionally, including a manifest file (a document that describes the contents of a folder) can provide details about your tokens, such as their usage rights and author information.
Versioning is another critical aspect of managing your token library. By including date codes in your filenames, such as `Tokens_2026-01.zip`, you can easily track updates and changes to your assets. This practice is particularly useful when collaborating with other Game Masters or artists, as it allows everyone to stay on the same page regarding the latest assets. Furthermore, maintaining a consistent naming convention will help you avoid confusion and ensure that everyone involved knows exactly what each file represents.
12.2 Backups, cloud sync, and VTT library uploads

Backing up your token library is essential to prevent data loss and ensure your assets are safe. I recommend using cloud storage solutions like Dropbox or Google Drive to sync your files automatically. This way, you’ll have access to your tokens from any device and a backup in case your local files become corrupted. Additionally, zipping your libraries into manageable files under 500 MB can make it easier to upload to VTTs and reduce the risk of upload errors.
When uploading to platforms like Foundry or Roll20, keep in mind the specific requirements and limitations of each VTT. For example, Foundry allows for a broader range of file types and sizes, while Roll20 often has stricter limits. Always prepare both static and animated versions of your tokens to maximize compatibility. This ensures that even if one format fails, you have a backup ready to go.
12.3 Sharing tokens with players and permission tips
When it comes to sharing tokens with your players, it’s essential to do so in a way that is both efficient and respectful of copyright laws. One effective method is to share your tokens via handouts or zipped libraries, ensuring that players only receive the necessary files without overwhelming them. When sharing, consider providing static PNGs rather than animated versions to reduce bandwidth usage and avoid unintentional spoilers during gameplay.
Additionally, always check the licensing terms of any assets you plan to share. For instance, if you purchased token packs from platforms like Etsy, ensure that you have the right to distribute those assets. A good practice is to remind players about the licensing terms and encourage them to purchase their own copies if they wish to use the tokens outside of your games. This not only protects you but also supports the artists and creators of the assets you love.
13. Legal, attribution and asset licensing best practices
Understanding the legal aspects of using tokens and assets is vital for any Game Master. Always distinguish between commercial assets (those that can be sold or used for profit) and free assets (those that are available for personal use). For instance, many token packs on Etsy offer commercial usage options, but you must verify these terms before monetizing any content. Ignoring these rules can lead to legal issues down the line, so it’s best to err on the side of caution.
Attribution is another critical component of using art assets. If you use someone else’s work, including AI-generated art, make sure to credit the creator appropriately. A simple attribution template could be: “Token art by [Author] / used under [license].” Additionally, it’s wise to keep purchase receipts and license documentation handy in case you need to verify your right to use and share these assets in the future. This not only protects you but also fosters respect within the creative community.
13.1 Commercial vs free assets, attribution examples
When navigating the world of token assets, it’s crucial to understand the differences between commercial and free assets. Commercial assets are those that can be used for profit, either through direct sales or by incorporating them into products that generate revenue. Free assets, on the other hand, are typically meant for personal use and may require attribution if you share them. For example, many Etsy token packs have specific licenses that allow for commercial usage, but you must carefully read and verify these terms before using them in your campaigns.
Attribution is a best practice that not only respects the creator’s rights but also enhances your reputation as a responsible GM. A simple attribution template could read: “Token art by [Author] / used under [license].” This can often be placed in a README file within your token library or included in handouts given to players. Additionally, consider storing your licensing documentation alongside your assets to streamline the process of verifying your rights to use these materials.
13.2 Best practices with AI-generated portraits and community rules
AI-generated art is becoming increasingly popular for creating tokens and assets, but it’s essential to use these tools responsibly. Many communities have specific rules regarding the use of AI-generated content, particularly when it comes to attribution and the portrayal of recognizable characters. For instance, if you generate a portrait using AI, you should indicate that it is AI-generated in the asset’s metadata. Additionally, be careful not to replicate trademarked characters or proprietary intellectual property in your prompts.
Creating a short internal policy for using AI-generated art can help you navigate these waters smoothly. This policy might include guidelines for obtaining consent from players if you’re using likenesses of them, ensuring that your creations remain respectful and compliant with community standards. Keeping a log of your prompts along with the generated images can also help track the provenance of your assets, which is especially useful if your community requires proof of originality.
14. Troubleshooting common issues
Even the most seasoned Game Masters can encounter issues with their tokens, but many of these problems can be resolved with a little troubleshooting. Common issues often include transparent edge aliasing, animations that fail to loop correctly, and border misalignment. A good first step is to check the transparency of your tokens to ensure that the alpha channel is functioning correctly. If you notice jagged edges, consider re-exporting your images with anti-aliasing settings enabled.
If your animations are not playing or exhibit frame jumps, the culprit may be incorrect loop metadata or mismatched frame rates. A quick solution is to re-encode your animated tokens using a tool like ffmpeg, setting the loop and FPS properly. Additionally, if you experience border misalignment, it might be due to the portrait not being centered correctly within the token. Ensuring that your portraits are consistently centered on a square canvas can help prevent this issue.
14.1 Transparent edges and anti-aliasing problems
Transparent edges and anti-aliasing problems are common issues that can detract from the visual quality of your tokens. These problems often arise when the mask edges are not properly anti-aliased, leading to jagged lines or unwanted artifacts around the token. To fix this, you can feather the mask by 1-2 pixels, which will soften the edges and help blend the token into various backgrounds seamlessly. Re-exporting your PNG with the alpha channel enabled is also crucial for maintaining transparency.
Testing your tokens in an editing tool like GIMP or Photoshop can help you identify these issues before uploading them to your VTT. By ensuring that your tokens have clean, anti-aliased edges, you can create a more polished and professional appearance for your assets, enhancing the overall gaming experience.
14.2 Animation not playing or frame jumps
Animation issues, such as animations not playing or experiencing frame jumps, can be frustrating. These problems are often caused by incorrect loop metadata, mismatched frames per second (FPS), or exceeding the file limits set by your VTT. To resolve these issues, you can re-encode your animated tokens using ffmpeg, ensuring that you set the loop and FPS parameters correctly. If your animations are too long, consider splitting them into shorter clips that can be looped effectively.
Testing your animations in a browser or directly within your VTT is a good practice. This allows you to confirm that the animations play smoothly and loop as intended. If you encounter any stuttering or playback issues, it may be necessary to adjust the FPS or trim the animation length to ensure optimal performance during gameplay.
14.3 Border misalignment and offset fixes
Border misalignment is a common issue when working with tokens, and it often results from the portrait being improperly centered within the token. To fix this, ensure that your portrait is centered on a square canvas, ideally with a 300-400 px inner circle visible. This will help ensure that the border aligns correctly with the portrait when combined in your VTT.
Using tools like GM Craft Tavern can also assist with aligning borders to your portraits. The auto-fit feature allows you to adjust the alignment of your token borders easily. If you notice any misalignment, you can use the nudge sliders in the tool to make fine adjustments until everything is perfectly aligned.
15. Examples, presets and naming conventions
Having a set of examples, presets, and naming conventions can greatly simplify the process of creating and organizing your tokens. For instance, you could use presets like `Combat Ally: 400×400 PNG with a teal border` or `Boss Animated: 800×800 WebM with a pulsing red rune border`. These examples not only provide a quick reference for what sizes and formats to use but also help ensure consistency across your token library.
When it comes to naming conventions, following a pattern like `[Size]_[Type]_[Name]_[Status].[ext]` can make it easier to manage your files. For example, a medium-sized ally elf token could be named `Med_Ally_Elf_Warrior.png`. This structure helps you quickly identify the type and purpose of each token, making it easier to locate them when needed.
15.1 Sample token presets (FPS, dimensions, file type)
Here are some useful sample token presets to kickstart your token creation process:
- Ally Medium Token: 400×400 PNG, 12 FPS
- Boss Animated Token: 800×800 WebM, 10 FPS
- Minion Pack: 512×512 WebM, 8 FPS
- Encounter Pack: 512 px WebM at 8 FPS for mobs to save bandwidth.
By using these presets, you can quickly export tokens that are optimized for different scenarios, ensuring that you have the right assets ready for your game sessions.
15.2 Suggested file naming patterns and tag usage
Establishing a consistent file naming pattern is crucial for maintaining an organized token library. A recommended pattern is `[Size]_[Type]_[Name]_[Status].[ext]`. For instance, you could name a medium-sized ally elf token as `Med_Ally_Elf_Warrior.webm`. This pattern helps ensure that you can quickly identify the purpose and size of each token at a glance.
In addition to naming conventions, consider incorporating tags for metadata, such as race, role, or campaign. This will enhance your ability to filter and search through your tokens efficiently. By combining a structured naming convention with effective tagging, you can streamline your token management process, making it much easier to locate the right assets when you need them.
16. Resources & complementary tools (name, description, why useful, URL)
Here are some valuable resources and tools to assist you in creating and managing your tokens:
- GM Craft Tavern Token Maker: A free online editor for creating animated portraits and borders. It’s user-friendly and optimized for VTTs. Visit GM Craft Tavern
- Foundry vtta-tokenizer: This tool allows for in-VTT masking and effects, making it easier to create polished tokens directly within Foundry. Check out vtta-tokenizer
- Etsy Token Packs: Explore various token packs available for purchase, providing a wide range of tokens and borders. Some recommended listings include:
By utilizing these resources, you can either create custom tokens or purchase pre-made ones to save time and enhance your gameplay experience.
17. Appendix: sample commands, short procedures and quick references
Here are some sample commands and procedures to help you get started with your token creation:
- ffmpeg Command for WebM Encoding:
ffmpeg -i input.mp4 -c:v libvpx -b:v 1M -pix_fmt yuva420p output.webm - ImageMagick Loop Example:
for i in *.png; do convert "$i" -resize 400x400 "${i%.png}_token.png"; done - rpgbot Command Example:
/imagine prompt:"fantasy elf warrior portrait, detailed face, transparent background" --ar 1:1/animate input:[URL] style:breathing idle loop frames:12
These commands will help you with encoding, processing, and generating your tokens from various sources. By following these examples, you can streamline your workflow and ensure that your tokens are ready for use in your VTT.
Fox’s take
By following the steps outlined in this guide, you should now feel confident in creating your own round VTT tokens, complete with animations and clear visuals for your players. Remember to experiment with different tools and formats to find what works best for your game. Whether you’re using GM Craft Tavern for animated tokens or rpgbot for generating portraits, the right resources will elevate your gameplay. Now, it’s time to dive in and start crafting those tokens for your next session!
FAQ
How do I make a round animated token compatible with Foundry VTT?
Design your token at 400×400 pixels, export as WebM, and test in Foundry.
Can I create animated portraits and borders using only Discord and GM Craft Tavern?
Yes, generate portraits with rpgbot and animate them in GM Craft Tavern.
What file format and frame rate should I use to keep animated tokens small?
Use WebM format and aim for 8-12 FPS for smooth playback.
How do I fix transparent edge or halo issues around round tokens?
Use 32-bit PNG with alpha channel and apply a feather mask for smooth edges.
Is it legal to use AI-generated portraits or purchased token packs in my games?
Yes, as long as you follow licensing agreements and provide proper attribution.
Sources
- app.roll20.net
- discord.gg
- foundryvtt.com
- foundryvtt.com
- gmcrafttavern.com
- gmcrafttavern.com
- gmcrafttavern.com
- gmcrafttavern.com
- gmcrafttavern.com
- gmcrafttavern.com[3]
- rpgs.wtf
- theangrygm.com
- thefatefulforce.com
- enworld.org
- etsy.com
- etsy.com
- etsy.com
- etsy.com
- etsy.com
- etsy.com
- etsy.com
- reviews.io
- reviews.io
- youtube.com
- youtube.com
- youtube.com