

Creating your own DnD character can feel overwhelming, especially with all the choices and rules involved. But don’t worry! I’m here to guide you through the process step-by-step, helping you build a character that reflects your imagination while ensuring it’s both fun and playable. Whether you’re eager to choose a race, class, or even name your character, I’ve got practical tips and tools to make it easier for you. Let’s dive in and bring your character to life!
What you’ll learn in this article
- 🎲1Choose your edition and understand the ruleset.
- 🎲2Start with a concept — theme, role, and mechanical intent.
- 🎲3From concept to name — using generators and naming tips.
- 🎲4Choose race/ancestry — mechanical benefits and roleplay hooks.
- 🎲5Pick a class and subclass — playstyle and responsibilities.
- 🎲6Set ability scores — methods and worked examples.
- 🎲7Backgrounds, proficiencies, and personality hooks.
- 🎲8Equipment, spells, and build-focused loadouts.
- 🎲9Level progression, feats, and multiclassing decisions.
- 🎲10Visual design & character art — creating a look.
- 🎲11Build the character sheet: step-by-step procedure.
- 🎲12Tools & platforms for managing characters (D&D Beyond, VTTs, apps).
- 🎲13Automation, macros, and VTT productivity (save time at the table).
- 🎲14File management, version control, and campaign notes.
- 🎲15Playtesting, balancing, and iterating on your character.
1. Choose your edition and understand the ruleset (Which D&D version — why it matters)
When starting your journey to create a DnD character, the first step is to choose which edition of Dungeons & Dragons you will be using. The most current and popular edition is D&D 5E (5th Edition), which has a streamlined ruleset that makes character creation more accessible for beginners. Understanding your chosen edition is crucial because it dictates which races, classes, and rules are available to you. If you’re joining an existing group, be sure to confirm which edition they are using, as well as any house rules (custom rules set by the Dungeon Master) that may apply.
Tip: Before you start building your character, ask your DM these five questions to clarify the rules:
- Which edition are we playing?
- What sourcebooks are allowed?
- What is the starting level?
- What method will we use for ability scores (Standard Array, Point Buy, or Rolling)?
- Are there any banned combos or classes?
Why edition choice changes character creation
The edition you choose significantly affects your character creation process. For instance, in D&D 5E, you have access to a variety of subclasses that can change your character’s abilities and playstyle as you progress. Different editions may offer unique races or classes that can drastically alter how you build your character. For example, if you choose an edition that allows for a variant human feature, you could start with a feat (an ability that grants your character a special capability), which can drastically change your early game strategy.
Example: In 5E, if you select a Druid class, you can choose a Circle of the Moon subclass at level 2, allowing you to transform into more powerful beasts. In a different edition, that option may not be available, forcing you to adapt your character’s concept.
Quick rule differences that affect builds (5 key points)
Here are five quick rule differences that can impact your character builds:
- Ability Score Methods: Different editions may allow different methods for calculating ability scores. For example, 5E allows for Standard Array, Point Buy, and Rolling methods.
- Racial Bonuses: Each edition might have different bonuses for races. In 5E, a Tiefling gains a +2 to Charisma and a +1 to Intelligence, while another edition might assign different bonuses.
- Subclass Availability: Some editions grant subclasses at different levels, which can influence your character’s development path.
- Hit Die and HP Scaling: The way hit points are calculated and scaled can vary, affecting your character’s survivability.
- Proficiency Bonus Progression: In 5E, proficiency bonuses increase as you level up, which can affect your attack rolls and skill checks.
2. Start with a concept — theme, role, and mechanical intent
Once you’ve settled on your edition, the next step in creating your DnD character is developing a concept. This involves determining the theme, role, and mechanical intent of your character. The theme could be anything from a noble hero seeking redemption to a rogue with a dark past. Your character’s role will dictate how they fit into the party, such as whether they are a frontline fighter, a spellcaster, or a support character.
To begin, consider answering these questions:
- What motivates your character to adventure?
- What role do you want them to play in the party?
- What is one major flaw or weakness that could drive character development?
Concept prompts and inspiration exercises
If you’re stuck for inspiration, here are a few exercises to help spark your creativity:
- Swap a Real-World Figure: Take a historical figure and imagine them in a fantasy setting. For example, think of a famous explorer and consider how their traits would translate to a DnD character.
- Create a Failing: Give your character a failing that costs them mechanically once per session, such as being overly trusting or having a short temper.
- Write a One-Sentence Motivation: Craft a simple motivation for your character that ties into the campaign setting. For example, “She seeks to reclaim her family’s lost honor after they were unjustly accused of treason.”
Example: If you decide on a former explorer, your character might be a Bard who uses their knowledge of distant lands to inspire their party while grappling with a fear of water due to a shipwreck in their past.
Example concepts (3 one-line seeds)
Here are three example concepts to get you started:
- Combat-focused: “A battle-scarred veteran fighter haunted by the souls of those they couldn’t save, seeking redemption through valor.”
- Roleplay-focused: “A charming bard with a secret identity as a notorious thief, using their skills in deception to protect their family.”
- Utility-focused: “A quirky gnome wizard obsessed with ancient maps, always searching for the next lost treasure while struggling with their fear of heights.”
These seeds can be expanded into full character builds by considering race, class, and backstory, providing a solid foundation for your character’s motivations and personality.
3. From concept to name — using generators and naming tips
Once you have a solid concept, it’s time to give your character a name that fits their identity. A name can reflect your character’s race, culture, and personality, enhancing the overall immersion of your roleplay. You can draw inspiration from various sources, including the Player’s Handbook (PHB) or fantasy name generators, such as the one available at GM Craft Tavern’s Fantasy Name Generator.
Tip: When choosing a name, consider how it sounds aloud. If it’s difficult to pronounce, it may slow down gameplay. Aim for something that is unique yet fitting for your character’s background and race.
How to pick a name that fits race and tone
To create a name that resonates with your character, follow these guidelines:
- Match Phonetics to Culture: Different races have distinct naming conventions. For instance, Elvish names often have a lyrical quality, while Dwarven names might be more guttural.
- Consider Nicknames: Sometimes, a longer name can be shortened for ease of use at the table. Choose a nickname that feels natural.
- Test for Pronunciation: Say the name out loud to ensure it flows well and is easy for others to say. If it slows down the game, consider shortening it.
Example: If your character is a Half-Orc, a name like “Gromnar” might fit well, while a nickname like “Grom” could be used at the table for simplicity.
Suggestion: use the fantasy name generator — https://gmcrafttavern.com/fantasy-name-generator/
I highly recommend using the GM Craft Tavern Fantasy Name Generator for inspiration. It can produce a variety of names based on different races and cultures, making it an excellent tool to help you find the perfect fit for your character.
Tip: Try generating several names and modify them to better suit your character’s tone. You might find that a name generated can be a great starting point that you can tweak for uniqueness.
4. Choose race/ancestry — mechanical benefits and roleplay hooks
Selecting a race or ancestry for your character is a critical step that impacts both mechanics and roleplay. In D&D, races come with specific abilities, traits, and bonuses that can enhance your character’s capabilities. For example, a Wood Elf might gain a bonus to Dexterity and proficiency in stealth, making them an ideal choice for a Rogue.
Tip: Remember that any race can be any class; prioritize your character concept first, then choose a race that enhances their abilities or fits their story.
Race vs ancestry distinctions and typical bonuses
In modern D&D terminology, “race” and “ancestry” are often used interchangeably, but they can imply different things. Ancestry might refer to the cultural background of the character, while race pertains to the mechanical benefits. Typical bonuses might include:
- +2/+1 Arrays: Many races provide a +2 to one ability score and a +1 to another.
- Traits: Certain races have unique traits, like Darkvision (the ability to see in low light) or resistance to certain types of damage.
Example: A Tiefling, for instance, gains a +2 to Charisma and a +1 to Intelligence, along with innate spellcasting abilities, making them a strong choice for a Warlock or Sorcerer.
Example pairings: race + class synergy
Choosing a race that synergizes well with your class can enhance your character’s effectiveness. Here are some solid pairings:
- Goliath Barbarian: Durability and Strength bonuses make this combination a powerhouse.
- Wood Elf Ranger: Dexterity and stealth bonuses complement the Ranger’s skills perfectly.
- Tiefling Warlock: Charisma boost aligns well with the Warlock’s spellcasting needs and adds an infernal flair.
- Dwarf Cleric: Constitution and Wisdom bonuses provide resilience and strong healing capabilities.
- Halfling Rogue: The Lucky trait combined with Dexterity makes this a stealthy and reliable choice.
- Gnome Wizard: The Intelligence boost and quirky flavor align well with the Wizard’s lore.
These pairings can help guide your decisions, but remember that thematic choices can be just as rewarding as mechanical ones.
5. Pick a class and subclass — playstyle and responsibilities
Choosing your class is one of the most defining moments in your character creation process. Each class in D&D has its unique playstyle and responsibilities within the party. For example, if you want to be the primary damage dealer, you might choose a Barbarian or Fighter. If you prefer spellcasting and crowd control, a Wizard or Sorcerer could be more suitable.
Tip: If you’re starting at level 1, focus on picking your class first and defer your subclass choice until you reach the appropriate level unless your campaign starts at a higher level.
Class archetypes and how to choose by role (striker, controller, defender, support)
Understanding class archetypes can help you select a class that fits your desired role in the party. Here’s a breakdown of common roles:
- Striker: Classes like Rogue and Barbarian excel in dealing damage.
- Controller: Wizards and Druids manipulate the battlefield, affecting enemy movements and actions.
- Defender: Fighters and Paladins can absorb damage and protect their teammates.
- Support: Bards and Clerics provide healing and buffs to enhance allies’ capabilities.
Choosing a role that complements your party composition will enhance your gaming experience and make team dynamics more effective.
Subclass timing and why it matters
Subclass selection usually occurs at level 3, and it’s essential to understand how this choice can affect your character’s development. Some classes may grant features earlier or later, and it can impact your initial choices regarding race, feats, and ability scores.
Example: If you know you’re going to take the Circle of the Moon Druid subclass, you might want to prioritize Wisdom and Constitution early on to maximize your effectiveness in shape-shifting.
Tip: Review your subclass features before making decisions about your race or feats, especially if your subclass has specific ability prerequisites.
6. Set ability scores — methods and worked examples
Setting your ability scores is a crucial step in character creation that determines your character’s capabilities. There are three primary methods to assign ability scores in DnD: Standard Array, Point Buy, and Rolling.
- Standard Array: You assign the numbers 15, 14, 13, 12, 10, and 8 to your abilities. This method is straightforward and ensures a balanced character.
- Point Buy: You start with 27 points to allocate across your abilities, with increasing costs for higher scores. This method allows for more customization but requires careful planning.
- Rolling: You roll 4d6 (four six-sided dice) and drop the lowest die for each ability. This method can yield high variability and is more suited for players who enjoy the thrill of chance.
Tip: For beginners, I recommend starting with the Standard Array method, as it provides a balanced approach without the chance of poor rolls affecting your character’s viability.
Method A: Standard Array (example numbers applied)
Using the Standard Array, you would assign the scores as follows:
Rogue Example:
- Strength: 10
- Dexterity: 15 (+2 racial bonus = 17)
- Constitution: 12
- Intelligence: 13
- Wisdom: 8
- Charisma: 14
Example Calculation: For a level 1 Rogue, your Dexterity score of 17 gives you a +3 modifier, which will apply to your attack rolls and skills like Stealth and Acrobatics.
Tip: Always remember to apply racial bonuses after you assign your scores to maximize your character’s potential.
Method B: Point Buy (step-by-step calculation example)
To use the Point Buy system, follow these steps:
- Start with 27 points.
- Decide how you want to allocate points based on your class needs.
- Use the following costs for increasing scores:
| Score | Cost |
|---|---|
| 8 to 13 | 1 point per increase |
| 14 | 2 points |
| 15 | 3 points |
| 16 | 5 points |
Example Calculation: If you want a Fighter with the following stats:
- Strength: 15 (cost 7 points)
- Dexterity: 14 (cost 5 points)
- Constitution: 14 (cost 5 points)
- Intelligence: 8 (cost 0 points)
- Wisdom: 10 (cost 0 points)
- Charisma: 8 (cost 0 points)
Total Cost: 7 + 5 + 5 = 17 points used, leaving you with 10 points for further adjustments.
Tip: Keep track of your total points spent to ensure you don’t exceed the limit.
Method C: Rolling (risks and mitigation)
When using the Rolling method, you roll 4d6 for each ability score and drop the lowest die. Here’s how to do it:
- Roll 4d6 and set aside the lowest die.
- Add the three remaining dice together to get your score.
- Repeat for each ability score.
Warning: Rolling can lead to unbalanced scores, making it challenging to create a viable character. To mitigate this, consider allowing rerolls or a fallback to Standard Array if scores are exceptionally low.
Tip: Always check with your DM about their rolling policy before starting, as some groups may have specific rules regarding the rolling method.
7. Backgrounds, proficiencies, and personality hooks
When creating your DnD character, backgrounds play a crucial role in not only shaping your character’s skills but also enhancing the narrative depth of your gameplay. Each background grants specific skill proficiencies (areas where your character excels), tool proficiencies (expertise with specific tools), languages, and starting equipment. Choosing a background that complements your class and supports your character’s story can lead to a more cohesive and enjoyable gaming experience. For example, if you’re creating a rogue, the Criminal background could give you useful contacts in the underworld, enhancing your roleplay opportunities and providing mechanical benefits like proficiency in Stealth.
In addition to equipment, spell selection is critical for spellcasting classes. As a beginner wizard, you might choose cantrips like Fire Bolt and Mage Hand, which provide both damage and utility. For your first-level spells, consider options like Sleep or Magic Missile for damage output. It’s important to balance your spell choices to cover different scenarios, such as crowd control, healing, or damage. Make sure to prepare backup actions for when concentration spells are lost, ensuring you’re never left without options in critical moments.
Picking a background that complements mechanics
When creating your character, it’s essential to choose a background that not only fits your character’s story but also provides useful proficiencies and features. For example, a Sage background grants proficiency in Arcana and History, which can complement a Wizard’s skillset. On the other hand, a Folk Hero background might offer skills like Animal Handling and Survival, perfect for a Ranger.
Take the time to review available backgrounds in your chosen edition and select one that aligns with your character concept. This creates a more cohesive backstory and enhances your character’s relevance in the campaign.
Roleplaying prompts: bonds, flaws, ideals, and ties to campaign
Incorporating bonds, flaws, and ideals into your character’s background can enhance the roleplay experience and create interesting dynamics in your party. Consider the following prompts:
- Bonds: What does your character care about? This could be a family member, a mentor, or a cause they believe in.
- Flaws: What is your character’s weakness? This can lead to compelling storylines and character growth.
- Ideals: What principles guide your character’s actions? These can shape their decisions and interactions with others.
- Ties to Campaign: How does your character fit into the campaign world? Consider their connections to factions, locations, or other characters.
By answering these prompts, you can create a rich and engaging character that feels integrated into the story, allowing for deeper roleplay opportunities.
8. Equipment, spells, and build-focused loadouts
Choosing the right equipment and spells for your character is essential to ensure they can perform effectively in various situations. Starting equipment typically includes weapons, armor, and tools relevant to your class and background. You can also buy additional equipment using starting gold. For instance, if you’re playing a melee-focused fighter, you might start with chain mail, a shield, and a longsword, which would enable you to engage in combat effectively right from the beginning.
In addition to equipment, spell selection is critical for spellcasting classes. As a beginner wizard, you might choose cantrips like Fire Bolt and Mage Hand, which provide both damage and utility. For your first-level spells, consider options like Sleep or Magic Missile for damage output. It’s important to balance your spell choices to cover different scenarios, such as crowd control, healing, or damage. Make sure to prepare backup actions for when concentration spells are lost, ensuring you’re never left without options in critical moments.
Starting equipment vs buy-your-own (examples for melee, caster, skill-focused)
When starting your character, you typically have the option to either select starting equipment based on your class or purchase your own gear using starting gold. Here are some considerations:
- Melee Characters: If you’re playing a melee-focused character, prioritize armor and weapons that suit your combat style. For example, a Fighter might choose a longsword and heavy armor to maximize their effectiveness in battle.
- Caster Characters: Spellcasters often have more flexibility with their starting equipment. Choose a spell focus or component pouch, and ensure you have a few essential spells prepared for your first session.
- Skill-Focused Characters: Characters who rely on skills, like Rogues, should consider equipment that enhances their abilities. Tools for skills like Thieves’ Tools or musical instruments for Bards can be invaluable.
Ultimately, the choice between starting equipment and buying your own comes down to personal preference and character concept. Just ensure your choices align with your character’s role in the party.
Spell selection basics and sample spell lists
For spellcasting classes, selecting the right spells at the beginning of your journey is critical. Here are a few tips for spell selection:
- Prioritize Utility: Choose spells that offer versatility, allowing you to adapt to different scenarios. Spells like Detect Magic or Disguise Self can provide valuable utility.
- Focus on Damage: For offensive spells, consider options that deal damage while also offering secondary effects, like Thunderwave or Burning Hands.
- Healers and Buffs: If you’re playing a support role, ensure you have healing spells like Cure Wounds and buffs like Bless prepared for your party.
Sample Spell List for a Level 1 Wizard:
- Cantrips: Fire Bolt, Mage Hand
- 1st Level Spells: Sleep, Magic Missile
With careful spell selection, you can ensure your character is well-equipped to handle a variety of challenges.
9. Level progression, feats, and multiclassing decisions
As your character progresses in levels, you will face important decisions about taking feats or ability score improvements (ASI). It’s essential to understand when to choose one over the other. Generally, you should prioritize ASIs until your primary ability score reaches key thresholds (14, 16, or 18). For example, if you’re playing a fighter, boosting your Strength score to 16 will enhance your attack and damage rolls significantly. Once you have hit those thresholds, consider taking feats that can improve your character’s effectiveness in specific areas, such as the Great Weapon Master feat for a damage-focused build.
Multiclassing allows you to blend features from different classes, but it comes with prerequisites. For instance, if you want to multiclass from Fighter to Rogue, your Dexterity must be at least 13. Popular multiclass plans include Fighter (Battlemaster) 5 / Rogue 3 for a character that can deal high damage while also utilizing sneak attack mechanics. When considering multiclassing, think about how the new class features will enhance your character’s playstyle and whether they align with your character concept.
When to take a feat vs ability score improvements
Understanding when to take a feat or ASI is crucial for character optimization. Here’s a guideline:
- Focus on Ability Score Improvements for your primary stats until they reach 16 or higher.
- Consider feats that provide unique abilities or enhancements after reaching those thresholds.
- Evaluate your party’s needs; if you notice gaps in your team’s capabilities, choose feats that can fill those roles.
By balancing ASIs with feats, you can create a character that is both powerful and versatile, adapting to the challenges of your campaign.
Basic multiclass rules and 3 sample multiclass plans
When exploring multiclassing, remember these basic rules:
- You must meet the ability score prerequisites for the new class.
- When you gain a level in a new class, you gain the hit points, proficiencies, and features of that class.
- Carefully consider how the new class complements your existing abilities; some combinations might dilute your character’s effectiveness.
Sample Multiclass Plans:
- Fighter (Battlemaster) 5 / Rogue 3: This combination allows for high damage output while utilizing sneak attack mechanics.
- Cleric 2 / Paladin 3: Gain access to healing spells while also being able to smite enemies effectively.
- Wizard 3 / Sorcerer 2: Blend spellcasting capabilities to maximize versatility in spell selection.
Multiclassing can add depth to your character and open up new avenues for gameplay, but always weigh the pros and cons before making the leap.
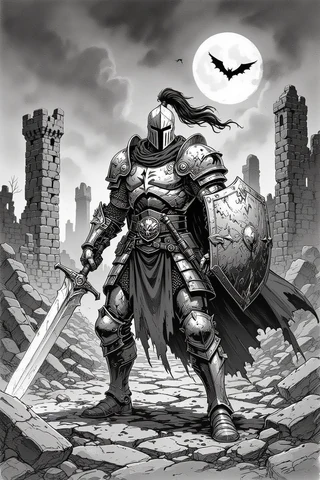
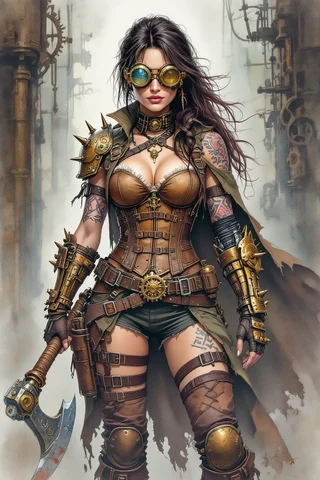
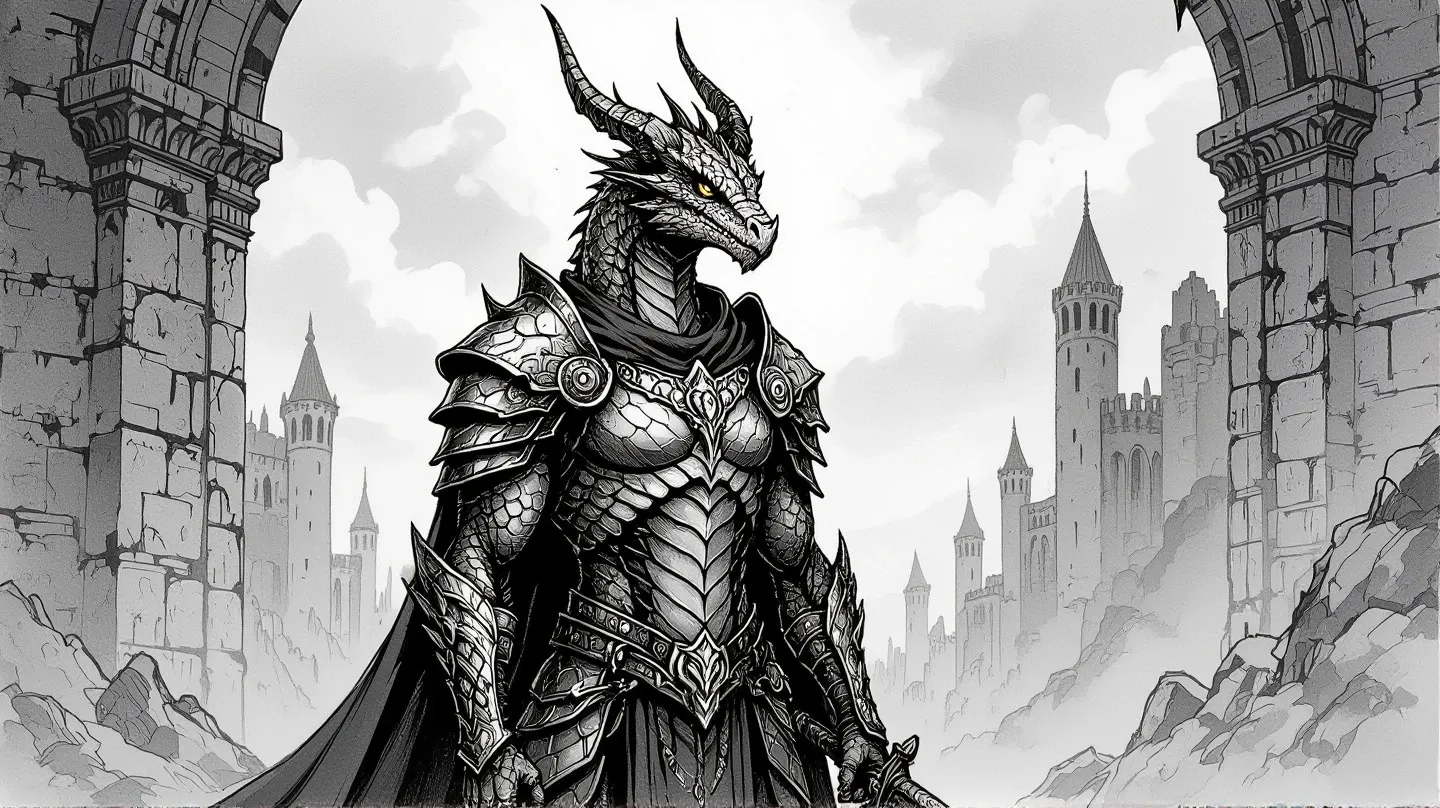
10. Visual design & character art — creating a look
Visual design is a fun part of the character creation process, as it enhances immersion and helps you connect with your character. When selecting character art, consider aspects like color palette, posture, and props that reflect your character’s personality and backstory. For example, a noble bard might have elegant clothing and a lute, while a rugged barbarian might wear furs and wield a massive axe. If you’re using visual assets in a virtual tabletop (VTT), remember to crop images to an appropriate size and format for tokens.
When commissioning art or choosing stock images, it’s helpful to have a clear brief ready for the artist. Include details like race, age, outfit, pose, three reference images, and a color palette to ensure the final product matches your vision. You can also use the character image database bundle available at Sacred Arts Designs for a wide range of DnD-compatible character art.
How to brief an artist or pick stock art
When working with an artist or selecting stock art, clear communication is key. Here are some tips to ensure you get the best results:
- Provide Reference Images: Include multiple reference images that capture the style and elements you want in your character art.
- Detail Your Character: Offer a detailed description of your character, including their backstory, personality, and any specific features that are important.
- Discuss the Usage: Clarify how you plan to use the art (e.g., for a character sheet, VTT token, or promotional material) to help the artist tailor their work accordingly.
Tip: Consider creating multiple versions of your character art to reflect different gear or appearance states, making it easier to represent your character as they progress through the campaign.
Recommend: character image database bundle — https://sacredartsdesigns.etsy.com/listing/1581301181/dungeons-and-dragons-compatible
Visuals can significantly enhance your roleplaying experience. Consider creating multiple versions of your character art to reflect different gear or appearance states, making it easier to represent your character as they progress through the campaign.
11. Build the character sheet: step-by-step procedure
Filling out a character sheet is a crucial step in the character creation process, as it organizes all your character’s stats, abilities, and equipment in one place. Here’s a straightforward approach to completing your character sheet:
- Fill in your name, class, race, background, and alignment at the top of the sheet.
- Enter your ability scores and their corresponding modifiers in the designated sections.
- Compute your hit points (HP), armor class (AC), and proficiency bonus.
- Add attacks, spells, and skills, ensuring to include any relevant proficiency bonuses.
- List your equipment, features, and spell slots in their respective areas.
Finally, make sure to save or print a copy of your character sheet for easy access during gameplay. This preparation will help you reduce confusion and streamline your first session.
Filling core fields and derived stats (HP, AC, saves, attacks)
When filling out your character sheet, make sure to accurately enter your core fields:
- Hit Points (HP): Calculate based on your class’s hit die and Constitution modifier.
- Armor Class (AC): Determine your AC based on your equipment and Dexterity modifier.
- Saves: Fill in your saving throws based on your class and any relevant ability modifiers.
- Attacks: List your attack bonuses for weapons and spells, including any modifiers.
Tip: Double-check these calculations to ensure you have accurate stats for your first session.
Short 3–6 step procedure: filling a character sheet
To simplify the process of filling out your character sheet, follow these steps:
- Write down your character’s name, class, race, and background.
- Assign ability scores and calculate modifiers.
- Determine hit points, armor class, and saving throws.
- List attacks, spells, and features.
- Check for any equipment and proficiencies.
By following this concise procedure, you can efficiently fill out your character sheet and be ready for your first session.
12. Tools & platforms for managing characters (D&D Beyond, VTTs, apps)
Managing your character effectively can significantly enhance your gameplay experience. Tools like D&D Beyond, Foundry, and Roll20 provide different functionalities to suit your preferences. For instance, D&D Beyond is great for official content and automation but may come with some paid features. Foundry offers deep automation and customization but requires a one-time cost and self-hosting. Roll20 is accessible via a web browser, but its free tier has limitations on automation.
As you explore these platforms, consider your specific needs. If you prefer offline play, Fight Club 5 or Google Sheets can be fully customizable options. Remember to test your chosen tools before your first session to ensure a smooth experience.
Pros/cons of D&D Beyond, Foundry, Roll20, and local spreadsheets
Each platform comes with its advantages and disadvantages:
- D&D Beyond: Great for official content and automation, but some features require payment.
- Foundry: Offers extensive customization but requires a technical setup.
- Roll20: Accessible and easy to use, but its free version has limitations.
- Local Spreadsheets: Fully customizable but requires manual updates and management.

Tip: Choose a platform that matches your gameplay style—whether you value official content, automation, or portability. This will help you focus on enjoying the game rather than troubleshooting tech issues.
How to share characters with your group
Sharing your character with your group can enhance collaboration and ensure everyone is on the same page. Here are some ways to do it:
- Export PDFs: Most platforms allow you to export your character sheet as a PDF, which can be easily shared via email or cloud storage.
- Use Shared Folders: If using Google Sheets or similar tools, create shared folders where everyone can access character sheets.
- Discuss in Session Zero: Use your first session to present your character and discuss their background with the group, fostering connections.
By sharing your character effectively, you can enhance party dynamics and create a more cohesive gaming experience.
13. Automation, macros, and VTT productivity (save time at the table)
Incorporating automation and macros into your gameplay can save time and improve efficiency during sessions. Macros are simple commands that automate repetitive tasks, such as rolling attacks or managing spell effects. For example, you might create an attack macro that rolls a d20 and adds your attack modifier: /roll d20 + attack_mod + prof. This allows you to quickly resolve actions without manual calculations.
To get started, I recommend setting up a few essential macros: one for attacks, one for damage rolls, and another for a key spell. This will help reduce overhead and keep the pace of the game flowing smoothly. Always test your macros in a sandbox environment before your session to ensure they work as expected.
Useful macros and automated checks (examples for attacks, spells, saves)
To streamline your gameplay on virtual tabletops (VTTs) like Roll20 or Foundry, using macros (short commands that automate actions) can save you a lot of time and reduce the chance for errors during your sessions. Here are some handy macro examples you can implement:
- Attack Roll Macro:
/roll d20 + attack_mod + prof– This macro rolls a d20 (a twenty-sided die), adds your attack modifier, and includes proficiency if applicable. - Skill Check Macro:
/roll d20 + skill_mod– Use this for any skill checks, simply replacingskill_modwith the relevant modifier for skills like Stealth or Persuasion. - Damage Roll Macro:
/roll damage_dice + mod– This macro calculates damage by rolling the specified damage dice and adding any relevant modifiers. - Concentration Check Macro:
/roll d20 + Con mod– For maintaining concentration on spells, this macro helps you check if you succeed after taking damage.
Tip: Always parameterize (customize) your macros with the specific attributes of your character in the chosen VTT to make them more effective and tailored to your needs.
Quick guide to setting up basic automation on popular VTTs
Setting up automation on VTTs can enhance your gaming experience by making actions quicker and smoother. Here’s a straightforward guide to get you started on the most popular platforms:
- Install the Appropriate System Module: Depending on your VTT, there may be specific modules or settings for D&D 5E. Make sure these are installed first.
- Import Your Character: Bring your character sheet into the VTT. Most platforms allow you to upload or create a character directly.
- Map Attributes to Macro Tokens: Link your character’s stats to the macros you’ve set up. For example, ensure your attack rolls pull from the right attack modifiers.
- Test a Basic Attack Roll: Before your session, run a test to see if the macros work correctly. Roll an attack to confirm that everything calculates accurately.
Tip: Always test with a dummy token before your session to ensure that your macros function properly. This way, you can troubleshoot any issues ahead of time.
14. File management, version control and campaign notes
Effective file management is essential for keeping track of your D&D character and campaign notes. A well-organized system can save you time and prevent confusion when you need to reference your character details or campaign notes. Here’s how to set up an efficient system:
- Create a Folder Structure: Start by creating a main folder for your D&D characters. Inside, create subfolders for each campaign you’re part of.
- Use Consistent Naming Conventions: Adopt a clear naming format for your files. This can include the character’s name, level, and the date of last update (e.g.,
CharacterName_v2_20231001.pdf). - Backup Strategies: Regularly back up your files in multiple locations, such as a cloud service (like Google Drive) and a local encrypted folder.
Tip: Always consider keeping a printed copy of your character sheet handy, especially if your gaming group meets in person. This can serve as an additional backup and provide quick access during gameplay.
Naming conventions and a folder structure for characters
Establishing a clear naming convention for your character files is crucial for an organized approach to D&D file management. Here’s a recommended structure to help keep your files orderly:
- Folder Structure:
Characters/ CampaignName/ CharacterName_v{level}_YYYYMMDD.pdf Assets/ Tokens/ CharacterName.png- Naming Template: Use a name format like
CharacterName_v1_20231001.pdffor your character sheets. This allows you to track revisions easily and ensures you know which version is the most current.
Tip: Incorporate the date in your filenames to enhance traceability, especially for ongoing campaigns where characters may evolve over time.
Backup strategies and export formats
Backing up your D&D files is essential to prevent data loss and ensure that all your hard work is preserved. Here’s how to establish effective backup strategies along with the best export formats for your character sheets and assets:
- Redundant Backups: Use a combination of cloud storage (like Google Drive or OneDrive) and a local encrypted folder.
- Export Formats: When saving your character sheets, export them as PDFs for easy sharing and printing.
- Test Restore Procedure: Regularly check your backup system by restoring a file from backup to ensure everything works correctly.
Tip: Always consider keeping a printed copy of your character sheet handy, especially if your gaming group meets in person. This can serve as an additional backup and provide quick access during gameplay.
15. Playtesting, balancing, and iterating on your character
Playtesting your D&D character is an essential step in ensuring that they are balanced and fun to play. By simulating encounters and logging outcomes, you can identify areas for improvement and make necessary adjustments. Here’s a simple guide to help you effectively playtest your character:
- Run a Quick Test: Set up a one-session test where you simulate three different encounters: easy, medium, and hard. This will allow you to see how your character performs under various conditions.
- Log Key Stats: During your test, keep track of important metrics such as damage per round (DPR), spell slot usage, and any key skill checks that could affect your character’s performance.
- Review Results: After the test, analyze the logged data to see how well your character performed. Were there areas where they struggled? Did they excel in certain situations? Use this information to inform your next steps.
Warning: If you find that your character consistently has trouble contributing to the party or doesn’t feel enjoyable to play, it may be time to discuss potential adjustments with your DM.
How to run a quick 1-session test and what to log
To effectively test your character in a single session, it’s important to structure your mock encounters and identify which data to log for meaningful analysis. Here’s how to do it:
- Structure Your Test: Plan for three encounters of varying difficulty—easy, medium, and hard—as well as one social interaction and one exploration scenario.
- Create a Log Template: Use a simple log format to record encounter type, rounds survived, average damage dealt per round, spells used, hit points remaining, and any critical failures or successes.
- Conduct the Test: Run through your planned encounters, logging the relevant data as you go.
Tip: After your session, review the logged data and discuss your findings with your DM. They can provide insights on potential adjustments or improvements based on your performance.
Balancing tips and when to talk to your DM
Balancing your character is crucial for ensuring a fun and engaging experience for both you and your fellow players. If you notice issues with your character’s performance, it’s important to address them proactively. Here are some tips on when and how to discuss balance with your DM:
- Identify the Issues: Pay attention to how often your character struggles to contribute during sessions. If you find that you’re frequently sidelined or unable to participate in key moments, it may be time to reconsider aspects of your build.
- Prepare Your Points: Before approaching your DM, gather data from your playtests and be ready to present specific examples of how your character could be improved.
- Be Collaborative: When discussing changes, use a collaborative tone. Frame your conversation around enhancing the fun for the entire party rather than just your own character.
Example: “I’ve noticed that my character struggles to stay relevant in combat compared to others. Would it be possible to swap my current feat for something that enhances my utility without unbalancing the game?”
By approaching your DM with a constructive mindset and clear examples, you can create an open dialogue about character balance. This ensures that everyone at the table can have a rewarding and enjoyable experience during gameplay.
Fox’s take
Now that you have a clearer understanding of how to create your DnD character, it’s time to put your ideas into action! Remember to think about each step carefully, from choosing your edition to filling out your character sheet. Don’t hesitate to use the tools and resources mentioned to enhance your experience. Once your character is ready, gather with your friends, embark on epic adventures, and enjoy the storytelling magic of Dungeons & Dragons. Happy gaming!
FAQ
How do I choose a class that fits my preferred playstyle?
Identify if you prefer melee, spellcasting, or support roles and review class descriptions.
What is the easiest way to assign ability scores for a new player?
Use the Standard Array method for balanced scores, ensuring viability from the start.
When should I consider multiclassing and how does it affect my build?
Consider multiclassing after level 3 to diversify abilities, but be mindful of prerequisites.
Where can I get a good character portrait or token for my DnD character?
Check platforms like Roll20 or Etsy for character art, or use fantasy name generators for inspiration.
How do I prepare my character for the first session?
Complete your character sheet, understand abilities, and communicate with your DM about campaign details.
Sources
- gmcrafttavern.com
- pages.roll20.net
- sacredartsdesigns.etsy.com
- slyflourish.com
- slyflourish.com
- thedmlair.com
- thedmlair.com
- bjarkethebard.com
- dndbeyond.com
- dndbeyond.com
- dndbeyond.com
- dndbeyond.com
- dndbeyond.com
- dndbeyond.com
- etsy.com
- etsy.com
- etsy.com
- etsy.com
- etsy.com
- etsy.com
- etsy.com
- instructables.com
- rollbritannia.co.uk
- youtube.com
- youtube.com
- youtube.com
- youtube.com
- youtube.com
- youtube.com
- youtube.com